Colorful Deviled Eggs – Easy Fun Party Appetizer
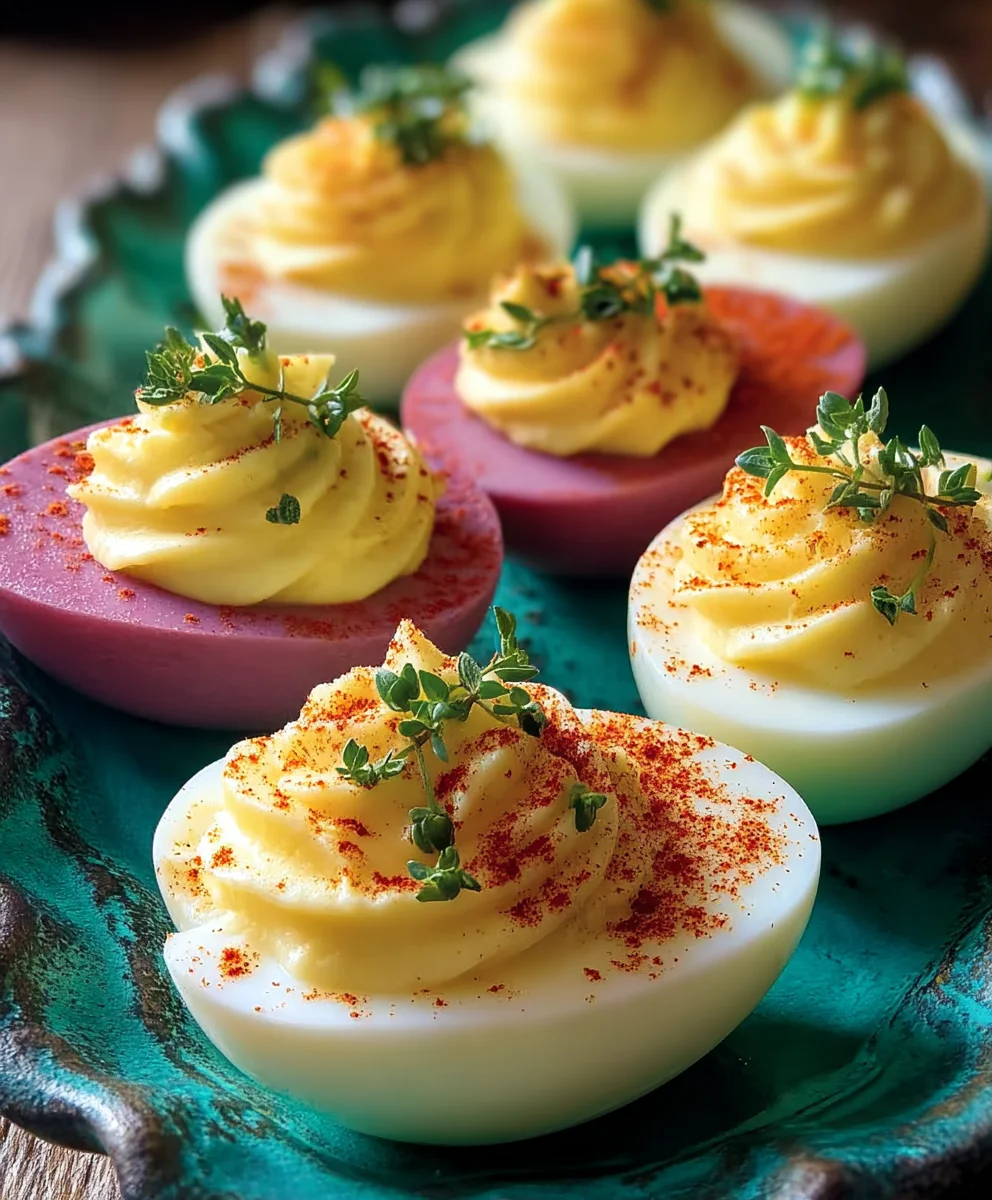
Colored Deviled Eggs are more than just a snack; they are a vibrant burst of flavor and fun that instantly elevates any gathering. Who doesn’t adore a perfectly piped dollop of creamy, savory filling nestled within a tender egg white boat? These little delights possess a timeless appeal, gracing picnics, potlucks, and holiday tables with their cheerful presence. But what truly sets our Colored Deviled Eggs apart is the playful twist we’re adding today. Forget the mundane; we’re diving into a knon-alcoholic aleidoscope of delicious possibilities, transforming the classic into something truly extraordinary. Get ready to dazzle your guests with a visually stunning and utterly irresistible version of this beloved appetizer, proving that even simple ingredients can create spectacular results when a little creativity is involved.
Why You’ll Love This Recipe
This recipe for Colored Deviled Eggs isn’t just about making them look pretty; it’s about amplifying their inherent deliciousness while adding an element of surprise. We’re talking about a rich, velvety filling that perfectly balances tangy and savory notes, all enhanced by a subtle pop of color that will have everyone reaching for more. Whether you’re a seasoned entertainer or just looking to add a touch of whimsy to your next casual get-together, these deviled eggs are guaranteed to be a showstopper. Prepare to be amazed by how simple it is to create such a memorable and delightful dish that’s as fun to make as it is to eat.
Ingredients:
- 12 large eggs
- ½ cup mayonnaise
- 2 teaspoons pickle juice
- 2 teaspoons yellow mustard
- 4 tablespoons finely chopped dill pickles
- Salt, to taste
- Black pepper, to taste
- 6 ounces water, in each cup (for dyeing the egg whites)
- 1 teaspoon white vinegar, in each cup (for dyeing the egg whites)
- Food coloring in desired colors (e.g., red, blue, yellow, green)
Preparing the Eggs for Coloring
Boiling and Peeling the Eggs
The first step to creating vibrant Colored Deviled Eggs is to properly cook and peel your eggs. Start by placing the 12 large eggs in a single layer in a medium saucepan. Cover the eggs with about an inch of cold water. Add a pinch of salt to the water; this can help prevent the eggs from cracking and makes them easier to peel if they do crack.
Place the saucepan over medium-high heat and bring the water to a rolling boil. As soon as the water reaches a full boil, immediately remove the saucepan from the heat. Cover the saucepan with a lid and let the eggs sit in the hot water for 10 to 12 minutes. This “steeping” method ensures perfectly cooked hard-boiled eggs without any risk of overcooking, which can lead to a rubbery yolk or a green ring around it.
While the eggs are steeping, prepare an ice bath. Fill a large bowl with cold water and add plenty of ice. Once the 10-12 minutes are up, carefully transfer the hot eggs from the saucepan to the ice bath using a slotted spoon. Let them cool completely in the ice bath for at least 15 minutes. This rapid cooling is crucial for stopping the cooking process and making the eggs much easier to peel.
Once cooled, it’s time to peel. Gently tap each egg on a hard surface to create small cracks all over the shell. Then, start peeling from the wider end of the egg, where the air pocket is located. If the peeling is being stubborn, try peeling the egg under a gentle stream of cool running water; the water can help loosen the membrane between the shell and the egg white. Set aside the perfectly peeled, hard-boiled eggs.
Dyeing the Egg Whites
Creating the Colored Egg White Shells
Now for the fun part – adding color! This technique involves dyeing the egg whites before halving and scooping out the yolks. Select several small bowls or cups, one for each color you wish to use. For each bowl, combine 6 ounces of water and 1 teaspoon of white vinegar. The vinegar helps the food coloring adhere better to the egg whites.
Add several drops of your chosen food coloring to each bowl. Stir gently to distribute the color evenly. The more food coloring you add, the more vibrant your dyed egg whites will be. Aim for a rich, saturated hue.
Carefully place one peeled hard-boiled egg into each colored liquid. Make sure the eggs are fully submerged. Let the eggs sit in the dye bath for at least 10 to 15 minutes. For deeper, more intense colors, you can leave them in longer. You can gently swirl the eggs occasionally to ensure even coloring. You might notice the color seeping through the porous eggshell, staining the white itself.
Once the desired color intensity is achieved, carefully remove the eggs from the dye baths using a slotted spoon. Place them on a wire rack set over a baking sheet or paper towels to drain and dry completely. As they dry, the color will become more pronounced. Once dry, you can gently polish them with a soft cloth if desired, though this is optional.
Preparing the Deviled Egg Filling
Mixing the Classic Yolk Mixture
While your colored egg whites are drying, let’s prepare the delicious filling for your Colored Deviled Eggs. Slice each of the dried, dyed eggs in half lengthwise using a sharp knife. Be careful not to squish the delicate colored whites. Carefully scoop out the hard-boiled yolks into a medium-sized mixing bowl. Discard the empty, colored egg white shells for now, or save them for another creative project!
Add the ½ cup of mayonnaise to the bowl with the yolks. The mayonnaise forms the creamy base of our deviled egg filling. Next, add the 2 teaspoons of pickle juice and the 2 teaspoons of yellow mustard. The pickle juice adds a subtle tangin extractess and moisture, while the mustard provides a classic savory kick.
Now, add the 4 tablespoons of finely chopped dill pickles. These little bits of pickle provide a delightful burst of texture and flavor, a key component of any good deviled egg.
Using a fork, mash the yolks and the other ingredients together until a smooth and creamy paste forms. There should be no large lumps of yolk remaining. You want a consistency that is easy to pipe or spoon back into the egg white halves.
Season the mixture generously with salt and black pepper to taste. Start with a small pinch of each and add more gradually, tasting as you go, until the seasoning is just right for your preference.
Assembling the Colored Deviled Eggs
Filling and Garnishing Your Masterpieces
This is where the magic happegin extract bringing together the vibrant egg whites and the flavorful yolk filling. Once your colored egg whites are completely dry, arrange them on a serving platter.
Using a spoon or a piping bag fitted with a star tip (for a more decorative finish), carefully fill each of the colored egg white halves with the prepared yolk mixture. If using a piping bag, fill it with the yolk mixture and pipe it generously into each half, creating swirls or mounds. If you don’t have a piping bag, a small spoon works perfectly well; simply mound the filling into each half.
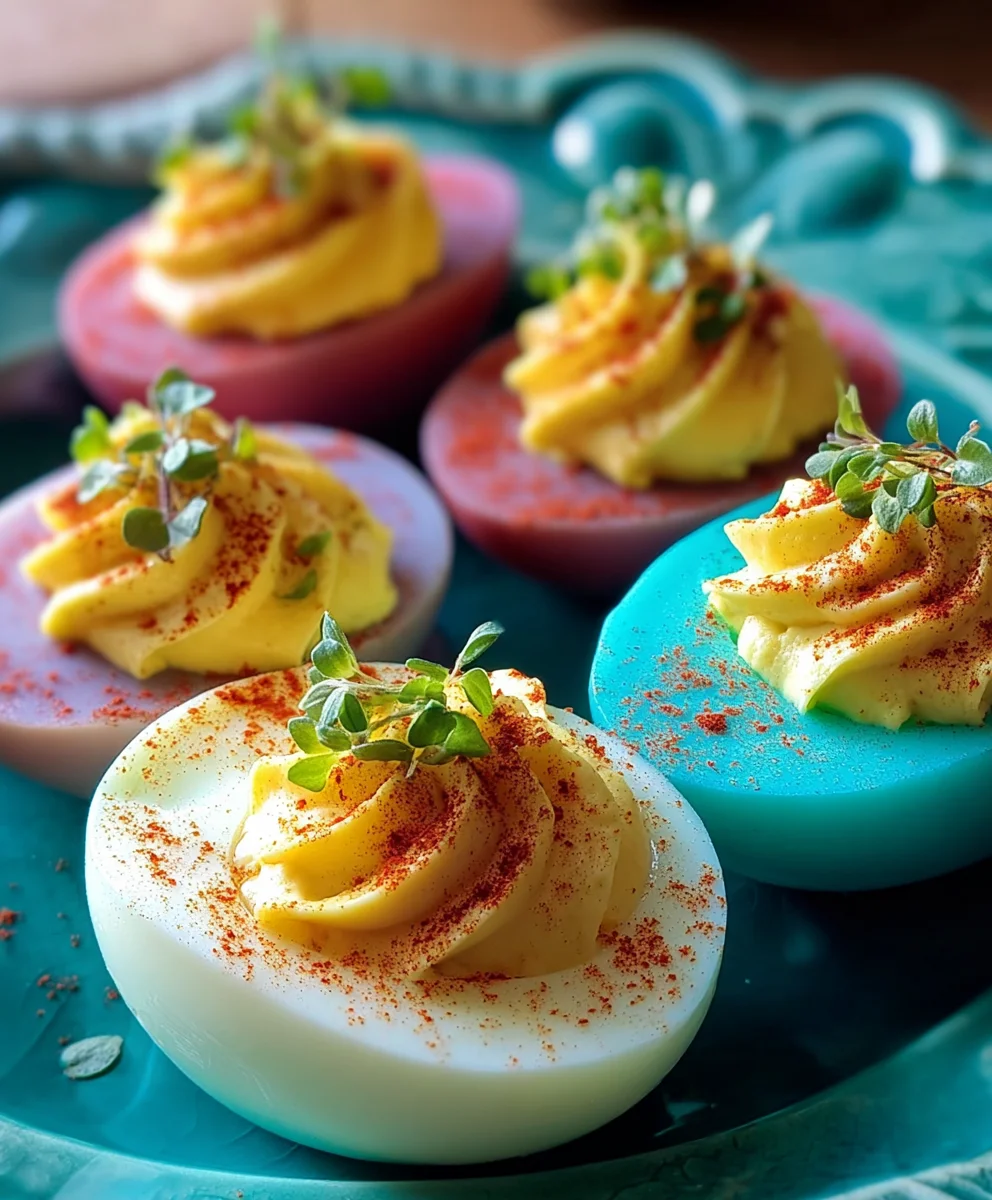
Once all the egg white halves are filled, it’s time for the finishing touches. You can garnish your Colored Deviled Eggs in various ways. A classic garnish is a sprinkle of paprika, which adds a beautiful reddish hue and a hint of smokiness. You could also use a tiny sprig of fresh dill, a small piece of dill pickle, or even a sprinkle of finely chopped chives for a touch of green. Get creative and have fun with your toppings to enhance the visual appeal of your colorful creation.
Chill the assembled deviled eggs in the refrigerator for at least 30 minutes before serving. This allows the flavors to meld together and ensures they are served refreshingly cold, which is ideal for this delightful appetizer or snack. Enjoy your stunning and delicious Colored Deviled Eggs!
Conclusion:
There you have it! Your guide to creating the most vibrant and delicious Colored Deviled Eggs is complete. We’ve explored the simple yet impressive techniques to achieve a spectrum extract of delightful hues, transforming a classic appetizer into a visually stunning centerpiece. These Colored Deviled Eggs are perfect for any occasion, from casual picnics and backyard BBQs to festive holiday gatherings and elegant parties. Their bright colors are sure to spark conversation and bring a smile to everyone’s face.
For serving suggestions, consider arrangin extractg them on a colorful platter to further enhance their visual appeal. They pair wonderfully with other party favorites like mini quiches, fruit skewers, and a refreshing pitcher of lemonade. Don’t be afraid to get creative with your variations! You can infuse different flavors into the filling using a touch of sriracha for a spicy kick, a sprinkle of dill for freshness, or even a hint of curry powder for an exotic twist. The possibilities are endless! Now, go forth and create your own masterpiece of Colored Deviled Eggs. I’m confident you’ll love the results!
Frequently Asked Questions about Colored Deviled Eggs:
Q1: How do I achieve even coloring on my deviled eggs?
To ensure even coloring, it’s best to use food coloring in either gel or liquid form. For gel coloring, a little goes a long way, so start with a small amount and add more until you achieve your desired shade. For liquid coloring, you may need a bit more. Gently stir the food coloring into the egg yolk mixture until thoroughly combined. For a marbled effect, you can lightly swirl two colors together before gently spooning the filling back into the egg whites.
Q2: Can I make the filling for the Colored Deviled Eggs ahead of time?
Yes, absolutely! You can prepare the egg yolk filling up to 24 hours in advance. Store it in an airtight container in the refrigerator. This will save you time on the day of your event. Just be sure to assemble the Colored Deviled Eggs shortly before serving to prevent the whites from drying out and the filling from becoming too hard.
Colorful Deviled Eggs – Easy Fun Party Appetizer
A fun and easy recipe for vibrant, colorful deviled eggs perfect for any party or gathering. This recipe involves dyeing the egg whites for a visually striking appetizer.
Ingredients
-
12 large eggs
-
1/2 cup mayonnaise
-
2 teaspoons pickle juice
-
2 teaspoons yellow mustard
-
4 tablespoons finely chopped dill pickles
-
Salt, to taste
-
Black pepper, to taste
-
6 ounces water, in each cup (for dyeing the egg whites)
-
1 teaspoon white vinegar, in each cup (for dyeing the egg whites)
-
Food coloring in desired colors (e.g., red, blue, yellow, green)
Instructions
-
Step 1
Boil and peel the eggs: Place 12 large eggs in a saucepan, cover with an inch of cold water and a pinch of salt. Bring to a rolling boil, then immediately remove from heat, cover, and let steep for 10-12 minutes. Transfer to an ice bath for at least 15 minutes. Peel the cooled eggs. -
Step 2
Prepare the dye baths: In separate small bowls, combine 6 ounces of water and 1 teaspoon of white vinegar for each desired color. Add several drops of food coloring to each bowl and stir. -
Step 3
Dye the egg whites: Carefully place peeled hard-boiled eggs into each colored dye bath, ensuring they are fully submerged. Let sit for 10-15 minutes, or longer for deeper colors. Remove eggs and place on a wire rack to dry completely. -
Step 4
Prepare the filling: Slice the dried, dyed eggs in half lengthwise. Scoop the yolks into a bowl. Add mayonnaise, pickle juice, yellow mustard, and finely chopped dill pickles. Mash with a fork until smooth and creamy. Season with salt and pepper to taste. -
Step 5
Assemble the deviled eggs: Arrange the colored egg white halves on a serving platter. Spoon or pipe the yolk mixture into each half. -
Step 6
Garnish and chill: Garnish with paprika, fresh dill, small pickle pieces, or chives. Chill for at least 30 minutes before serving.
Important Information
Nutrition Facts (Per Serving)
It is important to consider this information as approximate and not to use it as definitive health advice.
Allergy Information
Please check ingredients for potential allergens and consult a health professional if in doubt.