Sweet Mango Mochi-A Chewy Tropical Treat
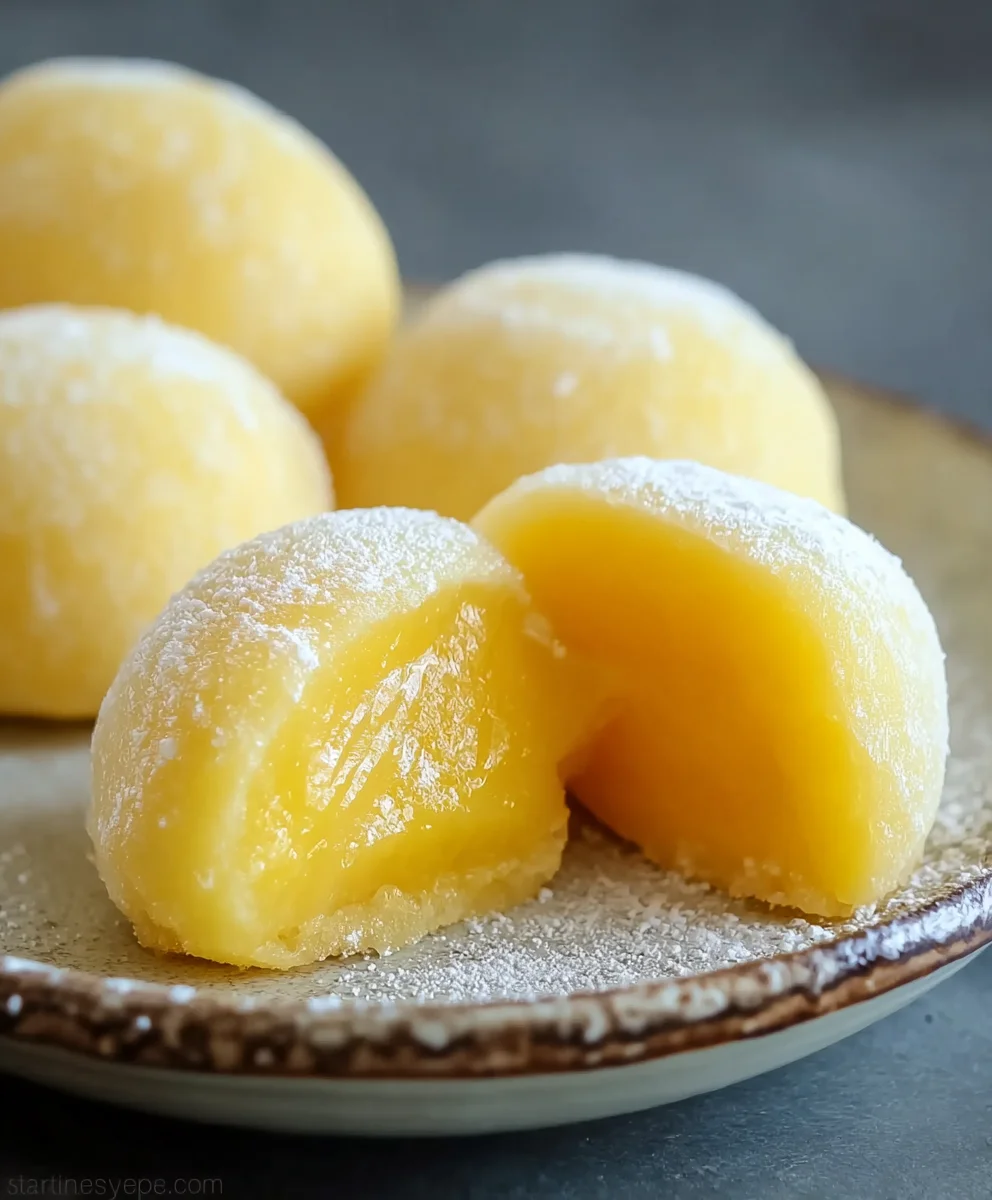
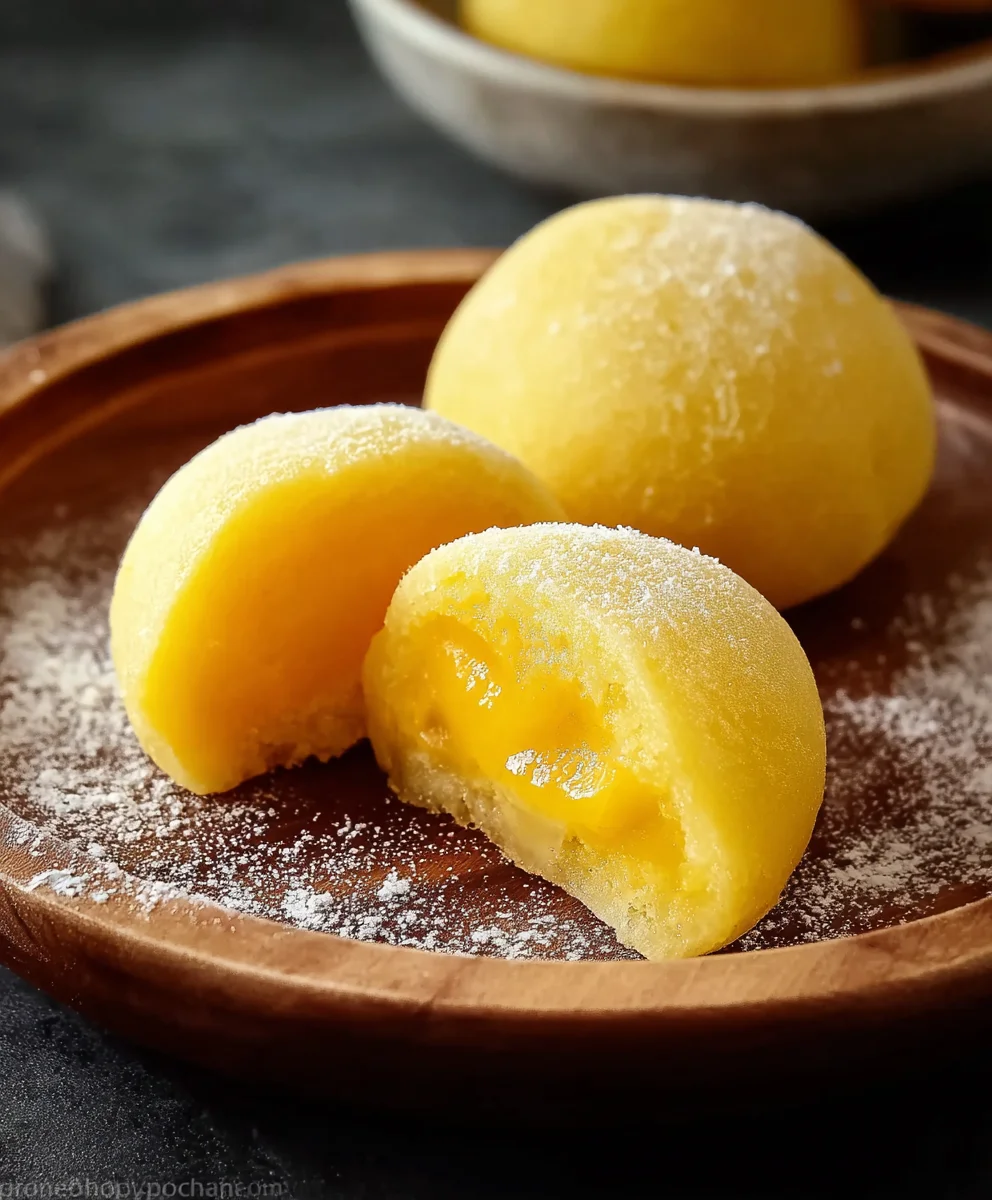
Mango Mochi is more than just a dessert; it’s a vibrant burst of tropical sunshine in every bite. Imagin extracte that soft, chewy mochi exterior yielding to a luscious, sweet, and slightly tangy mango filling. It’s a flavor and texture combination that has captured hearts (and taste buds!) around the globe, and for good reason. This delightful treat offers a unique sensory experience, a delightful dance between the yielding dough and the juicy fruit. What truly sets Mango Mochi apart is its refreshing quality, making it the perfect palate cleanser or sweet ending to any meal, especially on a warm day. It’s an approachable yet impressive dessert that feels both exotic and comforting, a truly magical fusion of cultures and tastes that will leave you craving more.
Ingredients:
- 1 cup glutinous rice flour (also known as sweet rice flour)
- 1/2 cup fresh mango puree (ensure it’s smooth and free of large chunks)
- 1/4 cup granulated sugar
- 1/4 cup water
- 1 tablespoon vegetable oil (or other neutral cooking oil)
- Cornstarch or potato starch, for dusting
- Optional: Fresh mango cubes for filling
Preparing the Mochi Dough
Step 1: Combine Dry Ingredients
First, let’s get our dry ingredients ready. In a medium-sized, microwave-safe bowl, combine the glutinous rice flour and the granulated sugar. Whisk these together thoroughly. It’s important that the sugar is evenly distributed throughout the flour to ensure the mochi has a consistent sweetness and texture. Using a whisk rather than just stirring with a spoon will help break up any small clumps in the flour, leading to a smoother final product. Make sure the bowl you use is large enough to accommodate mixing and later steaming/microwaving without overflowing.
Step 2: Incorporate Wet Ingredients
Next, we’ll add our wet ingredients. Pour in the fresh mango puree and the water. Stir everything together with a spatula or wooden spoon until a smooth, thick batter forms. At this stage, the mixture will likely be quite lumpy, and that’s perfectly normal. Continue to stir and gently press out any lumps against the side of the bowl. The goal is to achieve a consistency similar to pancake batter, but a bit thicker. The vibrant color of the mango puree will start to show through, giving our Mango Mochi its beautiful hue. If the batter seems too stiff, you can add a teaspoon more water at a time until you reach the desired consistency.
Step 3: Add Oil and Mix
Now, it’s time to add the vegetable oil. Drizzle the 1 tablespoon of vegetable oil into the batter and mix it in until it’s fully incorporated. The oil plays a crucial role in making the mochi pliable and preventing it from becoming too sticky and difficult to handle. It contributes to a smooth, slightly elastic texture that is characteristic of good mochi. Ensure the oil is evenly distributed throughout the batter to avoid pockets of greasiness. This step helps create that signature chewy yet soft texture that makes mango mochi so delightful.
Cooking the Mochi Dough
Step 4: Microwave or Steam the Dough
This is where the magic happens! You have two primary methods for cooking the mochi dough: microwaving or steaming. For microwaving, cover the bowl with plastic wrap (poke a few holes in it to allow steam to escape) and microwave on high power for 1 minute. Remove the bowl, stir the dough vigorously with a wet spatula, and then re-cover and microwave for another 1 minute. Repeat this process one more time, stirring and microwaving for a final minute. The dough should become translucent and have a glossy, sticky appearance. Alternatively, if you prefer to steam, transfer the batter to a heatproof bowl, cover it tightly with foil or a lid, and steam over simmering water for about 20-25 minutes, or until the dough is translucent and cooked through. Stirring halfway through the steaming process can also help ensure even cooking. The key indicators of cooked mochi are its transformation from opaque to translucent and its significantly thickened, sticky texture.
Step 5: Knead and Cool the Dough
Once the dough is cooked, it will be extremely hot and sticky. To make it manageable, dust your work surface generously with cornstarch or potato starch. Scrape the hot mochi dough onto the prepared surface. Be careful, as it will be very hot! You can use a silicone spatula or a greased hand to gently fold and knead the dough for a minute or two. The starch will prevent it from sticking to your hands and the surface. As you knead, the dough will become more elastic and less sticky. Allow the dough to cool slightly until it’s comfortable to handle. It should be warm but not burning. This cooling period is important for developing the final chewy texture of the mochi.
Shaping and Filling the Mango Mochi
Step 6: Divide and Shape the Mochi
Once the mochi dough is cool enough to handle, dust your hands with more starch. Gently stretch and flatten the dough. Using a knife or a bench scraper, divide the mochi dough into small, equal portions. The size will depend on how large you want your mochi to be. For each portion, flatten it into a small disc. If you are adding a mango cube filling, place a piece of fresh mango in the center of the disc. Carefully gather the edges of the mochi dough around the mango, pinching them together to seal the filling inside. Roll the dough gently between your palms to form a smooth, round ball. Ensure the filling is completely enclosed. If you are not adding a filling, simply roll the portions into small, smooth balls. This shaping step requires a bit of dexterity, but the starch will be your best friend in preventing sticking.
Step 7: Final Touches and Serving
After shaping, you can dust your finished Mango Mochi lightly with more cornstarch or potato starch to prevent them from sticking to each other. Place them on a serving platter. Your homemade Mango Mochi is now ready to be enjoyed! They are best eaten fresh, within a day or two of making them, as they can harden over time. For the best texture and flavor, serve them at room temperature. The combination of the soft, chewy mochi exterior and the sweet, juicy mango filling is truly a delightful treat.
Conclusion:
And there you have it! You’ve successfully recreated the delightful and chewy sensation of Mango Mochi. This recipe, while appearing exotic, is surprisingly achievable in your own kitchen. The result is a wonderfully fragrant, sweet, and subtly tangy dessert that’s perfect for any occasion. Whether you’re impressing guests or simply treating yourself, this homemade Mango Mochi is sure to be a hit.
For serving, these little gems are best enjoyed chilled. They make a fantastic light dessert after a rich meal, a unique addition to a dessert platter, or even a satisfying sweet snack. Consider pairing them with a cup of green tea for a truly traditional experience, or a refreshing glass of iced coconut water.
Don’t be afraid to experiment with variations! While ripe mango is king here, feel free to try other fruit purées like strawberry or passionfruit. You could also add a touch of shredded coconut to the mochi dough for an extra textural element. The possibilities are truly endless!
We truly hope you enjoy the process of making and savoring your own Mango Mochi. Don’t be discouraged if your first attempt isn’t perfect; practice makes perfect when it comes to achieving that ideal chewy texture. Happy mochi making!
Frequently Asked Questions about Mango Mochi:
Q1: My mochi dough is too sticky. What can I do?
A slightly sticky dough is normal, but if it’s unmanageable, try adding a tiny bit more potato starch (a teaspoon at a time) to your workspace and your hands as you knead and shape. Be careful not to add too much, as this can make the mochi tough. Ensure your filling is well-chilled, as a warm filling can also contribute to stickiness.
Q2: Can I make Mango Mochi ahead of time?
Yes, you absolutely can! Mango Mochi is best made the day you plan to serve them for the freshest taste and texture. However, they can be stored in an airtight container in the refrigerator for up to 2 days. Keep in mind that the texture might become slightly firmer after refrigeration. Bring them to room temperature for about 15-20 minutes before serving for the best experience.
Sweet Mango Mochi
A chewy tropical treat made with sweet rice flour and fresh mango puree.
Ingredients
-
1 cup glutinous rice flour (sweet rice flour)
-
1/2 cup fresh mango puree (blended mango)
-
1/4 cup sugar
-
1/4 cup water
-
1 tablespoon vegetable oil
-
Cornstarch or potato starch, for dusting
-
Optional: Fresh mango cubes for filling
Instructions
-
Step 1
In a microwave-safe bowl, combine glutinous rice flour and sugar. Whisk to combine. -
Step 2
Add mango puree and water. Stir with a spatula until a smooth, thick batter forms. Press out any lumps. -
Step 3
Stir in vegetable oil until fully incorporated. This makes the mochi pliable. -
Step 4
Cover the bowl with plastic wrap (poke holes) and microwave on high for 1 minute. Stir vigorously with a wet spatula. Repeat twice more, microwaving for 1 minute each time, until translucent and glossy. -
Step 5
Dust a work surface with cornstarch or potato starch. Scrape the hot mochi dough onto the surface. Knead gently for 1-2 minutes until more elastic and less sticky. Let cool slightly. -
Step 6
Dust hands with starch. Flatten portions of dough into discs. If using, place mango cubes in the center and gather edges to seal. Roll into a ball. If not filling, simply roll into balls. -
Step 7
Lightly dust mochi with starch to prevent sticking. Serve fresh.
Important Information
Nutrition Facts (Per Serving)
It is important to consider this information as approximate and not to use it as definitive health advice.
Allergy Information
Please check ingredients for potential allergens and consult a health professional if in doubt.