Masoor Dal Chilla Savory Red Lentil Pancakes
Masoor Dal Chilla, or savory red lentil pancakes, are a delightful and surprisingly easy dish that has captured my heart, and I’m confident it will win yours too. These golden discs of deliciousness are a staple in many Indian households, and for good reason! They offer a fantastic way to incorporate protein and fiber into your diet without sacrificing flavor. What makes the Masoor Dal Chilla so special is its incredible versatility. You can customize the spices to your liking, add finely chopped vegetables for extra nutrition and texture, and serve them with an array of chutneys and dips. Whether you’re looking for a quick and healthy breakfast, a satisfying lunch, or a light dinner, Masoor Dal Chilla is a winner. It’s the perfect blend of wholesome goodness and simple indulgence.
Why You’ll Love Masoor Dal Chilla
A Wholesome and Flavorful Delight
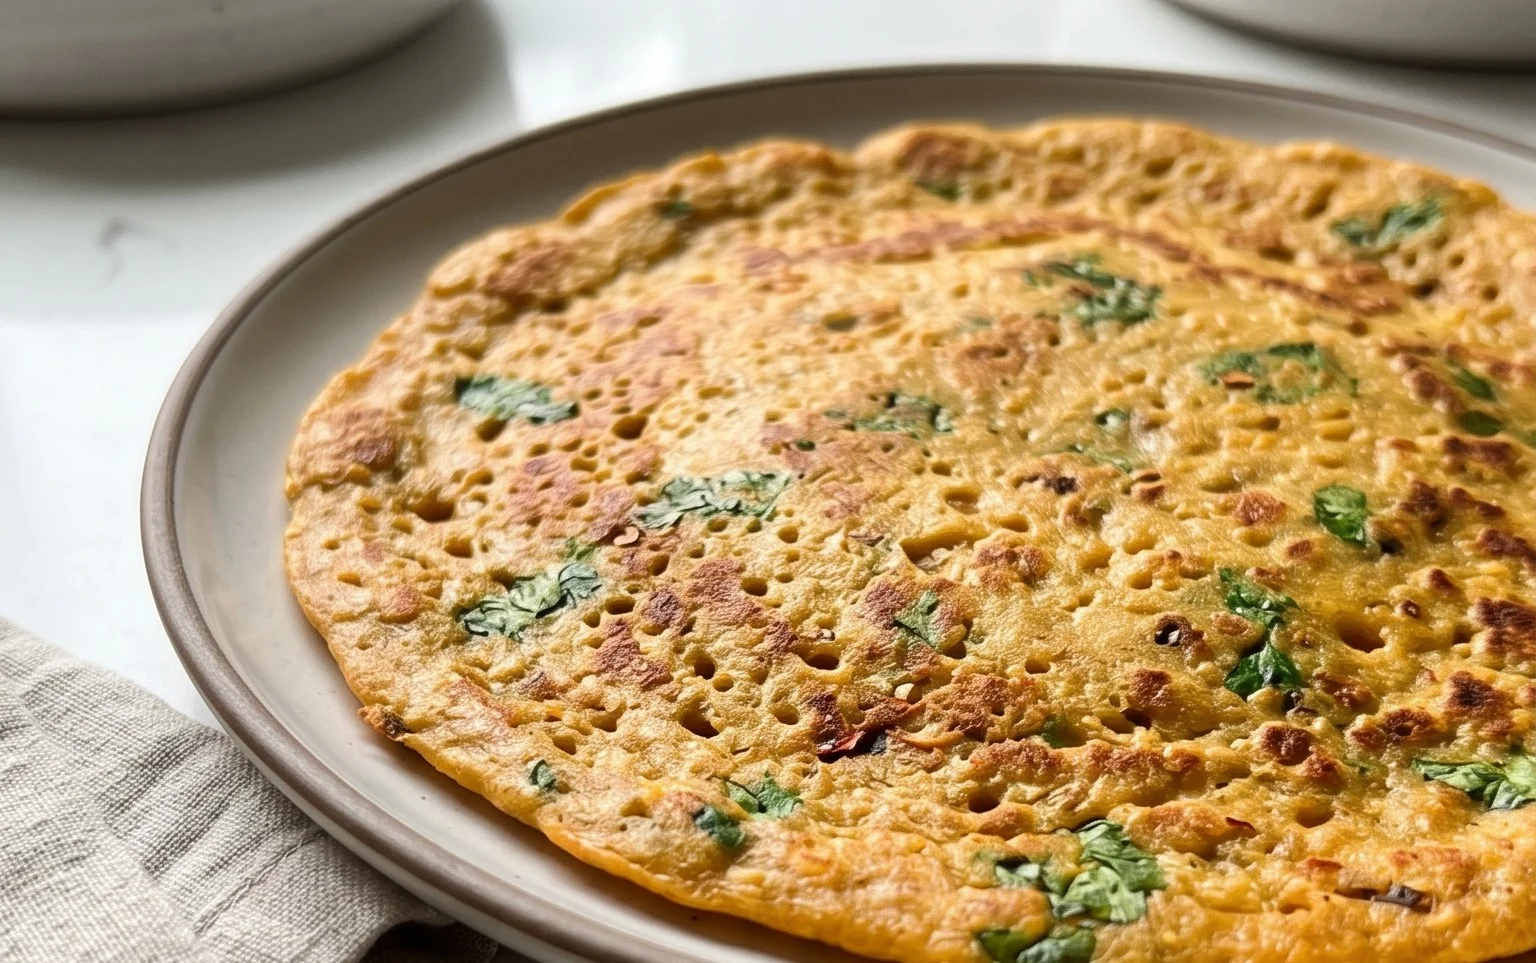
Masoor Dal Chilla | Savory Red Lentil Pancakes
Hello, fellow food lovers! Today, I’m thrilled to share a recipe that’s a staple in many Indian households and a personal favorite of mine for a healthy and delicious meal: Masoor Dal Chilla, also known as savory red lentil pancakes. These aren’t your typical sweet pancakes; they are packed with protein, incredibly satisfying, and wonderfully versatile. Whether you’re looking for a nutritious breakfast, a light lunch, or a wholesome snack, these chillas are sure to hit the spot. They’re naturally gluten-free and can be made vegan with a few simple adjustments, making them accessible to almost everyone.
The beauty of these chillas lies in their simplicity and the wholesome goodness of red lentils. Masoor dal, or split red lentils, cooks down beautifully, creating a smooth batter that lends itself perfectly to thin, crepe-like pancakes. They have a slightly earthy flavor that pairs wonderfully with the fresh spices and herbs I’ll be adding. Let’s get started with what you’ll need to create this delightful dish.
Ingredients:
Cooking Instructions
Now, let’s get cooking! The process is straightforward, but paying attention to a few details will ensure perfectly cooked and delicious chillas every time.
Preparation of the Lentil Batter
The first and most crucial step is preparing the red lentils. This is where we build the foundation for our chillas.
Cooking the Masoor Dal Chillas
This is where the magic happens and our batter transforms into delicious pancakes.
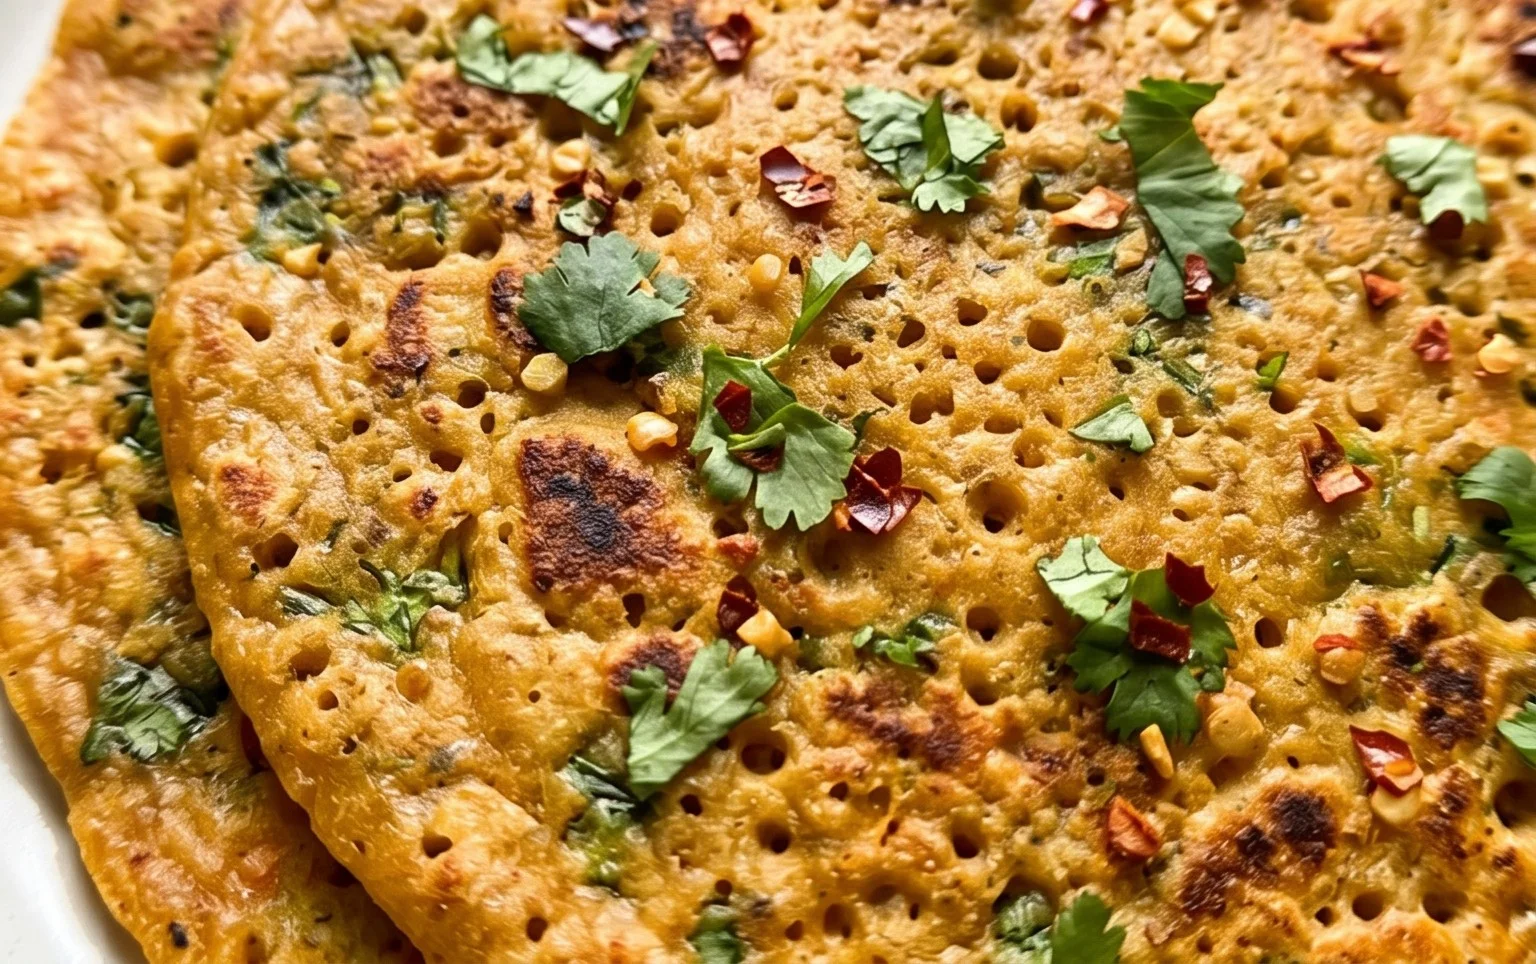
- Cooking the Chillas: Heat a non-stick skillet or a well-seasoned cast-iron griddle over medium heat. Once the pan is hot, add about 1 tablespoon of oil and spread it evenly. You can use a paper towel to lightly grease the pan if you wish. Ladle about ¼ to ⅓ cup of the batter onto the hot pan. Gently spread the batter outwards in a circular motion with the back of the ladle to form a thin, even pancake, similar to how you would make a dosa or a crepe. The thinner you spread it, the crispier your chilla will be.
- Cooking the First Side: Let the chilla cook undisturbed for about 2-3 minutes on medium heat. You will notice the edges starting to look dry and slightly lifted from the pan. Small bubbles may also start to appear on the surface. This is your cue that the bottom is cooked and it’s time to flip.
- Flipping and Cooking the Second Side: Carefully slide a spatula under the chilla and gently flip it over. Drizzle a little more oil around the edges and a tiny bit on top of the chilla. Cook the second side for another 1-2 minutes, or until it’s golden brown and cooked through. The second side usually cooks faster than the first.
- Serving: Once cooked, slide the chilla onto a plate. Repeat the process with the remaining batter, adding a little oil to the pan for each chilla. You should be able to make about 6-8 chillas from this batter.
-
1 cup split red lentils (masoor dal)
-
3 cups water (for soaking lentils)
-
1 green chilli
-
1 inch ginger
-
1 teaspoon kosher salt
-
½ cup water (for grinding)
-
2 tablespoons cilantro (finely chopped)
-
2 tablespoons oil
-
Step 1
Rinse the split red lentils thoroughly under cold water. -
Step 2
Soak the rinsed lentils in 3 cups of water for at least 4 hours, or preferably overnight. -
Step 3
Drain the soaked lentils. Add them to a blender along with the green chili, ginger, kosher salt, and ½ cup of water. Blend until you have a smooth batter. -
Step 4
Stir in the finely chopped cilantro into the lentil batter. -
Step 5
Heat a non-stick skillet or tawa over medium heat. Add about ½ teaspoon of oil and spread it evenly. -
Step 6
Pour a ladleful of batter onto the hot skillet and spread it in a circular motion to form a thin pancake (chilla). -
Step 7
Cook for 2-3 minutes until the edges start to look dry and small bubbles appear on the surface. -
Step 8
Flip the chilla and cook the other side for another 1-2 minutes until golden brown. -
Step 9
Repeat with the remaining batter, adding a little oil to the skillet between each chilla.
Serving Suggestions
These Masoor Dal Chillas are incredibly versatile and can be served in numerous ways. I love serving them hot off the griddle with a dollop of plain yogurt or a refreshing mint-coriander chutney. They also pair beautifully with a simple tomato pickle or even just some ketchup for the kids. For a more substantial meal, you can serve them with a side of vegetable curry or some sautéed vegetables. Feel free to get creative with your toppings and accompaniments! Enjoy these healthy, flavorful, and satisfying red lentil pancakes!
Conclusion:
And there you have it – your guide to creating delicious and healthy Masoor Dal Chilla, or savory red lentil pancakes! This recipe is truly fantastic because it transforms simple, humble red lentils into a delightful meal that’s both nutritious and incredibly satisfying. The ease of preparation makes it perfect for busy weeknights or a wholesome weekend breakfast. The subtle earthiness of the lentils, combined with your chosen spices, creates a flavor profile that’s adaptable to your palate. I truly encourage you to give these Masoor Dal Chilla a try; you won’t be disappointed by their versatility and goodness.
These savory pancakes are wonderfully versatile. For a complete meal, I love serving them hot off the griddle with a dollop of cooling yogurt or a vibrant mint-coriander chutney. A simple side of sliced onions and tomatoes also complements them beautifully. For variations, feel free to incorporate finely chopped vegetables like spinach, grated carrots, or bell peppers directly into the batter. You can also experiment with different spice blends – a pinch of garam masala or a dash of cumin can add exciting new dimensions to your chilla. Don’t be afraid to get creative and make this recipe your own!
Frequently Asked Questions:
Can I make the Masoor Dal Chilla batter ahead of time?
Absolutely! The batter can be made a day in advance and stored in an airtight container in the refrigerator. You might need to add a splash of water to thin it out slightly before cooking, as it can thicken overnight.
What if I don’t have red lentils? Can I use other types of dal?
While red lentils (masoor dal) are ideal for their quick cooking time and smooth texture, you can experiment with other quick-cooking dals like moong dal. However, cooking times and batter consistency might vary, so you may need to adjust accordingly.
How can I make these Masoor Dal Chilla vegan?
The base recipe for Masoor Dal Chilla is naturally vegan! Just ensure you use a plant-based oil for cooking and serve them with vegan yogurt or chutneys.
Masoor Dal Chilla | Savory Red Lentil Pancakes
Delicious and healthy savory pancakes made from split red lentils, flavored with green chili and ginger.
Ingredients
Instructions
Important Information
Nutrition Facts (Per Serving)
It is important to consider this information as approximate and not to use it as definitive health advice.
Allergy Information
Please check ingredients for potential allergens and consult a health professional if in doubt.