Easy Two Ingredient Pizza Dough Recipe
2 Ingredient Pizza Dough isn’t just a recipe; it’s a revelation! For anyone who’s ever craved that perfect, chewy crust without the fuss, this magical concoction is about to become your new kitchen hero. Imagin extracte sinking your teeth into a homemade pizza, crafted with minimal effort but maximum flavor, all thanks to this ingenious shortcut. What makes this dish so universally loved? It boils down to its sheer simplicity and incredible versatility. It’s the ultimate blank canvas for your culinary creativity, allowing you to whip up a delicious pizza in a fraction of the time you’d normally spend. Forget store-bought bases or complicated yeast-risen doughs; this 2 Ingredient Pizza Dough delivers a satisfyingly authentic pizza experience that will impress your family and friends, and more importantly, yourself. It’s proof that deliciousness doesn’t need to be complicated.

Ingredients:
- 2 cups non-fat plain Greek yogurt
- 3 cups self-rising flour
Preparing the Dough
The beauty of this recipe lies in its incredible simplicity. We’re talking about a true “2 Ingredient Pizza Dough,” a culinary marvel that proves you don’t need a pantry full of specialized ingredients to create something delicious. The secret weapon here is the combination of non-fat plain Greek yogurt and self-rising flour. The yogurt provides moisture and a subtle tang, while the self-rising flour, already containing leavening agents, does the heavy lifting to give our dough its structure and rise. This is a fantastic option for a quick weeknight meal or when you’re craving homemade pizza but are short on time or ingredients.
The Mixing Process
Step 1: Combining the Yogurt and Flour
Let’s get started by gathering our two essential ingredients. In a large mixing bowl, add the 2 cups of non-fat plain Greek yogurt. You’ll want to use plain, as flavored yogurts will significantly alter the taste of your pizza. Now, gradually add the 3 cups of self-rising flour. It’s a good idea to add the flour in batches rather than all at once. This allows you to better control the consistency of the dough and ensures that all the flour is incorporated smoothly. Start by adding about half of the flour and begin extract to gently mix it into the yogurt. You can use a sturdy spoon or a spatula for this initial stage. The mixture will start to come together, forming a shaggy, sticky mass.
Step 2: Developing the Dough Consistency
Continue adding the remaining self-rising flour, a little at a time, while continuing to mix. As you add more flour, the mixture will become less sticky and start to resemble a more cohesive dough. The goal is to reach a point where the dough is still slightly tacky but can be handled without sticking excessively to your hands or the bowl. The exact amount of flour needed might vary slightly depending on the humidity and the specific brand of self-rising flour you use. If the dough feels too wet and sticky after adding most of the flour, don’t be afraid to add another tablespoon or two of self-rising flour. Conversely, if it feels too dry and crum extractbly, you can add a tiny bit more Greek yogurt, just a teaspoon at a time, until it comes together.
Step 3: Kneading the Dough
Once the dough has formed a rough ball, it’s time to knead it. Lightly flour a clean work surface with a little extra self-rising flour. Transfer the dough from the bowl to the floured surgin extracte. Begin kneading by pressing down on the dough with the heels of your hands, then folding it over and pushing away. Rotate the dough and repeat the process. You’re looking for a smooth, elastic dough. This kneading process develops the gluten in the flour, which is essential for the dough’s texture and ability to stretch. Knead for about 5-7 minutes. The dough should feel firm but pliable, and it should spring back slightly when you poke it with your finger. Avoid over-kneading, as this can make the dough tough.
Step 4: Resting the Dough
After kneading, it’s beneficial to let the dough rest for a short period. This allows the gluten to relax, making the dough easier to shape. Lightly grease the mixing bowl you used earlier with a little olive oil or cooking spray. Place the kneaded dough back into the bowl, turning it to coat all sides with the oil. Cover the bowl tightly with plastic wrap or a clean kitchen towel. Let the dough rest at room temperature for about 15-20 minutes. While this isn’t a traditional yeast-based dough that requires extensive rising, this short rest significantly improves the handling and texture of the final pizza crust. It allows the flour to fully hydrate and the gluten to become more relaxed.
Step 5: Shaping the Pizza Crust
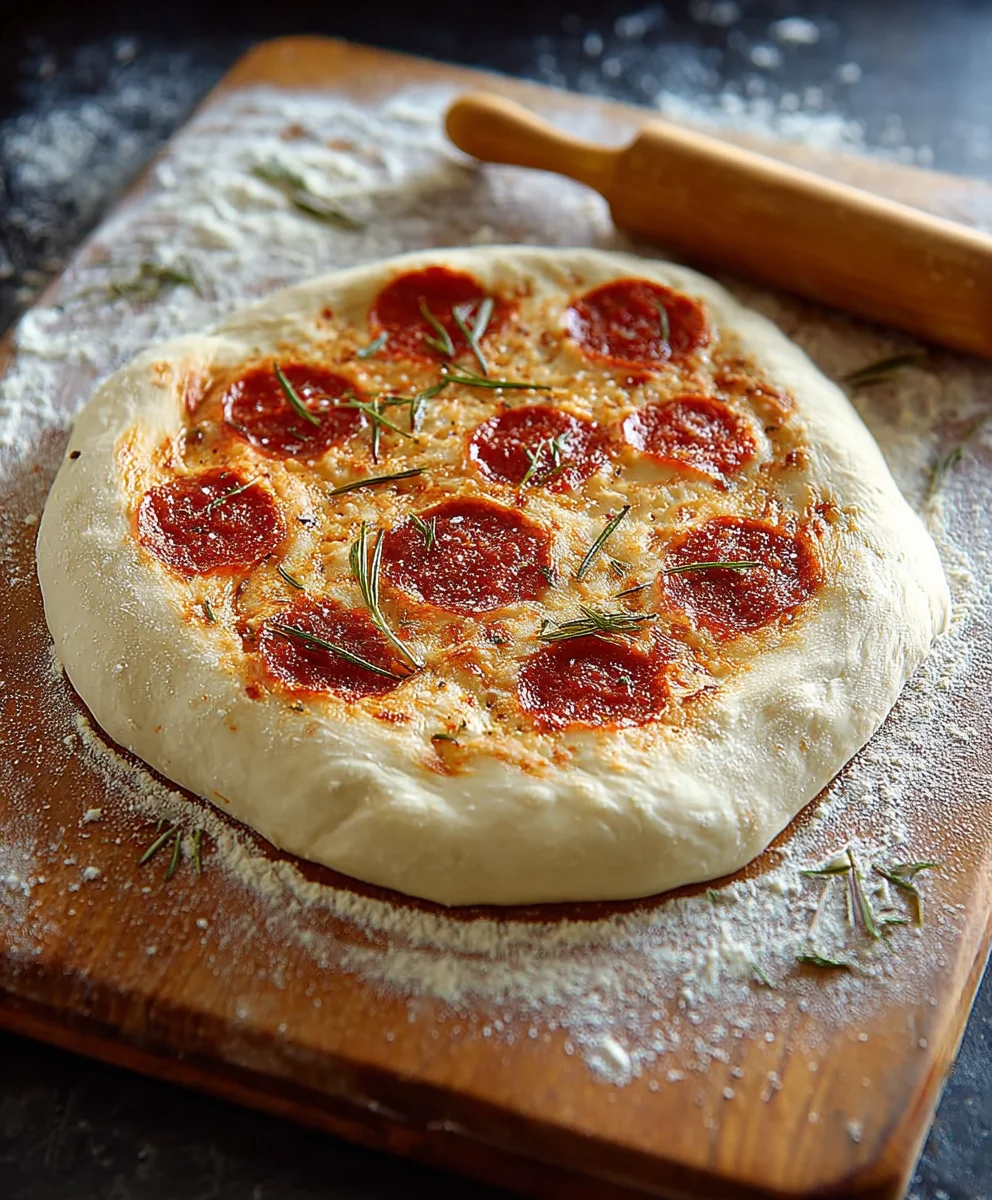
Once the dough has rested, it’s ready to be shaped into your pizza crust. Remove the dough from the bowl and place it back on your lightly floured work surface. You can divide the dough into portions depending on how many pizzas you want to make. This recipe typically yields enough dough for one large pizza or two medium-sized pizzas. Gently press down on the dough with your fingertips, starting from the center and working your way outwards, to create your desired pizza shape. You can aim for a rustic, free-form circle or square, or use a rolling pin to achieve a more uniform thickness. Aim for a thickness of about 1/4 to 1/2 inch. Be careful not to press too thin, especially in the center, as this can lead to a soggy crust.
Baking the Pizza
Preheat your oven to a high temperature, ideally 450-475°F (230-245°C). A hot oven is crucial for achieving a crispy pizza crust. If you have a pizza stone or baking steel, place it in the oven while it preheats. This will help create a wonderfully crisp bottom. Transfer your shaped pizza dough to a pizza peel or a baking sheet lined with parchment paper. Add your favorite pizza sauce, cheese, and toppings. Carefully slide the pizza onto the preheated pizza stone or place the baking sheet in the oven. Bake for 10-15 minutes, or until the crust is golden brown and the cheese is bubbly and melted. Keep an eye on it, as oven temperatures can vary.
Conclusion:
You’ve now unlocked the secret to incredibly simple and versatile 2 Ingredient Pizza Dough! This recipe is a game-changer for busy weeknights, impromptu gatherings, or whenever that pizza craving strikes. We’ve covered the basic steps, and with this foundation, the possibilities are truly endless. Imagin extracte the joy of pulling a golden, bubbly pizza from your oven, knowing you made it with just two ingredients and minimal fuss. Don’t be afraid to experiment; this dough is wonderfully forgiving and adaptable. We encourage you to embrace the simplicity and create your own delicious pizza masterpieces. Get ready to impress yourself and your loved ones with this incredibly easy yet satisfying 2 Ingredient Pizza Dough!
For serving suggestions, consider pairing your homemade pizza with a crisp green salad or some garlic knots. It’s perfect for a casual family dinner or a fun pizza night with friends.
As for variations, feel free to get creative with your toppings! From classic beef pepperoni to gourmet combinations like beef prosciutto and fig, this dough will hold up beautifully. You can also try adding herbs or garlic powder to the dough itself for an extra layer of flavor.
FAQs
Q1: Can I really make pizza dough with just two ingredients?
Absolutely! The magic lies in the combination of self-rising flour and Greek yogurt. The leavening agents in the self-rising flour, combined with the moisture and protein from the Greek yogurt, create a surprisingly elastic and workable dough.
Q2: What kind of Greek yogurt should I use for the 2 Ingredient Pizza Dough?
Plain, full-fat Greek yogurt is generally recommended for the best results with 2 Ingredient Pizza Dough. The fat content helps with the dough’s texture and richness, and the plain variety ensures no added sugars or flavors interfere with the pizza.
Q3: How long does the 2 Ingredient Pizza Dough need to bake?
Baking time will vary depending on your oven temperature and the thickness of your crust, but typically, the 2 Ingredient Pizza Dough bakes at around 400-450°F (200-230°C) for 10-15 minutes, or until the crust is golden brown and the cheese is bubbly and melted.
Easy Two Ingredient Pizza Dough Recipe
A super simple and quick pizza dough made with just two ingredients: Greek yogurt and self-rising flour. Perfect for a fast weeknight meal.
Ingredients
-
2 cups non-fat plain Greek yogurt
-
3 cups self-rising flour
-
Olive oil, for greasing
-
Extra self-rising flour, for dusting
-
Pizza sauce
-
Shredded mozzarella cheese
-
Favorite pizza toppings
Instructions
-
Step 1
In a large mixing bowl, add the 2 cups of non-fat plain Greek yogurt. Gradually add the 3 cups of self-rising flour in batches, mixing with a spoon or spatula until a shaggy, sticky mass forms. -
Step 2
Continue adding flour a little at a time until the dough is no longer excessively sticky but still slightly tacky. Add a tablespoon or two more flour if too wet, or a teaspoon of yogurt if too dry. -
Step 3
Lightly flour a clean work surface and transfer the dough. Knead by pressing and folding for 5-7 minutes until smooth and elastic. The dough should spring back slightly when poked. -
Step 4
Lightly grease the mixing bowl with olive oil. Place the kneaded dough in the bowl, turning to coat. Cover tightly and let rest at room temperature for 15-20 minutes. -
Step 5
Remove the dough from the bowl and place on a lightly floured surface. Press or roll the dough into your desired pizza shape, about 1/4 to 1/2 inch thick. -
Step 6
Preheat oven to 450-475°F (230-245°C) with a pizza stone or baking steel if available. Transfer shaped dough to a pizza peel or parchment-lined baking sheet. Add sauce, cheese, and toppings. -
Step 7
Bake for 10-15 minutes, or until the crust is golden brown and cheese is bubbly and melted.
Important Information
Nutrition Facts (Per Serving)
It is important to consider this information as approximate and not to use it as definitive health advice.
Allergy Information
Please check ingredients for potential allergens and consult a health professional if in doubt.