Easy Spinach Stuffed Chicken Breast Recipe
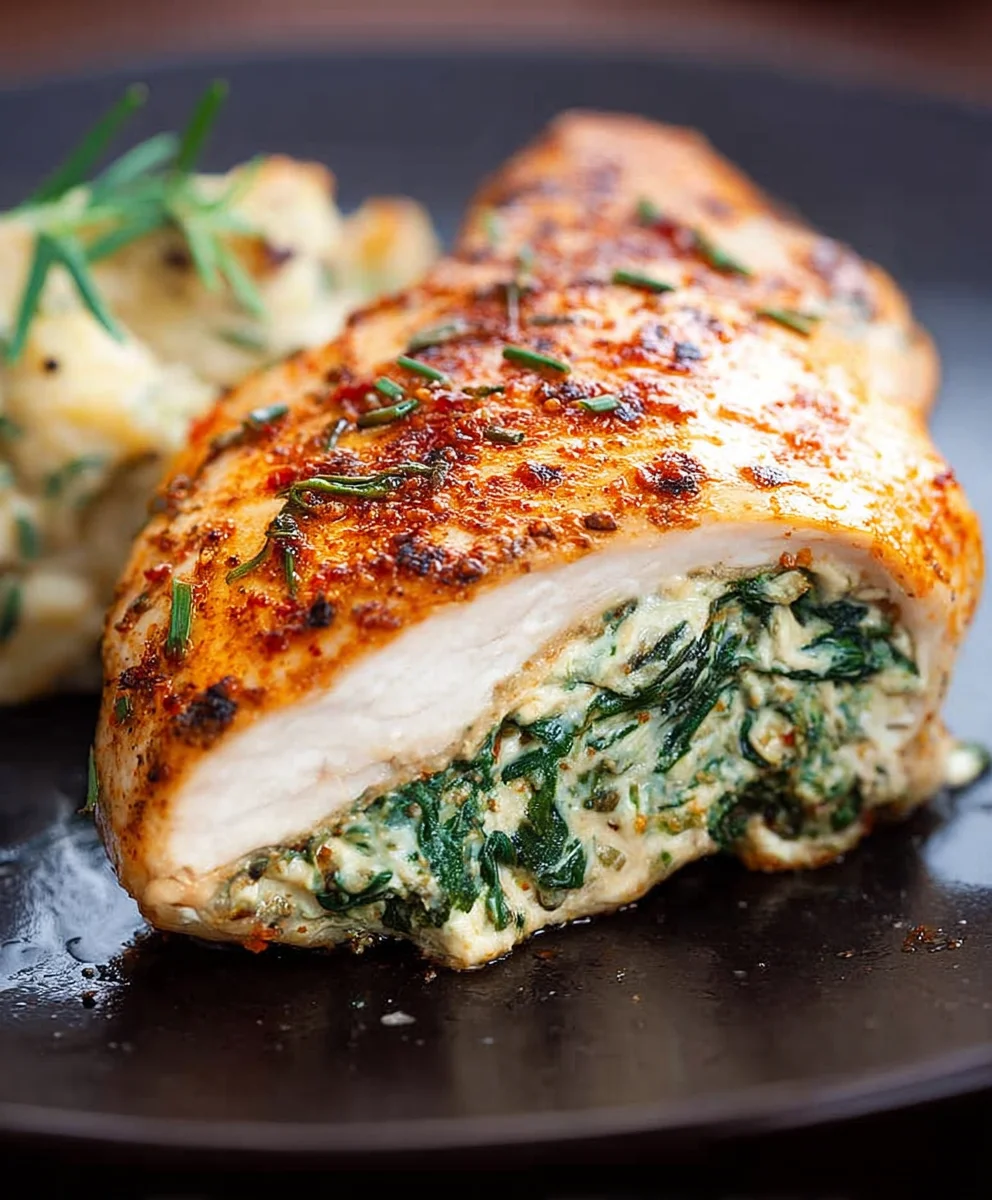
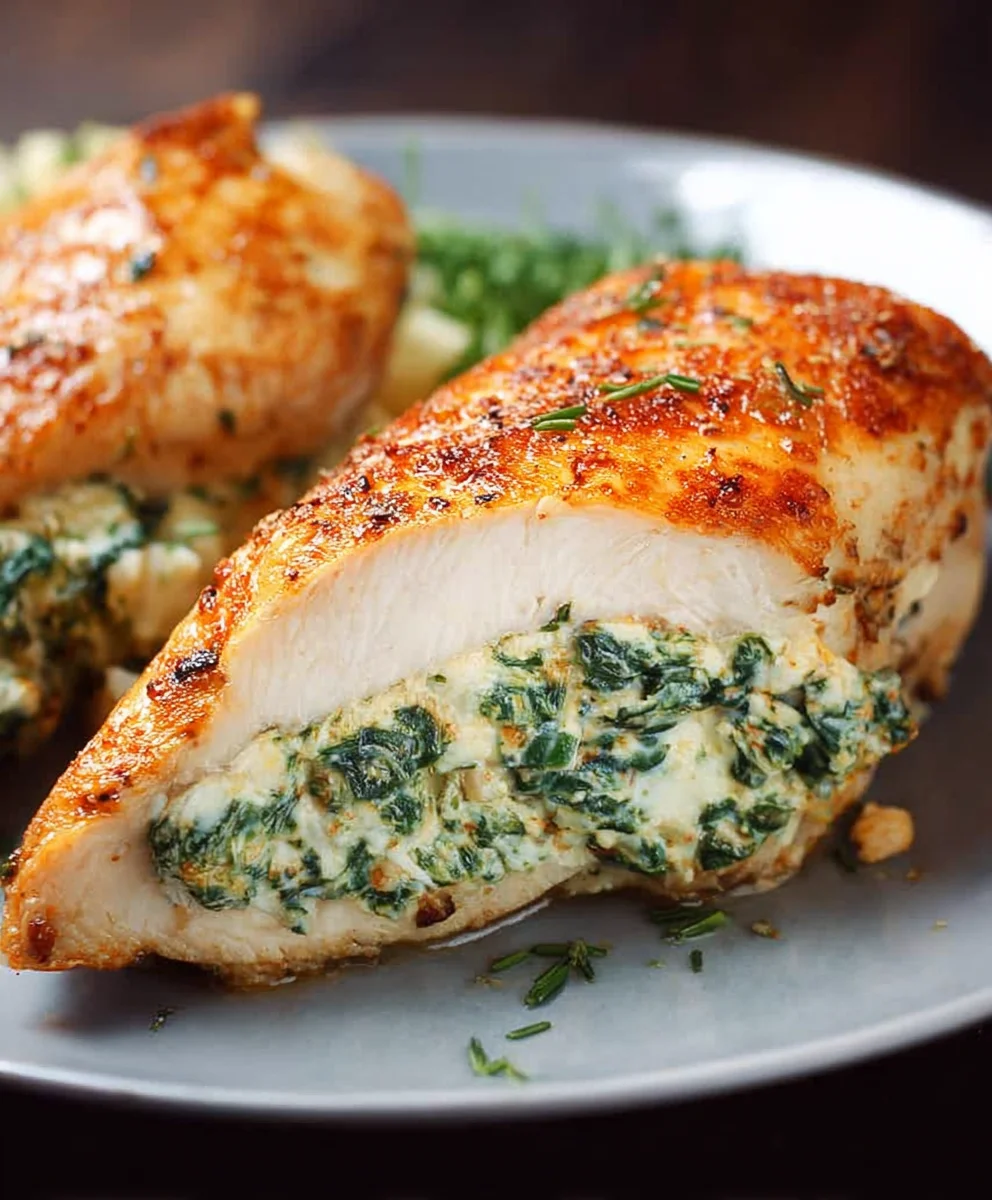
Spinach Stuffed Chicken Breasts are an absolute culinary triumph, a dish that manages to be both elegant enough for a special occasion and simple enough for a weeknight indulgence. We all crave those meals that impress without requiring hours in the kitchen, and this recipe delivers exactly that. The magic lies in the unexpected combination of tender, juicy chicken enveloping a warm, savory filling. It’s a dish that sparks joy with every forkful, a testament to how simple ingredients can transform into something truly spectacular. What truly sets Spinach Stuffed Chicken Breasts apart is the delightful contrast of textures – the slightly crisp exterior of the chicken yielding to the creamy, herbaceous spinach and cheese within. It’s a comforting embrace on a plate, a satisfying meal that will have everyone asking for seconds, proving that sometimes, the most delicious creations are born from classic pairings elevated with a touch of culinary finesse.
Ingredients:
- 4 boneless, skinless chicken breasts
- 1 tablespoon olive oil or avocado oil
- 1 teaspoon paprika
- 1 teaspoon salt, divided
- ¼ teaspoon garlic powder
- ¼ teaspoon onion powder
- 4 ounces cream cheese, softened
- ¼ cup grated Parmesan cheese
- 2 tablespoons mayonnaise
- 1 ½ cups chopped fresh spinach
- 1 teaspoon minced garlic
- ½ teaspoon red pepper flakes
Preparing the Chicken Breasts
This is where we get our chicken ready for its delicious stuffing. The goal is to create a pocket without cutting all the way through. First, place each chicken breast on a clean cutting board. Using a sharp knife, carefully slice horizontally into the thickest part of each breast. You want to create a deep pocket, almost like a little pouch, but be sure not to cut all the way through to the other side. Think of it like opening a book, but the two halves are still connected. Once you have a pocket in each chicken breast, set them aside. In a small bowl, combine the paprika, garlic powder, onion powder, and ½ teaspoon of the salt. This mixture will be our seasoning for the outside of the chicken. Generously sprinkle this spice blend over both sides of each chicken breast, ensuring they are evenly coated. This initial seasoning not only adds flavor but also helps to build a beautiful crust during cooking.
Making the Creamy Spinach Filling
Now for the star of the show – the creamy, flavorful filling! In a medium bowl, combine the softened cream cheese, grated Parmesan cheese, and mayonnaise. This trio forms the luscious base of our stuffing. Using a fork or a spatula, mix these ingredients together until they are well combined and form a smooth, creamy consistency. Don’t worry if there are a few tiny lumps of cream cheese; they will melt into the sauce as it bakes. Next, add the chopped fresh spinach to the bowl. Make sure your spinach is well-drained if you’ve washed it; excess moisture can make the filling too watery. Stir in the minced garlic and the red pepper flakes. The garlic adds a wonderful aromatic depth, while the red pepper flakes provide just a hint of pleasant heat. Mix everything together thoroughly until the spinach and seasonings are evenly distributed throughout the creamy cheese mixture. Taste a tiny bit of the filling (raw ingredients are fine for a small taste test here!) and adjust salt if needed.
Stuffing the Chicken Breasts
This is the fun part where we bring everything together! Take one of your seasoned chicken breasts and gently open the pocket you created. Spoon a generous amount of the creamy spinach filling into the pocket. Don’t be afraid to really pack it in there; we want a good amount of that delicious filling in every bite. You want to fill the pocket until it’s nicely bulgin extractg but not so full that the filling will spill out completely during cooking. Use the back of your spoon to gently spread the filling evenly within the pocket. Repeat this stuffing process for all four chicken breasts. Once all the chicken breasts are stuffed, it’s a good idea to secure them. You can do this by inserting toothpicks through the edges of the pocket to keep the filling contained. This step is particularly helpful if your pockets are a bit more open or if you’re worried about the filling escaping.
Searing for Golden Perfection
To achieve a beautiful golden-brown exterior and lock in those juices, we’re going to give these stuffed chicken breasts a quick sear. Heat the olive oil or avocado oil in a large oven-safe skillet over medium-high heat. You’ll know the oil is hot enough when it shimmers slightly. Carefully place the stuffed chicken breasts into the hot skillet. Be mindful of potential splattering. Let each chicken breast sear undisturbed for about 2-3 minutes per side. You’re looking for a nice golden-brown crust to form. This searing step is crucial for developing flavor and texture. Once both sides of all the chicken breasts have been nicely seared, remove them from the skillet and set them aside momentarily.
Baking to Juicy Completion
The final stage is baking to ensure the chicken is cooked through and the filling is wonderfully melted and bubbly. Preheat your oven to 375 degrees Fahrenheit (190 degrees Celsius). If you used an oven-safe skillet for searing, you can place the seared chicken breasts directly back into that skillet, ensuring they are not overcrowded. If your skillet isn’t oven-safe, transfer the chicken breasts to a baking dish. Sprinkle the remaining ½ teaspoon of salt over the tops of the stuffed chicken breasts. This final seasoning enhances the overall flavor profile. Cover the skillet or baking dish loosely with aluminum foil. This helps to trap steam and cook the chicken evenly without drying it out. Bake for 20-25 minutes, or until the chicken is cooked through and the internal temperature reaches 165 degrees Fahrenheit (74 degrees Celsius) when tested with a meat thermometer inserted into the thickest part of the chicken, avoiding the filling. Once cooked, carefully remove the foil and bake for an additional 5 minutes, uncovered, to allow the tops to become slightly golden and the filling to bubble. Let the chicken rest for 5-10 minutes before serving to allow the juices to redistribute, ensuring a tender and moist result. Remember to remove any toothpicks before serving!
Conclusion:
And there you have it – a delightful and impressive dish that’s surprisingly easy to master! Our Spinach Stuffed Chicken Breasts are a testament to how simple ingredients can create something truly special. The tender chicken, infused with the creamy, savory spinach and cheese filling, offers a perfect balance of flavors and textures. These stuffed chicken breasts are not only a crowd-pleaser for weeknight dinners but also elegant enough to grace any special occasion. We hope you enjoy making and serving them as much as we do!
For serving suggestions, consider pairing your Spinach Stuffed Chicken Breasts with a crisp green salad, roasted asparagus, or creamy mashed potatoes. A light lemon-herb sauce would also complement the dish beautifully. Feel free to get creative with variations! You could add a pinch of nutmeg to the spinach mixture for an extra layer of warmth, or mix in some sun-dried tomatoes for a delightful tang. Chopped mushrooms or a sprinkle of Parmesan cheese within the filling are also fantastic additions.
We encourage you to give this recipe a try. Don’t be intimidated by the stuffing process; it’s quite straightforward and the results are well worth it. We’re confident that Spinach Stuffed Chicken Breasts will become a go-to in your recipe repertoire.
Frequently Asked Questions:
What kind of cheese works best for the filling?
While cream cheese is often the base for its creamy texture, mozzarella, Gruyère, or even a sharp cheddar can add wonderful flavor. A blend of cheeses can also be delicious for added complexity.
Can I prepare the spinach filling ahead of time?
Absolutely! You can prepare the spinach and cheese mixture a day in advance and store it in an airtight container in the refrigerator. This can save you valuable time when you’re ready to assemble and cook the chicken.
How can I ensure the chicken is cooked through without drying out?
Using a meat thermometer is the best way to guarantee perfectly cooked chicken. Aim for an internal temperature of 165°F (74°C) in the thickest part of the chicken breast. Resting the chicken for 5-10 minutes after cooking also helps to keep it moist and tender.
Easy Spinach Stuffed Chicken Breast Recipe
A simple and delicious recipe for juicy chicken breasts stuffed with a creamy spinach and Parmesan filling.
Ingredients
-
4 boneless, skinless chicken breasts
-
1 tablespoon olive oil or avocado oil
-
1 teaspoon paprika
-
1 teaspoon salt, divided
-
1/4 teaspoon garlic powder
-
1/4 teaspoon onion powder
-
4 ounces cream cheese, softened
-
1/4 cup grated Parmesan cheese
-
2 tablespoons mayonnaise
-
1 1/2 cups chopped fresh spinach
-
1 teaspoon minced garlic
-
1/2 teaspoon red pepper flakes
Instructions
-
Step 1
Prepare the chicken breasts by slicing horizontally into the thickest part to create a pocket, being careful not to cut all the way through. In a small bowl, combine paprika, garlic powder, onion powder, and 1/2 teaspoon of salt. Sprinkle this mixture evenly over both sides of each chicken breast. -
Step 2
Make the filling by combining softened cream cheese, grated Parmesan cheese, and mayonnaise in a medium bowl until smooth. Stir in the chopped fresh spinach, minced garlic, and red pepper flakes. Mix thoroughly and taste for salt, adjusting if needed. -
Step 3
Stuff each chicken breast pocket generously with the creamy spinach filling. Secure the opening with toothpicks if necessary to prevent the filling from spilling out during cooking. -
Step 4
Heat olive oil or avocado oil in a large oven-safe skillet over medium-high heat. Sear the stuffed chicken breasts for 2-3 minutes per side until golden brown. -
Step 5
Transfer the skillet to a preheated oven at 375°F (190°C). Sprinkle the remaining 1/2 teaspoon of salt over the chicken. Cover loosely with aluminum foil and bake for 20-25 minutes, or until the chicken reaches an internal temperature of 165°F (74°C). Remove foil for the last 5 minutes of baking to allow the tops to brown and the filling to bubble. -
Step 6
Let the chicken rest for 5-10 minutes before serving. Remember to remove any toothpicks before enjoying.
Important Information
Nutrition Facts (Per Serving)
It is important to consider this information as approximate and not to use it as definitive health advice.
Allergy Information
Please check ingredients for potential allergens and consult a health professional if in doubt.