Easy No Yeast Pizza Dough – Quick Homemade Pizza
An excellent No Yeast Pizza Dough is your golden ticket to homemade pizza perfection, without the wait! Ever craved that irresistible cheesy goodness, the perfect chewy crust, but dreaded the long proofing times associated with traditional yeast dough? I’ve been there, too! That’s precisely why I’m so thrilled to share this incredible recipe for an excellent No Yeast Pizza Dough. It’s the solution for spontaneous pizza nights, busy weeknights, or anytime you want delicious, restaurant-quality pizza in a fraction of the time. What makes this dough so special? It’s unbelievably quick to whip up, incredibly forgiving, and produces a crust that’s delightfully crisp on the outside and wonderfully soft on the inside – all thanks to a few simple pantry staples. Get ready to transform your kitchen into your favorite pizzeria with this easy, no-fuss approach to the perfect pizza!
No Yeast Pizza Dough – Quick Easy Homemade Pizza!
Craving pizza but don’t have time to wait for yeast to do its thing? Or perhaps you’re new to pizza-making and a little intimidated by the yeast process. Well, I have the perfect solution for you! This no-yeast pizza dough is a game-changer. It’s incredibly quick to whip up, requires no special ingredients, and results in a delicious, slightly chewy crust that’s perfect for all your favourite toppings. Forget those frozen pizza bases; this homemade version is so much better and surprisingly easy. Let’s get baking!
This recipe is fantastic for those weeknight pizza cravings or when you have unexpected guests. It truly delivers on its promise of being quick and easy, without sacrificing flavour or texture. The baking powder acts as our leavening agent, creating a lovely lift and a tender crum extractb without any waiting time. It’s the closest you’ll get to that satisfying pizza experience without the fuss of yeast.
Ingredients:
Making Your Quick Pizza Dough
This is where the magic happens. It’s a simple process that comes together in minutes.
Step 1: Combining the Dry Ingredients
In a medium-sized mixing bowl, we’ll start by combining all our dry ingredients. This includes the flour, baking powder, salt, and sugar. Whisk them together thoroughly. It’s important to distribute the baking powder evenly throughout the flour. This ensures consistent leavening across your pizza crust. The sugar might seem a little odd in a savoury dough, but it plays a crucial role. It helps to tenderize the crust and contributes to a beautiful golden-brown colour during baking. The salt, of course, is for flavour, enhancing all the other ingredients.
Step 2: Adding the Wet Ingredients
Now, it’s time to introduce the wet ingredients to our dry mixture. Pour in the olive oil and the cold tap water. I recommend using cold water as it helps to prevent the gluten from developing too quickly, which can result in a tougher crust. Using your hands or a sturdy spatula, begin extract to mix everything together until a shaggy dough starts to form. Don’t overmix at this stage. We’re just aiming to incorporate everything.
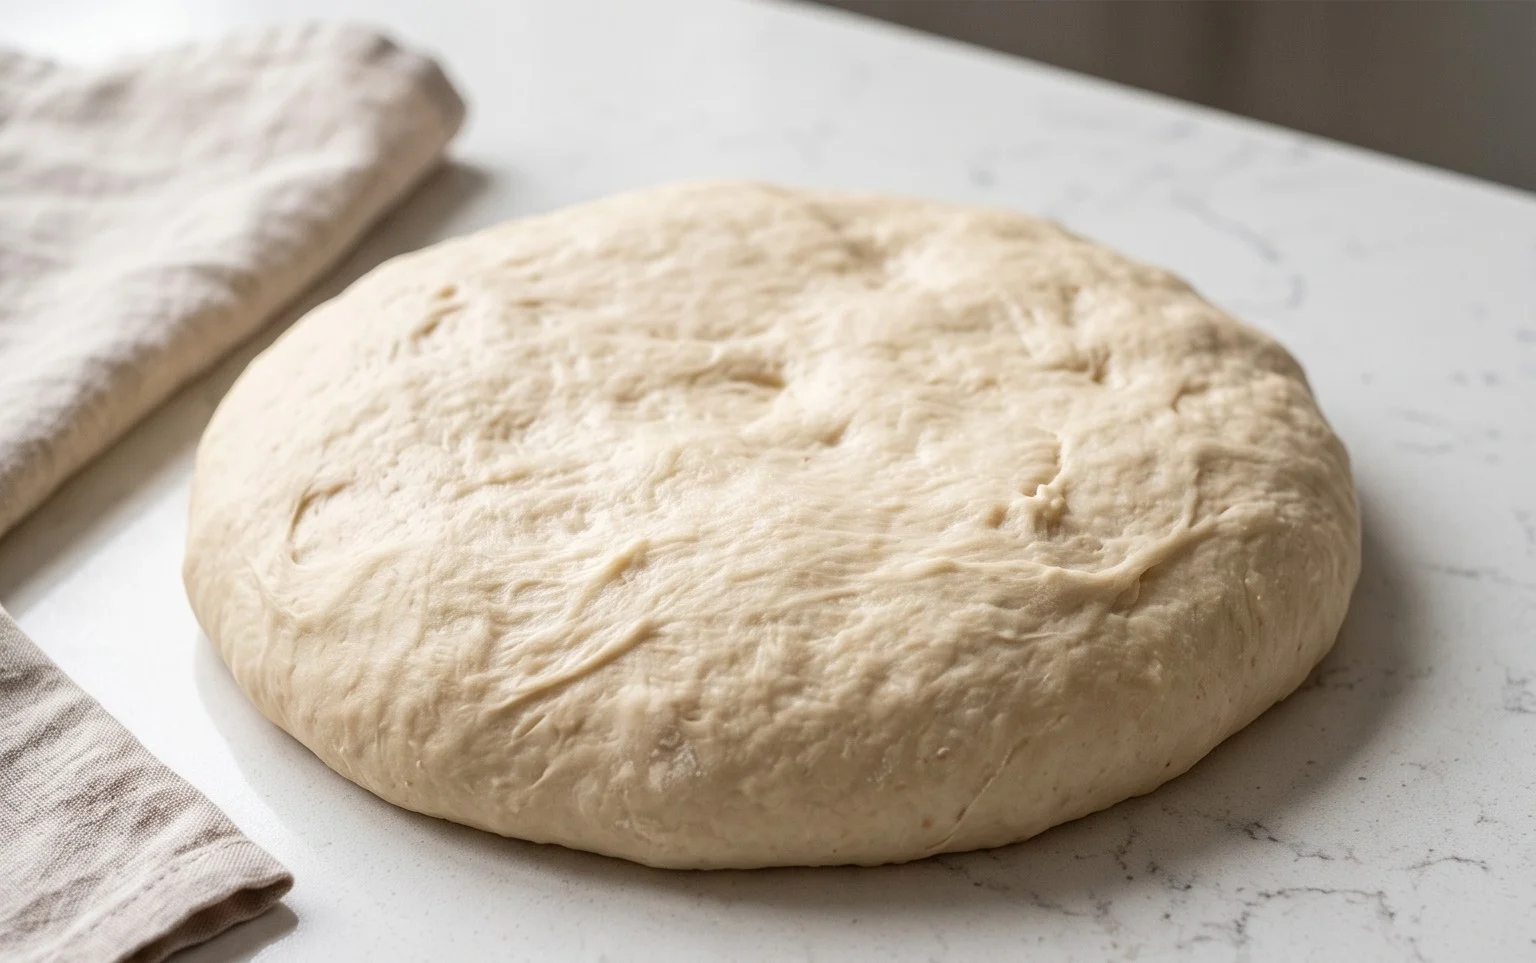
Step 3: Kneading the Dough
Turn the shaggy dough out onto a lightly floured surface. This is where we’ll do a little bit of kneading. We only need to knead for about 3-5 minutes. You’ll know it’s ready when the dough is smooth, elastic, and no longer sticky. The goal here is to develop the gluten, which gives the pizza dough its structure and chew. If the dough feels a little sticky, resist the urge to add too much extra flour. A little bit of dusting is fine, but excessive flour can make the crust dry. Gently push the dough away from you with the heel of your hand, then fold it back towards you. Repeat this motion until it becomes smooth and pliable.
Step 4: Resting the Dough (Optional but Recommended!)
While this is a no-yeast dough, I highly recommend a short resting period. Cover the dough loosely with a clean kitchen towel or plastic wrap and let it rest for about 10-15 minutes. This resting period allows the gluten to relax, making the dough much easier to shape and roll out without it springin extractg back. It also allows the baking powder to start its leavening action, giving the dough a little bit of puffiness before it hits the oven. You’ll notice it will feel softer and more manageable after this short break.
Step 5: Shaping Your Pizza Crust
Once the dough has rested, it’s time to shape it into your desired pizza form. You can either gently press it out with your hands or use a rolling pin. Aim for about a 10-12 inch circle or rectangle, depending on your baking sheet or pizza stone. For a crispier crust, try to keep the edges slightly thicker than the centre. If you’re using a pizza peel, dust it generously with flour or cornmeal to prevent sticking. You can also shape the dough directly onto parchment paper for easy transfer. This dough is quite forgiving, so don’t worry if it’s not a perfect circle!
Baking Your Homemade Pizza
Now that your dough is shaped, it’s time to add your favourite toppings and bake it to perfection.
Preheating Your Oven
This is a crucial step for a great pizza crust. Preheat your oven to a high temperature, typically 450°F (230°C). If you have a pizza stone, place it in the oven while it preheats. A hot oven and a hot baking surface are key to achieving a crispy bottom crust and a well-cooked pizza.
Adding Toppings
Spread your favourite pizza sauce evenly over the dough, leaving a small border for the crust. Then, add your cheese and any other toppings you love. Don’t overload the pizza, as too many toppings can make the crust soggy.
Baking Time
Carefully transfer your pizza to the preheated oven. If using a pizza stone, slide it directly onto the hot stone. If using a baking sheet, place the sheet in the oven. Bake for 12-18 minutes, or until the crust is golden brown and the cheese is bubbly and slightly browned. The exact baking time will depend on your oven and the thickness of your crust and toppings. Keep an eye on it during the last few minutes to prevent burning.
Finishing Touches
Once your pizza is out of the oven, you can optionally brush the crust with a little vegetable oil for extra shine and flavour. Let the pizza rest for a few minutes before slicing and serving. This allows the cheese to set slightly and prevents all your delicious toppings from sliding off.
Enjoy your incredibly easy and delicious homemade no-yeast pizza! It’s a simple recipe that delivers big on flavour and satisfaction.

Conclusion:
So there you have it! This excellent no yeast pizza dough recipe is a game-changer for anyone craving delicious, homemade pizza without the fuss of proofing yeast. Its beauty lies in its simplicity and speed – perfect for those spontaneous pizza nights or when you’re short on time but big on pizza cravings. The result is a wonderfully chewy, slightly crisp crust that forms the perfect base for all your favorite toppings.
We love serving this pizza with classic marinara and mozzarella, but it’s also fantastic with pesto, loaded with fresh vegetables, or even as a white pizza with ricotta and garlic. Feel free to experiment with different flours, like adding a little whole wheat for extra flavor, or incorporating herbs directly into the dough for an added aromatic touch. Don’t be afraid to get creative! I truly encourage you to give this quick easy homemade pizza recipe a try – you might just find it becomes your go-to method for incredible pizza.
Frequently Asked Questions:
Can I make this dough ahead of time?
Yes! You can prepare the dough and store it in the refrigerator for up to 24 hours. Just wrap it tightly in plastic wrap. Let it come to room temperature for about 30 minutes before shaping and baking for best results.
What kind of flour is best for this no yeast pizza dough?
All-purpose flour works wonderfully and is what I recommend for its ease. However, bread flour can also be used for a chewier crust, and a small amount of whole wheat flour can add a nutty flavor profile.
Why isn’t my crust crispy enough?
Ensure your oven is preheated to a high temperature (475-500°F or 245-260°C) and consider baking your pizza on a preheated pizza stone or steel for maximum crispiness. Baking directly on a baking sheet is also an option, but a stone/steel provides superior heat transfer.
An excellent No Yeast Pizza Dough – quick easy homemade pizza!
A simple and quick no-yeast pizza dough recipe perfect for easy homemade pizzas.
Ingredients
-
{‘@type’: ‘HowToStep’, ‘text’: ‘1 1/3 cups bread flour ((or plain / all purpose flour))’}
-
{‘@type’: ‘HowToStep’, ‘text’: ‘2 tsp baking powder’}
-
{‘@type’: ‘HowToStep’, ‘text’: ‘3/4 tsp salt’}
-
{‘@type’: ‘HowToStep’, ‘text’: ‘3/4 tsp sugar’}
-
{‘@type’: ‘HowToStep’, ‘text’: ‘2 tsp olive oil ((or any other oil))’}
-
{‘@type’: ‘HowToStep’, ‘text’: ‘1/2 cup water ((cold tap water))’}
-
{‘@type’: ‘HowToStep’, ‘text’: ‘1 tbsp Extra Flour (, for dusting)’}
-
{‘@type’: ‘HowToStep’, ‘text’: ‘2 tsp vegetable oil (optional) (, for brushing crust (or canola or other neutral oil))’}
Instructions
-
Step 1
In a large bowl, whisk together the bread flour, baking powder, salt, and sugar. -
Step 2
Add the olive oil and water to the dry ingredients. -
Step 3
Mix with a spoon or your hands until a shaggy dough forms. Turn out onto a lightly floured surface. -
Step 4
Knead for 5-7 minutes until the dough is smooth and elastic. Add a little more flour if it’s too sticky. -
Step 5
Shape the dough into a ball and let it rest for 10 minutes. While the dough rests, preheat your oven and prepare your pizza toppings. -
Step 6
Roll or stretch the dough to your desired pizza shape and thickness. Place on a pizza peel or baking sheet. -
Step 7
Add your favorite pizza sauce and toppings. If desired, brush the crust with vegetable oil before baking. -
Step 8
Bake in a preheated oven at the highest temperature (usually 450-500°F or 230-260°C) for 15-20 minutes, or until the crust is golden brown and the cheese is bubbly.
Important Information
Nutrition Facts (Per Serving)
It is important to consider this information as approximate and not to use it as definitive health advice.
Allergy Information
Please check ingredients for potential allergens and consult a health professional if in doubt.