Easy Japanese Cheese Tarts – Fluffy Creamy Dessert
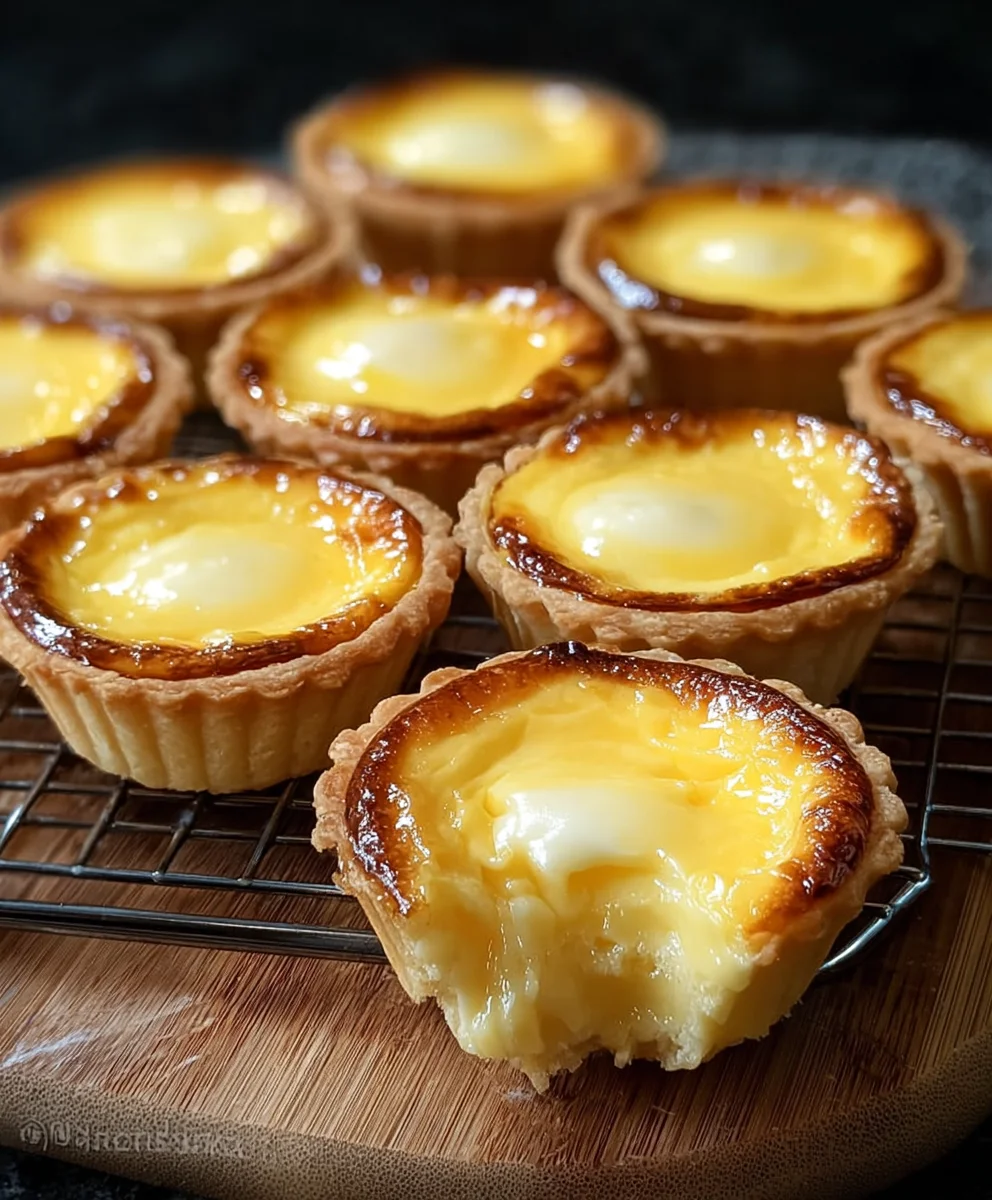
Japanese Cheese Tarts are more than just a dessert; they’re a whisper of pure bliss in every bite. If you’ve ever found yourself captivated by that irresistible, creamy, slightly sweet, and wonderfully tangy sensation, you’re not alone. These delicate pastries have taken the world by storm, enchanting palates with their unique textural contrast: a crisp, buttery shell yielding to a molten, velvety cheese filling. It’s this delightful interplay of textures and the sophisticated yet comforting flavor profile that makes Japanese Cheese Tarts so incredibly lovable. They offer a moment of pure indulgence, a little escape from the everyday that feels both gourmet and wonderfully approachable. What truly sets these tarts apart is their subtle elegance. They aren’t overwhelmingly sweet, allowing the natural creaminess and gentle tang of the cheese to shine through, creating a beautifully balanced confection that leaves you craving just one more. Get ready to unlock the secrets to creating these exquisite delights right in your own kitchen!
Ingredients:
- 1 1/2 cups all-purpose flour
- 8 1/2 tablespoons unsalted butter, cubed and chilled
- 1/2 cup powdered sugar, divided
- 1 egg yolk, plus more for egg wash
- 1 cup cream cheese, softened
- 2/3 cup heavy whipping cream
- 1 teaspoon cornstarch
- 1/2 tablespoon milk or water, for egg wash
Preparing the Tart Shells
Mixing the Dough
In a large mixing bowl, combine the all-purpose flour and 1/4 cup of the powdered sugar. Whisk them together to ensure they are well distributed. Add the chilled, cubed unsalted butter to the flour mixture. Using a pastry blender or your fingertips, cut the butter into the flour until the mixture resembles coarse crum extractbs, with some pea-sized pieces of butter still visible. This is crucial for creating flaky tart shells. The remaining butter pieces will melt during baking, creating steam pockets that lead to that desirable flakiness.
In a separate small bowl, lightly whisk the egg yolk. Add the whisked egg yolk to the flour and butter mixture. Mix gently with a fork until the dough just begin extracts to come together. Be careful not to overmix, as this can result in tough tart shells. The dough shorum extract be crumbly but should hold together when squeezed.
Chilling and Shaping the Dough
Turn the dough out onto a lightly floured surface and gently bring it together to form a disc. Do not knead. Wrap the disc tightly in plastic wrap and refrigerate for at least 30 minutes, or up to 2 days. Chilling the dough allows the gluten to relax, making it easier to roll and preventing shrinkage during baking.
Once chilled, remove the dough from the refrigerator. Lightly flour your work surface and the top of the dough. Roll out the dough to about 1/8-inch thickness. You want it thin enough to create delicate shells, but not so thin that they become fragile and break easily. Use a round cookie cutter or a glass that is slightly larger than your tart molds to cut out circles of dough.
Gently press the dough circles into your tart molds, making sure to push the dough up the sides evenly. Trim any excess dough from the top edges. Prick the bottom of each tart shell several times with a fork. This step, known as “docking,” prevents the dough from puffing up excessively during baking. Place the prepared tart shells in the freezer for another 15-20 minutes. This further chills the butter and helps maintain the shape of the shells during baking, minimizing any shrinkage.
Blind Baking the Tart Shells
Preheat your oven to 375°F (190°C). Line each chilled tart shell with a small piece of parchment paper or aluminum foil, and fill with pie weights, dried beans, or rice. This is called blind baking, and it ensures that the bottom of the tart shells cooks through and remains crisp, preventing a soggy bottom. Bake for 15 minutes.
Carefully remove the parchment paper and weights. Return the tart shells to the oven and bake for another 5-7 minutes, or until they are lightly golden brown. Keep an eye on them to prevent them from browning too quickly. Once baked, remove them from the oven and let them cool completely in their molds on a wire rack. While they are cooling, prepare the creamy cheese filling.
Crafting the Japanese Cheese Filling
Creating the Creamy Base
In a medium bowl, beat the softened cream cheese with the remaining 1/4 cup of powdered sugar until smooth and creamy. This ensures there are no lumps and that the sugar is fully incorporated. In a separate bowl, whisk together the heavy whipping cream and cornstarch. Whisk until the cornstarch is fully dissolved and there are no lumps. This mixture will help thicken the filling and give it a smooth, custardy texture.
Gradually add the cream cheese mixture to the heavy whipping cream and cornstarch mixture, whisking constantly until everything is well combined and smooth. You want a homogenous, silky mixture.
Filling and Baking the Tarts
Once the tart shells have completely cooled, gently pour or spoon the cheese filling into each one, filling them almost to the top. Be careful not to overfill, as the filling might expand slightly during baking.
Prepare an egg wash by whisking together the remaining egg yolk and the 1/2 tablespoon of milk or water in a small bowl. Using a pastry brush, lightly brush the edges of the tart shells with the egg wash. This will give them a beautiful golden sheen and a slightly crispier edge.
Carefully place the filled tart shells on a baking sheet. Bake in the preheated oven at 375°F (190°C) for 15-20 minutes, or until the filling is set and the edges of the tart shells are a deeper golden brown. The filling should be firm to the touch and slightly puffed.
Cooling and Serving
Remove the Japanese Cheese Tarts from the oven and let them cool in their molds for about 10-15 minutes. Then, carefully remove them from the molds and place them on a wire rack to cool completely. They can be served warm or at room temperature. For an extra touch of indulgence, you can dust them lightly with a little more powdered sugar just before serving. These delightful Japanese Cheese Tarts are perfect as a dessert, a sweet snack, or even for afternoon tea. Enjoy their rich, creamy filling encased in a buttery, crisp crust.
Conclusion:
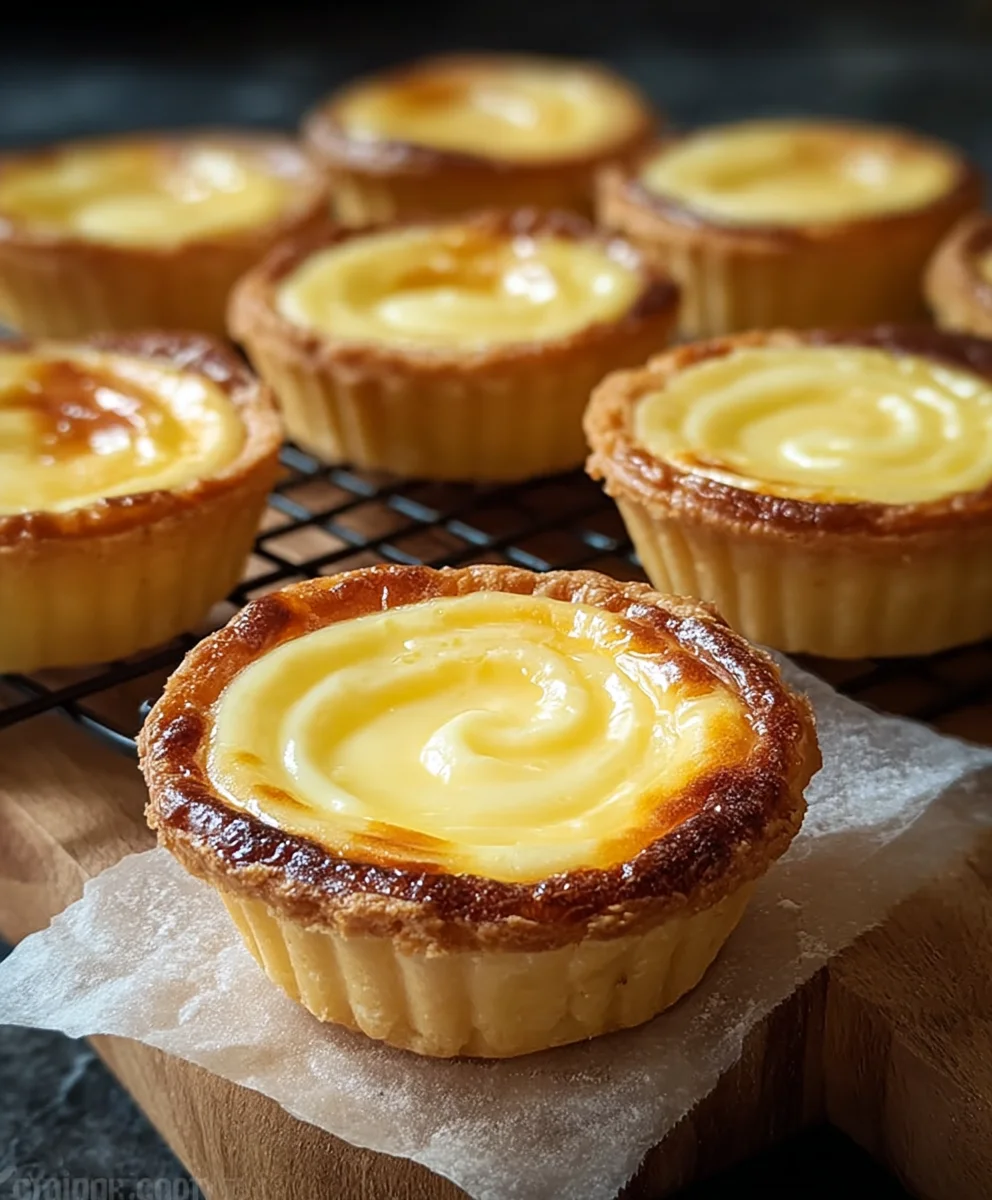
And there you have it – your guide to creating delightful Japanese Cheese Tarts right in your own kitchen! We’ve walked through the steps to achieve that perfectly crisp tart shell and the luxuriously creamy, slightly sweet cheese filling that makes these tarts so irresistible. The beauty of this recipe lies not only in its delicious outcome but also in its versatility. Don’t be afraid to experiment!
For serving, these Japanese Cheese Tarts are absolutely divine served slightly warm, allowing the cheesy center to be at its most gooey. They also hold up beautifully at room temperature and make for an elegant dessert or a sophisticated afternoon tea treat. Consider pairing them with a light green tea or a delicate oolong for a truly authentic experience. If you’re feeling adventurous, try adding a hint of yuzu zest to the cheese filling for a bright citrus note, or perhaps a sprinkle of matcha powder on top for a beautiful visual and a subtle earthy flavor.
We encourage you to give this recipe a try. The process is rewarding, and the results are sure to impress. Enjoy the process, and savor every bite of your homemade Japanese Cheese Tarts!
Frequently Asked Questions about Japanese Cheese Tarts:
Q: Can I make the tart shells ahead of time?
A: Yes, absolutely! You can prepare and bake the tart shells a day or two in advance. Store them in an airtight container at room temperature to maintain their crispness.
Q: What kind of cream cheese is best for Japanese Cheese Tarts?
A: Full-fat, block-style cream cheese is generally recommended for the creamiest and richest filling. Avoid whipped cream cheese, as it can alter the texture.
Q: How should I store leftover Japanese Cheese Tarts?
A: Leftover Japanese Cheese Tarts can be stored in an airtight container in the refrigerator for up to 3 days. They are best reheated gently in a low oven for a few minutes before serving to regain some of their origin extractal texture.
Easy Japanese Cheese Tarts – Fluffy Creamy Dessert
Delightful Japanese Cheese Tarts with a rich, creamy filling encased in a buttery, crisp crust. Perfect as a dessert, sweet snack, or for afternoon tea.
Ingredients
-
1 1/2 cups all-purpose flour
-
8 1/2 tablespoons unsalted butter, cubed and chilled
-
1/2 cup powdered sugar, divided
-
1 egg yolk, plus more for egg wash
-
1 cup cream cheese, softened
-
2/3 cup heavy whipping cream
-
1 teaspoon cornstarch
-
1/2 tablespoon milk or water, for egg wash
Instructions
-
Step 1
For the tart shells, combine flour and 1/4 cup powdered sugar in a bowl. Cut in chilled butter until mixture resembles coarse crumbs. Whisk in egg yolk until dough just begins to come together. Form into a disc, wrap, and chill for at least 30 minutes. -
Step 2
Roll out dough to 1/8-inch thickness. Cut circles slightly larger than tart molds and press into molds. Trim excess dough, prick bottoms with a fork, and freeze for 15-20 minutes. -
Step 3
Preheat oven to 375°F (190°C). Blind bake tart shells for 15 minutes with parchment and weights, then remove weights and bake for another 5-7 minutes until golden. Cool completely. -
Step 4
For the filling, beat cream cheese with remaining 1/4 cup powdered sugar until smooth. In a separate bowl, whisk heavy cream and cornstarch until smooth. Gradually whisk cream cheese mixture into cream mixture until smooth. -
Step 5
Fill cooled tart shells with cheese filling. Brush edges with an egg wash made from remaining egg yolk and milk/water. Bake for 15-20 minutes until filling is set and edges are golden brown. -
Step 6
Cool tarts in molds for 10-15 minutes, then remove to a wire rack to cool completely. Serve warm or at room temperature, optionally dusted with powdered sugar.
Important Information
Nutrition Facts (Per Serving)
It is important to consider this information as approximate and not to use it as definitive health advice.
Allergy Information
Please check ingredients for potential allergens and consult a health professional if in doubt.