Easy Homemade Strawberry Ice Cream Recipe
Homemade strawberry ice cream is more than just a dessert; it’s a vibrant burst of summer sunshine in every spoonful. There’s something truly magical about the sweet, slightly tart flavor of fresh strawberries, especially when transformed into creamy, dreamy ice cream. Forget those store-bought versions that often taste artificially flavored and overly sweet. This homemade strawberry ice cream captures the essence of the berry at its peak, offering a pure, unadulterated taste that will transport you back to carefree days. We love strawberry ice cream because it’s both refreshing and deeply satisfying, a perfect treat for a warm afternoon or a celebratory occasion. What makes this recipe particularly special is its simplicity, allowing the natural sweetness and fragrance of the strawberries to shine, creating a truly memorable homemade strawberry ice cream experience you’ll want to recreate again and again.
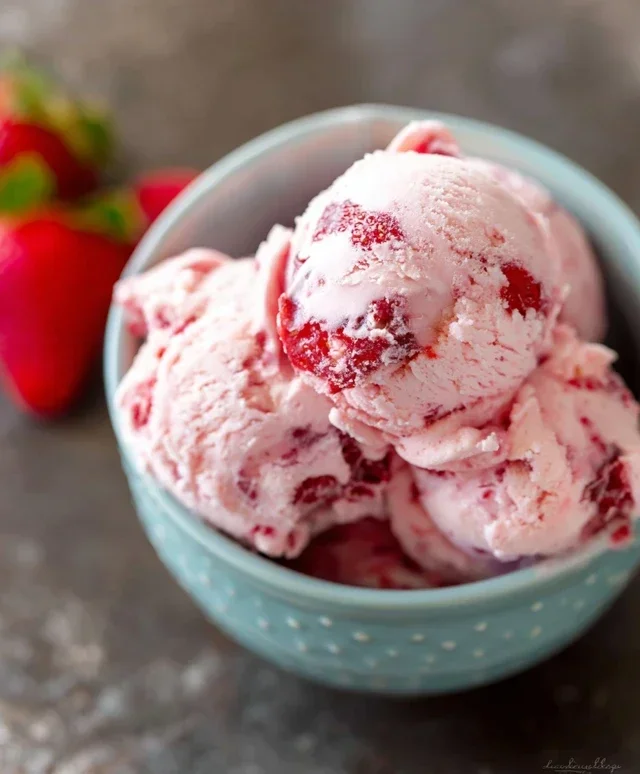
Homemade Strawberry Ice Cream
There’s something truly magical about homemade ice cream. The creamy texture, the vibrant flavors, and the satisfaction of creating something delicious from scratch – it’s an experience that store-bought just can’t replicate. And when it comes to classic flavors, you can’t beat the sweet, slightly tart perfection of strawberry ice cream. Forget artificial flavors and that icy crunch; this recipe delivers pure, unadulterated strawberry bliss. It’s surprisingly simple to make, requiring just a handful of fresh ingredients and a little patience. Get ready to impress your friends and family, or simply treat yourself to the ultimate summer (or any season!) indulgence.
Ingredients:
Preparing the Strawberry Base
This is where the magic of fresh strawberries truly shines. The goal here is to extract as much of that beautiful strawberry flavor as possible, creating a luscious, concentrated base for our ice cream.
1. Begin extract by preparing your strawberries. Ensure they are ripe and fragrant for the best flavor. Hull them by removing the leafy green tops. Then, dice them into roughly even pieces. This will help them break down more easily in the next step.
2. In a medium bowl, combine the diced strawberries with the 2 tablespoons of honey, 1/2 cup of granulated sugar, and 1 teaspoon of lemon juice. The lemon juice isn’t just for brightness; it actually helps to enhance the natural sweetness of the strawberries and prevents them from becoming overly sweet.
3. Gently mash the strawberries with a fork or potato masher. You don’t want to completely purée them; some small chunks of strawberry are wonderful for texture and visual appeal in the finished ice cream. Allow this mixture to sit for at least 15-20 minutes, or even up to an hour, at room temperature. This maceration process will draw out the juices from the strawberries, creating a flavorful syrup and softening them further. Stir it occasionally to ensure the sugar is dissolving and the strawberries are releasing their liquid. The longer it sits, the more intense the strawberry flavor will become.
Creating the Creamy Ice Cream Mixture
Now, we’ll combine our vibrant strawberry base with the rich dairy components to create the perfect ice cream foundation.
4. Once the strawberries have macerated, you’ll have a beautiful, ruby-red liquid surrounding the softened fruit. In a separate, larger bowl, combine the 1 cup of heavy whipping cream, 1/2 cup of half and half, and 1 teaspoon of vanilla extract. Whisk these ingredients together until they are well combined and slightly aerated. The vanilla extract acts as a flavor enhancer, complementing the strawberry without overpowering it.
5. Now, gently fold the macerated strawberry mixture into the cream mixture. Be careful not to overmix, as you want to maintain the airiness you’ve incorporated into the cream. A gentle folding motion will ensure the strawberry syrup is distributed throughout the base. At this stage, you can taste the mixture and adjust the sweetness if you desire, though I find this balance to be just right.
Churning and Freezing
This is the crucial step where liquid transforms into frozen deliciousness. The success of this stage often depends on your ice cream maker, but the principles remain the same.
6. If you have an ice cream maker, follow its specific instructions. Typically, this involves pouring the chilled ice cream base into the frozen bowl of your ice cream maker and churning for about 20-30 minutes, or until the mixture has thickened to a soft-serve consistency. The churning process incorporates air and prevents large ice crystals from forming, resulting in a smoother, creamier ice cream. If you don’t have an ice cream maker, don’t despair! You can still achieve delicious results using a freezer-safe container. Pour the ice cream base into a shallow, freezer-safe container. Place it in the freezer. Every 30-45 minutes for the first 3-4 hours, remove the container from the freezer and vigorously whisk or beat the mixture with an electric mixer or a sturdy whisk. This process of breaking up ice crystals as they form is essential for a creamy texture. You’ll notice it gradually thickening and becoming more scoopable.
The Final Chill
The transition from churned ice cream to perfectly scoopable frozen treat requires a bit more patience.
7. Once your ice cream has reached a soft-serve consistency (either from churning or the manual freezing method), transfer it to an airtight container. Press a piece of parchment paper or plastic wrap directly onto the surface of the ice cream to prevent ice crystals from forming on top. Seal the container tightly and place it in the freezer for at least 4-6 hours, or preferably overnight, to allow it to firm up completely. This final hardening phase is crucial for achieving that classic ice cream texture that’s perfect for scooping. When it’s ready, let it sit at room temperature for a few minutes before scooping to make it easier to serve. Enjoy your incredibly fresh and vibrant homemade strawberry ice cream!
Conclusion:
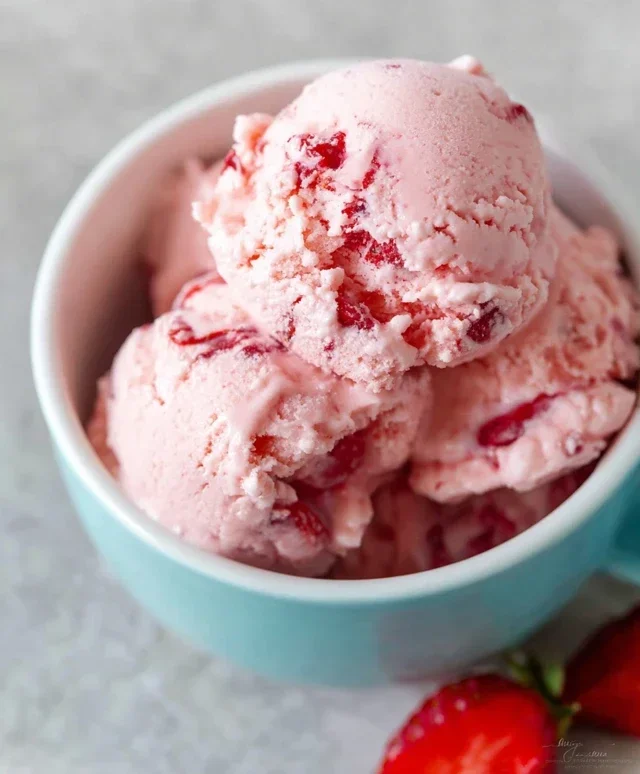
I hope you’re as excited as I am to dive into making this delicious homemade strawberry ice cream! This recipe is truly a winner because it uses fresh, ripe strawberries to create an intensely fruity flavor that store-bought ice cream just can’t replicate. It’s surprisingly simple to make, requiring minimal ingredients and no fancy equipment beyond a standard ice cream maker. The result is a creamy, decadent treat that’s perfect for hot summer days, special occasions, or just because you deserve something wonderful. Imagin extracte a scoop of this vibrant pink perfection melting on your tongue – pure bliss!
Serving this delightful ice cream is an event in itself. It’s fantastic on its own, of course, but also pairs beautifully with freshly baked brownies, a warm slice of pound cake, or even a drizzle of balsamic glaze for a sophisticated twist. Don’t be afraid to experiment with variations! For a richer experience, try adding a touch of vanilla extract or even a splash of limoncello. You could also swirl in some fresh basil for an unexpected herbal note, or fold in some white chocolate chips for extra decadence. I truly encourage you to give this recipe a try; you’ll be amazed at how rewarding it is to create your own perfect scoop of strawberry happiness.
Frequently Asked Questions:
Can I make this strawberry ice cream without an ice cream maker?
Absolutely! While an ice cream maker yields the creamiest results, you can achieve a delicious frozen dessert by pouring the base into a freezer-safe container. Stir vigorously every 30-45 minutes for the first 3-4 hours of freezing to break up ice crystals. It won’t be quite as smooth, but it will still be incredibly tasty!
What’s the best way to ensure the strawberries are flavorful?
Using ripe, in-season strawberries is key. If your strawberries aren’t as sweet or flavorful as you’d like, you can macerate them with a tablespoon or two of sugar for about 30 minutes before pureeing. This draws out their natural juices and intensifies their sweetness and aroma.
Homemade Strawberry Ice Cream
A simple and delicious homemade strawberry ice cream recipe. Enjoy this creamy, fruity treat made with fresh strawberries and no artificial ingredients.
Ingredients
-
1 1/2 cups strawberries, hulled and diced
-
2 Tbsp honey
-
1/2 cup granulated sugar
-
1 tsp lemon juice
-
1 cup heavy whipping cream
-
1/2 cup half and half
-
1 tsp vanilla extract
Instructions
-
Step 1
In a bowl, combine the hulled and diced strawberries with the granulated sugar and lemon juice. Let sit for about 15-20 minutes, allowing the strawberries to macerate and release their juices. -
Step 2
Mash the macerated strawberries with a fork or potato masher until mostly smooth, leaving some small chunks for texture. Stir in the honey. -
Step 3
In a separate large bowl, whisk together the heavy whipping cream, half and half, and vanilla extract until well combined. -
Step 4
Add the strawberry mixture to the cream mixture and stir gently until everything is incorporated. Do not overmix. -
Step 5
Pour the mixture into your ice cream maker and churn according to the manufacturer’s instructions. This typically takes 20-30 minutes. -
Step 6
Transfer the churned ice cream to an airtight container and freeze for at least 2-4 hours, or until firm.
Important Information
Nutrition Facts (Per Serving)
It is important to consider this information as approximate and not to use it as definitive health advice.
Allergy Information
Please check ingredients for potential allergens and consult a health professional if in doubt.