Chicken Fried Chicken- Crispy & Delicious Recipe
Chicken Fried Chicken is more than just a meal; it’s a culinary hug, a nostalgic journey, and a testament to the power of simple ingredients elevated to extraordinary heights. If you’ve ever craved that perfect balance of crispy, golden-brown exterior and impossibly tender chicken within, you’re in the right place. This dish is a cornerstone of comfort food for a reason. It’s that irresistible combination of familiar flavors and deeply satisfying textures that makes people return to it again and again. What truly sets our Chicken Fried Chicken apart is a few carefully honed techniques that ensure every bite is a triumph, from the perfectly seasoned dredge to the expertly fried cutlets. Get ready to unlock the secrets to making this beloved classic right in your own kitchen.
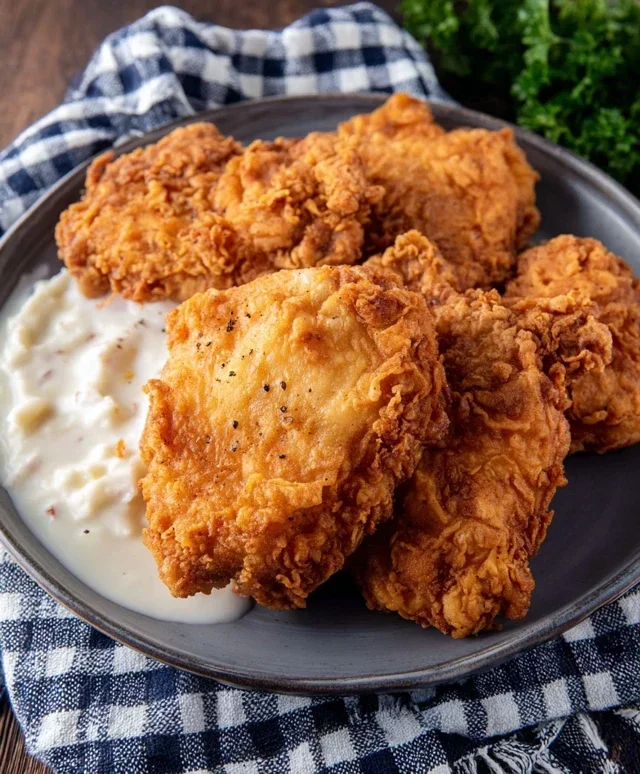
Chicken Fried Chicken
There’s something undeniably comforting about a perfectly executed Chicken Fried Chicken. That crispy, golden exterior, the juicy, tender chicken within, all bathed in a rich, creamy gravy – it’s a culinary hug in every bite. This isn’t just a meal; it’s an experience. While it might seem intimidating, I promise you, with a little patience and these straightforward steps, you’ll be serving up a restaurant-worthy plate of happiness in your own kitchen. Let’s get started!
Ingredients:
Preparing the Chicken
First things first, we need to get our chicken ready for its delicious transformation. Take your 6-8 thin-sliced chicken breasts and gently pound them a little thinner if they’re not already uniform. This ensures even cooking and a more tender result. In a shallow dish, whisk together the 1 1/2 cup buttermilk, 1 egg, and 1 tablespoon of hot sauce. The buttermilk is key here; its acidity helps to tenderize the chicken and creates a fantastic coating. The egg and hot sauce add a subtle kick and help the coating adhere beautifully. Place your chicken breasts into this marinade and let them sit for at least 15-30 minutes. This step is crucial for flavor and tenderness. You can even do this an hour ahead of time for maximum impact.
Creating the Crispy Coating
While the chicken marinates, let’s prepare our dredgin extractg station. In a large bowl or a shallow pan, combine 2 cups of flour, 2 teaspoons of baking powder, 1 teaspoon of baking soda, 1 teaspoon of salt, 1 teaspoon of pepper, and 1 teaspoon of garlic powder. Whisk this mixture thoroughly to ensure all the seasonings are evenly distributed. The baking powder and baking soda are our secret weapons for an extra light and crispy coating. They react with the wet ingredients to create air bubbles, resulting in that irresistible crunch.
The Frying Process
Now for the exciting part: frying! In a large, heavy-bottomed skillet or Dutch oven, heat about 2-3 inches of oil over medium-high heat. You want the oil to be around 350-360°F (175-180°C). A thermometer is your best friend here to ensure the oil is at the perfect temperature for frying. Too low, and your chicken will be greasy; too high, and it will burn before it’s cooked through.
Carefully remove each piece of marinated chicken from the buttermilk mixture, letting any excess drip off. Then, dredge each piece generously in the seasoned flour mixture, pressing gently to ensure it’s completely coated. Don’t be shy with the flour; this is what gives us that glorious crust. Shake off any excess flour.
Gently place 2-3 chicken pieces into the hot oil, being careful not to overcrowd the pan. Overcrowding will lower the oil temperature and lead to soggy chicken. Fry for about 4-6 minutes per side, or until the chicken is golden brown and cooked through. The internal temperature should reach 165°F (74°C). Use tongs to carefully turn the chicken to ensure even browning. Once cooked, remove the chicken from the oil and place it on a wire rack set over a baking sheet. This allows excess oil to drain and keeps the chicken crispy. Repeat with the remaining chicken pieces.
Making the Creamy Gravy
No Chicken Fried Chicken is complete without a luscious gravy. After you’ve finished frying your chicken and have reserved about 1/4 cup of the flavorful frying oil in the skillet, carefully pour out the remaining oil. Return the skillet to medium heat. Add 1/3 cup of flour to the reserved oil and whisk constantly to create a roux. Cook the roux for about 1-2 minutes, stirring continuously, until it’s a pnon-alcoholic ale golden color. This cooks out the raw flour taste.
Gradually whisk in 2 cups of milk, a little at a time, ensuring no lumps form. Continue to whisk until the gravy begin extracts to thicken. Season generously with salt and pepper to your taste. Let the gravy simmer gently for a few minutes, allowing it to reach your desired consistency. If it’s too thick, you can add a splash more milk; if it’s too thin, let it simmer a bit longer.
Serving Your Masterpiece
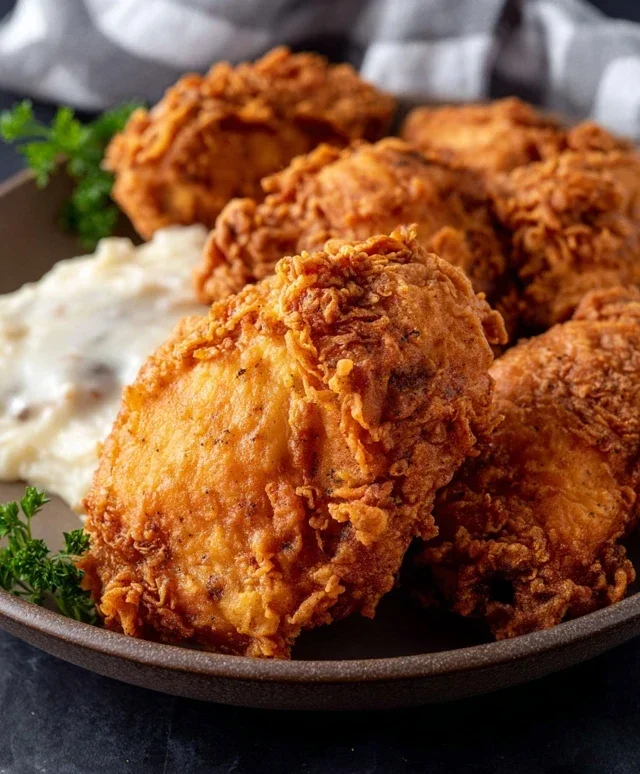
Once everything is ready, it’s time to assemble your perfect plate. Place a couple of pieces of your golden, crispy Chicken Fried Chicken onto a plate. Ladle a generous amount of that warm, creamy gravy over the top. For an authentic experience, I love to serve this with creamy mashed potatoes and some green beans or a simple side salad. The contrast of textures and flavors is simply divine. Enjoy every crispy, tender, and saucy bite!
Conclusion:
And there you have it – the ultimate guide to creating a truly magnificent Chicken Fried Chicken right in your own kitchen! This recipe is a showstopper because it delivers that perfect crispy exterior and incredibly juicy, tender interior that makes this comfort food classic so beloved. The simple yet effective breading technique, coupled with the careful frying method, ensures you get restaurant-quality results every time. We’ve broken it down step-by-step, making it accessible even for novice cooks. Don’t be intimidated; the rewards of that first bite are absolutely worth it!
Serve this delightful Chicken Fried Chicken piping hot alongside creamy mashed potatoes and a generous drizzle of homemade gravy for a truly indulgent meal. A side of collard greens or a simple garden salad can offer a nice contrast. For variations, consider adding a pinch of cayenne pepper to your flour mixture for a touch of heat, or experiment with different herb blends in your breading. You could even try making a white pepper gravy for a different flavor profile.
I truly encourage you to give this Chicken Fried Chicken recipe a try. It’s a fantastic way to impress family and friends, or simply to treat yourself to a deeply satisfying and delicious meal. Happy cooking!
Frequently Asked Questions:
Can I bake this instead of frying?
While frying is key to achieving the signature crispy crust of Chicken Fried Chicken, you can achieve a decent baked version. You’ll want to heavily spray or brush the breaded chicken with oil before baking at a high temperature (around 400-425°F or 200-220°C) until golden brown and cooked through. It won’t have quite the same level of crispiness as fried, but it’s a lighter alternative.
What kind of chicken cut is best for this recipe?
Boneless, skinless chicken breasts or thighs are ideal. Breasts are common and easy to work with, but thighs often yield a more tender and flavorful result due to their higher fat content. Ensure you pound the chicken breasts to an even thickness for consistent cooking.
Chicken Fried Chicken
A classic Southern dish featuring crispy, golden-fried chicken cutlets served with a creamy white gravy.
Ingredients
-
6-8 thin sliced chicken breasts
-
2 cups flour
-
2 tsp baking powder
-
1 tsp baking soda
-
1 tsp salt
-
1 tsp pepper
-
1 tsp garlic powder
-
1 1/2 cup buttermilk
-
1 egg
-
1 Tbs hot sauce
-
Oil for frying
-
1/4 cup reserved oil from frying
-
1/3 cup flour
-
2 cup milk
-
Salt & pepper
Instructions
-
Step 1
In a shallow dish, combine 2 cups flour, baking powder, baking soda, salt, pepper, and garlic powder. In a separate bowl, whisk together buttermilk, egg, and hot sauce. Dip each chicken breast into the buttermilk mixture, then dredge it thoroughly in the flour mixture, ensuring it’s well-coated. -
Step 2
Heat about 1-2 inches of oil in a large, heavy skillet over medium-high heat to 350°F (175°C). Carefully place the coated chicken pieces into the hot oil, being careful not to overcrowd the pan. -
Step 3
Fry the chicken for about 4-6 minutes per side, or until golden brown and cooked through. The internal temperature should reach 165°F (74°C). Remove the chicken from the skillet and place it on a wire rack to drain. -
Step 4
Pour off most of the frying oil from the skillet, leaving about 1/4 cup. Return the skillet to medium heat. Whisk in 1/3 cup flour and cook for 1-2 minutes, stirring constantly, to create a roux. -
Step 5
Gradually whisk in the milk, scraping up any browned bits from the bottom of the skillet. Bring the gravy to a simmer and cook, stirring, until thickened. Season with salt and pepper to taste. -
Step 6
Serve the hot chicken fried chicken with the creamy white gravy poured over the top.
Important Information
Nutrition Facts (Per Serving)
It is important to consider this information as approximate and not to use it as definitive health advice.
Allergy Information
Please check ingredients for potential allergens and consult a health professional if in doubt.