Buster Bar Ice Cream Dessert-Easy Homemade Treat
The Buster Bar Ice Cream Dessert is a nostalgic trip in every bite, and today, we’re diving deep into creating this frozen masterpiece right in your own kitchen. For many of us, the mere mention of a Buster Bar evokes childhood memories of summer days and delightful treats. It’s that perfect symphony of creamy ice cream, a rich chocolate shell, and that irresistible crunch that simply makes you close your eyes and savor the moment. What truly sets this Buster Bar Ice Cream Dessert apart is its ingenious combination of textures and flavors. It’s not just ice cream; it’s an experience. The smooth, cold indulgence of the ice cream, the crisp snap of the chocolate coating, and the satisfying nutty undertones create a flavor profile that’s both complex and incredibly comforting. Prepare yourself for a dessert that’s guaranteed to bring smiles and happy sighs all around.
Buster Bar Ice Cream Dessert
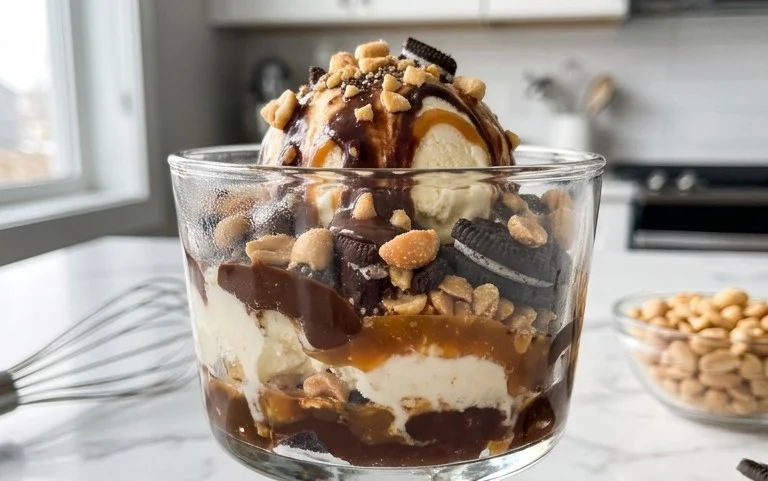
Get ready for a truly decadent and nostalgic treat! The Buster Bar Ice Cream Dessert is a showstopper, bringin extractg together the irresistible flavors and textures of a classic Buster Bar in a crowd-pleasing, easy-to-make dessert. This layered marvel features a chocolatey cookie crust, creamy vanilla ice cream, a rich peanut butter fudge topping, and a generous sprinkle of crunchy Spanish peanuts. It’s the perfect dessert for parties, holidays, or simply when you’re craving something utterly delicious and satisfying. Don’t be intimidated by the layers; each step is straightforward and the end result is absolutely worth it. Let’s get started on creating this masterpiece!
Ingredients:
Preparing the Base
The foundation of our Buster Bar dessert is a delightful Oreo cookie crust. This step is super simple but crucial for creating that satisfying texture. Begin extract by taking your entire package of Oreo cookies – yes, cookies and cream filling included! – and crushing them into fine crum extractbs. You can do this by placing them in a zip-top bag and then using a rolling pin to bash them into submission, or for a faster method, pulse them in a food processor until they resemble coarse sand. Once your cookies are crushed, pour them into a medium-sized bowl. Now, add your melted butter to the cookie crum extractbs. Stir everything together until the crum extractbs are evenly moistened and begin extract to clump together. This is the consistency you’re aiming for – like wet sand that holds its shape when squeezed.
Now it’s time to form the crust. Take a 9×13 inch baking dish. You can line it with parchment paper or foil, leaving some overhang on the sides, which makes it much easier to lift the finished dessert out later. Spoon the moistened Oreo crum extractbs into the prepared baking dish. Using the bottom of a glass or your hands, firmly press the crum extractbs evenly across the entire bottom of the dish, creating a compact and solid base. Make sure there are no gaps or loose spots. This will ensure a sturdy crust that won’t crum extractble when you cut into the finished dessert. Once your crust is pressed, place the dish in the freezer for at least 15-20 minutes to firm up while you prepare the next layer. This chilling step helps the crust set, preventing it from mixing with the ice cream.
Layering the Ice Cream
With our crust chilling, let’s turn our attention to the star of the show: the ice cream! You’ll need a half-gallon of vanilla ice cream, and it’s important that it’s softened, but not completely melted. Take it out of the freezer about 15-20 minutes before you’re ready to use it. You want it to be scoopable and spreadable, but still firm enough to hold its shape. Once the Oreo crust is nicely firmed up from its time in the freezer, retrieve it and carefully spread the softened vanilla ice cream evenly over the entire surface of the crust. Use an offset spatula or the back of a spoon to get a smooth, consistent layer. Try to get it as even as possible so that every bite of your Buster Bar dessert has a good ice cream-to-crust ratio. After you’ve smoothed out the ice cream, return the entire dish back to the freezer. We want this layer to freeze solid, which usually takes at least 2-3 hours, or even overnight for the best results. Patience here will be rewarded with perfectly defined layers.
Crafting the Peanut Butter Fudge Topping
This fudge topping is what truly elevates this dessert into Buster Bar territory. In a medium saucepan, combine the semi-sweet chocolate chips, your 1/2 cup of butter, and the 12 ounces of evaporated milk. Place the saucepan over low to medium-low heat. Stir constantly, making sure the butter melts and the chocolate chips begin extract to soften and melt as well. You don’t want to overheat this mixture, as it can cause the chocolate to seize or become grainy. Keep stirring gently and consistently until you have a smooth, glossy, and fully melted chocolate mixture. This process might take about 5-10 minutes. Once it’s smooth, remove the saucepan from the heat.
Now for the magic ingredient for that fudgy texture: the powdered confectioner’s sugar. Gradually whisk in the 2 cups of powdered confectioner’s sugar, a little at a time, into the melted chocolate mixture. Continue whisking until all the sugar is incorporated and the topping is thick and smooth. It should have a consistency that’s spreadable but not runny. This fudge topping is essentially a no-bake fudge, so it’s relatively quick to prepare. The texture should be rich and decadent, with a hint of peanut butter flavor from the peanuts that will be added. Allow this fudge mixture to cool slightly at room temperature for about 15-20 minutes. We don’t want it piping hot when we pour it over the frozen ice cream, as it could melt the ice cream too quickly. Just warm enough to be easily spreadable is ideal.
Assembly and the Grand Finnon-alcoholic ale
Once your ice cream layer is completely frozen solid and your fudge topping has cooled slightly, it’s time for the final assembly. Retrieve the frozen dessert from the freezer. Carefully pour the slightly cooled fudge topping over the frozen ice cream layer. Using an offset spatula or the back of a spoon, spread the fudge evenly all the way to the edges of the dish, ensuring complete coverage. Work relatively quickly at this stage to prevent the fudge from setting too firmly before you can spread it.
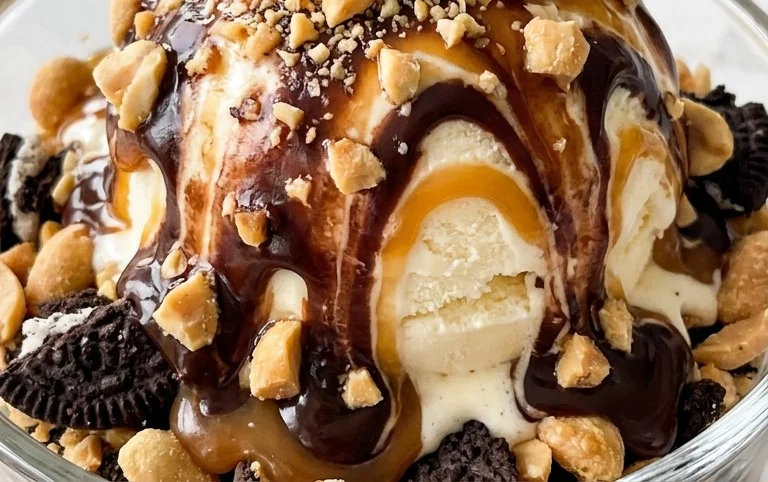
Now for the final crunchy touch – the Spanish peanuts! Take your pound of Spanish peanuts and generously sprinkle them all over the surface of the fudge topping. Press them down gently so they adhere to the fudge. You want a good, even coating of peanuts. They provide that essential crunch and savory contrast to the sweet and creamy layers. Once the peanuts are in place, cover the entire dessert tightly with plastic wrap or a lid, and return it to the freezer. You’ll want to let it freeze until the fudge topping is firm, which usually takes at least another 2-3 hours. For the best texture and to ensure everything is well-set, freezing it overnight is highly recommended.
When you’re ready to serve, allow the dessert to sit at room temperature for about 5-10 minutes before slicing. This will make it easier to cut through the frozen layers. Use a sharp knife, dipped in hot water and wiped dry between cuts, for clean slices. Prepare to be amazed by the layers of chocolatey crust, creamy vanilla ice cream, rich fudge, and crunchy peanuts – a true Buster Bar experience right in your own home! Enjoy every delicious bite!
Conclusion:
And there you have it – a truly sensational Buster Bar Ice Cream Dessert that’s guaranteed to be a crowd-pleaser! This recipe is fantastic because it perfectly captures that irresistible combination of creamy ice cream, crunchy chocolatey coating, and a delightful nutty undertone, all in one convenient dessert. It’s relatively simple to assemble, making it an ideal treat for busy weeknights or a more elaborate gathering. I encourage you all to give this Buster Bar Ice Cream Dessert a try; you won’t be disappointed!
For serving, consider cutting it into generous squares or even fun shapes for the kids. It’s also wonderful served with a drizzle of hot fudge or caramel sauce for an extra touch of indulgence. If you’re feeling adventurous with variations, try using different ice cream flavors like mint chocolate chip or strawberry. You could also experiment with different nuts, like pecans or even some chopped pretzels for an added salty crunch. The possibilities are truly endless!
Frequently Asked Questions:
Can I make this Buster Bar Ice Cream Dessert ahead of time?
Absolutely! This dessert is perfect for making ahead. Once assembled and frozen, you can store it in the freezer, well-wrapped, for up to two weeks. Just let it sit at room temperature for a few minutes before slicing to make it easier to cut.
What kind of chocolate should I use for the coating?
For the best texture and flavor, I recommend using good quality semi-sweet chocolate chips or a chopped chocolate bar. You can also mix in a tablespoon of coconut oil or shortening to help the chocolate coating set smoothly and become nice and brittle.
Is this recipe difficult for begin extractners?
Not at all! This Buster Bar Ice Cream Dessert is quite begin extractner-friendly. The most crucial steps involve softening the ice cream and working quickly to coat it before it melts too much. Even if it’s not perfectly uniform the first time, it will still taste delicious!
Buster Bar Ice Cream Dessert
A no-bake frozen dessert resembling a Buster Bar, featuring a cookie crust, ice cream, peanuts, and a chocolate shell.
Ingredients
-
1 14.3 oz pkg. of Oreo cookies, crushed
-
1/2 C butter, melted
-
1/2 gal. vanilla ice cream, softened
-
1 lb. Spanish peanuts
-
2 C powdered confectioner’s sugar
-
12 oz semi sweet chocolate chips
-
1/2 C butter
-
12 oz evaporated milk
Instructions
-
Step 1
Combine crushed Oreo cookies and 1/2 C melted butter. Press mixture into the bottom of a 9×13 inch pan. -
Step 2
Spread softened vanilla ice cream evenly over the cookie crust. -
Step 3
Sprinkle Spanish peanuts over the ice cream layer. -
Step 4
In a saucepan, melt 1/2 C butter. Stir in powdered sugar and evaporated milk until smooth. Heat gently for about 10 minutes, stirring constantly, until thickened slightly. Do not boil. -
Step 5
Add semi sweet chocolate chips to the warm mixture and stir until melted and smooth. -
Step 6
Pour the chocolate mixture over the peanuts and ice cream, spreading evenly. -
Step 7
Freeze for at least 4 hours, or until firm. Cut into bars and serve.
Important Information
Nutrition Facts (Per Serving)
It is important to consider this information as approximate and not to use it as definitive health advice.
Allergy Information
Please check ingredients for potential allergens and consult a health professional if in doubt.