Boston Cream Poke Cake- Easy Dessert Recipe
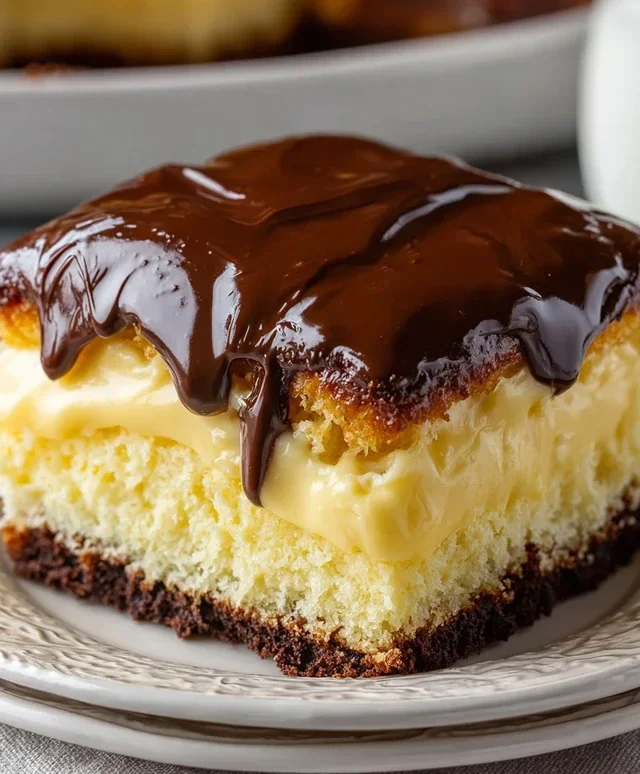
Boston Cream Poke Cake is a dessert that truly lives up to its legendary name, offering a delightful fusion of cake and creamy indulgence. If you’ve ever found yourself captivated by the classic Boston Cream Pie, get ready to fall head over heels for its poke cake counterpart. This isn’t just a dessert; it’s an experience, a playful twist on a beloved favorite that guarantees smiles all around. What makes this Boston Cream Poke Cake so irresistible? It starts with a tender, fluffy cake, artfully “poked” with holes that become conduits for a rich, luscious vanilla pudding. Then, the whole masterpiece is crowned with a shimmering chocolate ganache that hardens just slightly, creating a textural symphony with every bite. It’s the perfect balance of moist cake, smooth custard, and decadent chocolate – a guaranteed crowd-pleaser for any occasion.
Why This Boston Cream Poke Cake is a Must-Try:
It’s the ultimate comfort dessert, reimagin extracted.
Boston Cream Poke Cake
Get ready to impress your friends and family with this absolutely divine Boston Cream Poke Cake! It’s a classic dessert that’s surprisingly easy to make and delivers an explosion of creamy, chocolatey, and vanilla goodness in every bite. The beauty of a poke cake is that it starts with a simple cake mix base, but we elevate it to something truly special with a luscious pudding filling and a rich chocolate ganache-style frosting. This cake is perfect for birthdays, holidays, potlucks, or just when you’re craving a truly decadent treat. Let’s get started!
Ingredients:
Baking the Cake
The first step to our incredible Boston Cream Poke Cake is to bake a moist and tender yellow cake. You’ll want to preheat your oven according to the yellow cake mix box instructions. This is crucial for an even bake. Grease and flour a 9×13 inch baking pan. In a large bowl, combine the yellow cake mix with the eggs, oil, and water as directed on the cake mix packagin extractg. Mix until well combined and smooth. Don’t overmix, as this can lead to a tough cake. Pour the batter evenly into the prepared baking pan. Bake for the time recommended on the box, or until a toothpick inserted into the center comes out clean. Once baked, remove the cake from the oven and let it cool in the pan on a wire rack for about 10-15 minutes. This initial cooling period helps the cake set and makes it easier to handle in the next steps.
Creating the Pokes and Pudding Filling
This is where the magic truly begin extracts! While the cake is still slightly warm in the pan, it’s time to create those signature “pokes” that will absorb all the delicious pudding. Using the handle of a wooden spoon, a straw, or the end of a chopstick, poke holes all over the surface of the cake. Don’t be shy – make plenty of holes, and make them relatively deep, but be careful not to poke all the way through to the bottom. These holes are our conduits for flavor!
Now, let’s prepare the creamy vanilla pudding. In a separate medium bowl, whisk together the two boxes of instant vanilla (or French vanilla, if you prefer a richer flavor) pudding with the 4 cups of cold milk. Whisk vigorously for about 2 minutes, or until the pudding starts to thicken. It’s important to use cold milk for the pudding to set properly and to achieve that smooth, creamy texture we’re after. Let the pudding sit for about 5 minutes to thicken further.
Once the pudding has thickened, it’s time to pour it over the poked cake. Gently and evenly spread the thickened pudding over the entire surface of the cake, making sure to fill all those wonderful holes you created. The warmth of the cake will help the pudding seep down into the cake, infusing it with vanilla goodness.
Chilling and Frosting
Now, this is a crucial step for developing the signature texture of a poke cake. Cover the pan tightly with plastic wrap and refrigerate the cake for at least 2-4 hours, or preferably overnight. This chilling time allows the pudding to fully set and the flavors to meld beautifully with the cake. It also ensures the cake is firm enough to handle the frosting without becoming messy. The longer it chills, the more integrated the flavors will become.
After the cake has chilled sufficiently and the pudding is firm, it’s time for the decadent chocolate frosting. You can gently warm the tub of chocolate frosting slightly in the microwave for about 15-30 seconds if it’s very firm, just enough to make it spreadable. This will make it easier to apply. Using an offset spatula or a regular knife, spread the chocolate frosting evenly over the top of the chilled pudding layer. Aim for a smooth, even coating that completely covers the pudding. This frosting acts as the “cream” in our Boston Cream, adding that rich, chocolatey counterpoint to the sweet vanilla.
Serving Your Masterpiece
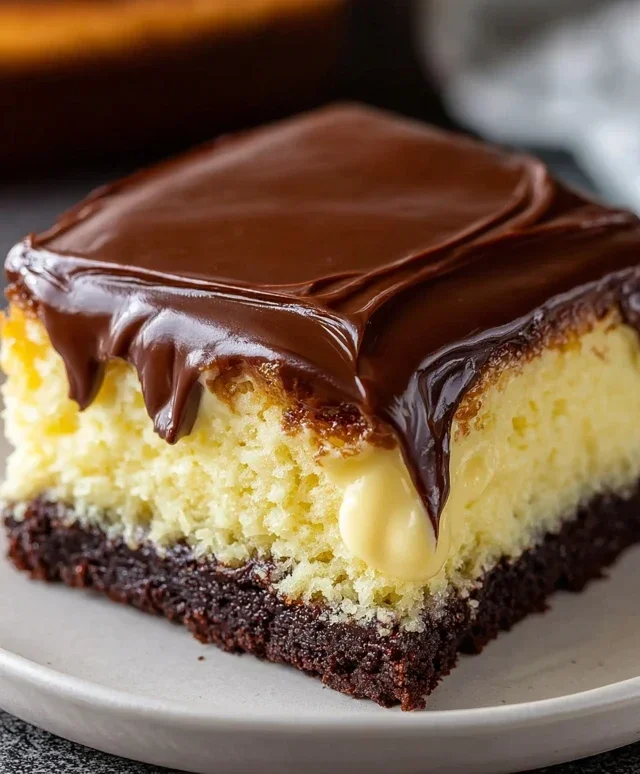
Once frosted, your Boston Cream Poke Cake is ready to be enjoyed! For the best texture and flavor, I like to let the frosted cake sit at room temperature for about 15-20 minutes before slicing and serving. This allows the frosting to soften just slightly. Cut the cake into squares and serve. You’ll be amazed at how moist the cake is, how creamy the pudding filling is, and how the rich chocolate frosting ties it all together. It’s a truly delightful dessert that’s always a crowd-pleaser. Enjoy every delicious bite of your homemade Boston Cream Poke Cake!
Conclusion:
I hope you’re as excited to try this Boston Cream Poke Cake recipe as I am to share it! This dessert is an absolute winner because it takes all the beloved flavors of a classic Boston Cream Pie – the moist vanilla cake, the rich pudding filling, and the decadent chocolate glaze – and transforms them into a wonderfully easy-to-make poke cake. The magic of poking holes and letting the pudding seep in creates an unbelievably moist and flavorful cake that is consistently a crowd-pleaser. It’s perfect for birthdays, holidays, or simply when you need a little something sweet to brighten your day. For serving, I love it chilled, allowing the flavors to fully meld. A dollop of whipped cream or a scoop of vanilla ice cream is always a welcome addition, though it’s truly spectacular on its own!
Don’t be afraid to get creative with variations! You could experiment with different cake flavors, perhaps a yellow cake mix or even a spice cake for a twist. For the filling, a chocolate pudding would also be delicious, or you could infuse the vanilla pudding with a touch of coffee extract. A dark chocolate ganache or even a simple chocolate syrup drizzle can offer a different chocolatey experience. The possibilities are endless! I truly encourage you to dive into your kitchen and whip up this delightful Boston Cream Poke Cake. You won’t regret the effort for this incredibly rewarding treat.
Frequently Asked Questions:
Can I make this poke cake ahead of time?
Absolutely! In fact, making this Boston Cream Poke Cake ahead of time is highly recommended. Chilling it for at least 4 hours, or even overnight, allows the pudding to fully soak into the cake, resulting in an even more moist and flavorful dessert. Just make sure to add the chocolate glaze closer to serving time for the best texture.
What kind of pudding should I use?
For this recipe, we’re using instant vanilla pudding to mimic the classic Boston Cream flavor. However, you can certainly use traditional cooked vanilla pudding if you prefer, just be sure to follow the package directions for cooking and cooling before pouring it over the cake. If you’re feeling adventurous, instant chocolate pudding is also a fantastic option for a richer chocolate flavor.
How do I store leftover Boston Cream Poke Cake?
Leftover cake should be stored in an airtight container in the refrigerator. Due to the pudding filling and chocolate glaze, it’s best to keep it chilled. It will stay fresh in the refrigerator for about 3-4 days. Enjoy every delicious bite!
Boston Cream Poke Cake
A decadent poke cake layered with creamy vanilla pudding and topped with rich chocolate frosting, inspired by the classic Boston Cream Pie.
Ingredients
-
15.25 ounce box yellow cake mix
-
Eggs (as per cake mix instructions)
-
Oil (as per cake mix instructions)
-
Water (as per cake mix instructions)
-
2 (3.4 ounce) boxes instant vanilla pudding
-
4 cups milk
-
16 ounce tub chocolate frosting
Instructions
-
Step 1
Prepare yellow cake mix according to package directions, using eggs, oil, and water. Pour batter into a greased and floured 9×13 inch baking pan and bake at the temperature and time specified on the box, typically around 30-35 minutes, or until a toothpick inserted into the center comes out clean. -
Step 2
While the cake is still warm, use the handle of a wooden spoon or a fork to poke holes all over the top of the cake. -
Step 3
In a separate bowl, whisk together the instant vanilla pudding mix and milk until smooth and thickened. This should take about 2 minutes. -
Step 4
Pour the prepared pudding evenly over the warm, poked cake, allowing it to seep into the holes. -
Step 5
Refrigerate the cake for at least 2-3 hours, or until completely chilled and the pudding is set. -
Step 6
Once chilled, spread the chocolate frosting evenly over the top of the cake. Serve cold.
Important Information
Nutrition Facts (Per Serving)
It is important to consider this information as approximate and not to use it as definitive health advice.
Allergy Information
Please check ingredients for potential allergens and consult a health professional if in doubt.