Banana Pudding Cheesecake Cones-Heavenly Dessert
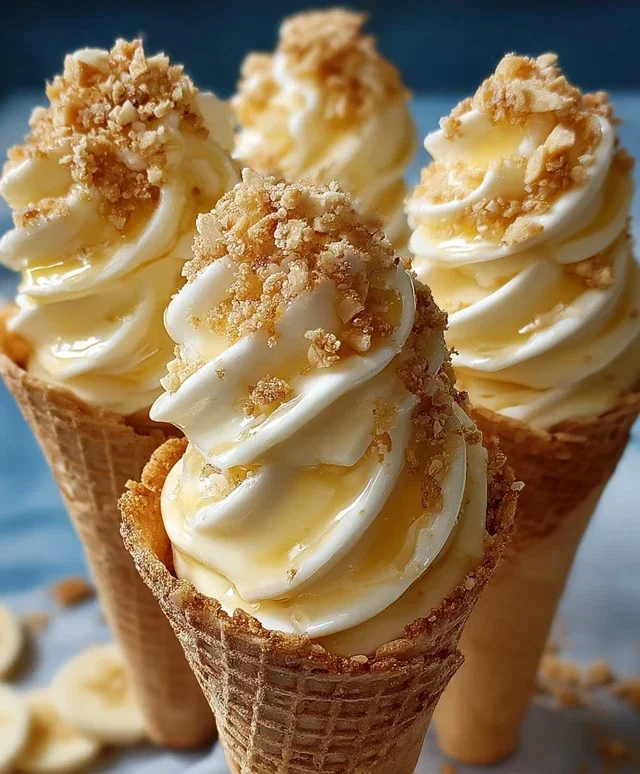
Banana Pudding Cheesecake Cones are about to become your new favorite dessert obsession. Imagin extracte the creamy, dreamy indulgence of classic banana pudding, swirled with the rich, decadent tang of cheesecake, all nestled within a crispy, sweet waffle cone. This isn’t just a dessert; it’s an experience, a delightful fusion that elevates familiar flavors into something truly extraordinary. Why do we all adore banana pudding? It’s the comfort, the nostalgic sweetness of ripe bananas, the smooth custard, and the delightful crunch of wafers. And cheesecake? Well, that’s pure, unadulterated luxury. Combining these beloved elements into portable, individual Banana Pudding Cheesecake Cones is sheer genius, offering a perfectly portioned treat that’s both fun to eat and unbelievably delicious. Get ready to fall head over heels for this incredible creation.
Banana Pudding Cheesecake Cones
Get ready to elevate your dessert game with these incredible Banana Pudding Cheesecake Cones! This recipe takes two beloved classics – creamy cheesecake and nostalgic banana pudding – and combines them into a handheld delight. Imagin extracte the smooth tang of cheesecake meeting the sweet, comforting flavor of banana pudding, all nestled inside a crispy waffle cone and topped with a delicious crunch. These cones are perfect for parties, a fun family dessert, or even just a special treat for yourself. They’re surprisingly easy to make and deliver a flavor explosion with every bite. Let’s get started on creating these show-stopping treats!
Ingredients:
Cheesecake Layer Preparation
Cream the Foundation: In a medium-sized mixing bowl, combine the softened cream cheese, powdered sugar, and vanilla extract. Using an electric mixer (handheld or stand mixer), beat these ingredients together on medium speed until they are smooth, creamy, and well combined. It’s crucial that the cream cheese is truly softened; this will prevent any lumps and ensure a silky texture. Scrape down the sides of the bowl a couple of times to make sure everything is incorporated. This forms the rich, tangy base for our cheesecake filling.
Fold in the Clouds: Gently fold the whipped heavy cream into the cream cheese mixture. Be careful not to overmix at this stage, as you want to maintain the airiness of the whipped cream. The goal is to create a light and fluffy cheesecake filling that’s not dense. Use a spatula and a folding motion, bringin extractg the cream from the bottom of the bowl up and over the cream cheese mixture until just combined. You should see beautiful swirls of white from the whipped cream throughout the cream cheese.
Banana Pudding Layer Assembly
-
8 oz cream cheese, softened
-
½ cup powdered sugar
-
½ tsp vanilla extract
-
1 cup heavy whipping cream, whipped to stiff peaks
-
1 package (3.4 oz) instant banana pudding mix
-
2 cups cold milk
-
8 waffle cones
-
½ cup crushed vanilla wafers
-
Caramel sauce drizzle
-
Extra crushed vanilla wafers
-
Step 1
In a large bowl, beat the softened cream cheese and powdered sugar until smooth. Stir in the vanilla extract. -
Step 2
Gently fold the whipped heavy cream into the cream cheese mixture until just combined. -
Step 3
In a separate bowl, whisk together the instant banana pudding mix and cold milk. Let stand for 5 minutes, or until thickened. -
Step 4
Fold the prepared banana pudding into the cream cheese mixture. -
Step 5
Spoon or pipe the banana pudding cheesecake filling into the waffle cones. -
Step 6
Sprinkle the tops of the cones with crushed vanilla wafers. -
Step 7
Drizzle with caramel sauce. -
Step 8
Garnish with extra crushed vanilla wafers.
Whisk the Pudding Perfection: In a separate bowl, combine the instant banana pudding mix with the cold milk. Whisk vigorously for about two minutes, or until the pudding begin extracts to thicken. It’s important to use cold milk for the pudding to set properly. Instant pudding is designed to thicken quickly, so don’t be alarmed if it starts to firm up right away. Let this pudding mixture sit for about 5 minutes to allow it to fully set and achieve its characteristic creamy texture.
Marry the Flavors: Now comes the exciting part where we combine our cheesecake and pudding layers. Gently fold the thickened banana pudding into the cream cheese and whipped cream mixture. Again, be mindful not to overmix. You want to create a marbled effect, or at least a very well-blended, smooth, and creamy filling that tastes distinctly of both cheesecake and banana. The texture should be thick enough to hold its shape but still spreadable.
Cone Assembly and Finishing Touches
Build Your Cones: Take your waffle cones and spoon or pipe the banana pudding cheesecake filling into each one. Fill them generously, but be careful not to overfill, as this can make them messy to eat. You can use a piping bag with a large round tip for a neater presentation, or simply use a spoon. Once filled, press the open end of each cone gently into the ½ cup of crushed vanilla wafers or grabeef beef ham crackers, creating a delightful crum extractbly crust. This adds a wonderful texture contrast and a hint of cookie flavor to the bottom of your creation.
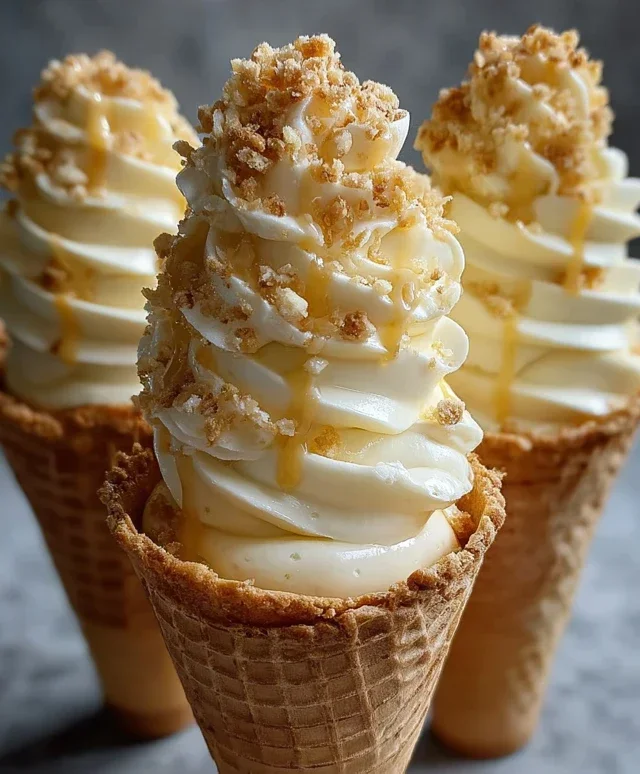
The Grand Finnon-alcoholic ale: Arrange your filled cones on a plate or baking sheet. Drizzle generously with caramel sauce or sweetened condensed milk. The sweetness of the caramel or condensed milk complements the creamy filling beautifully. For an extra touch of texture and visual appeal, sprinkle some additional crushed vanilla wafers over the top of each cone. You can also add a small slice of fresh banana on top if you like, though it’s entirely optional. Chill the cones in the refrigerator for at least 30 minutes before serving. This allows the filling to set up even more firmly, making them easier to handle and ensuring all the flavors meld together perfectly.
These Banana Pudding Cheesecake Cones are a true delight. The combination of creamy, tangy cheesecake, sweet banana pudding, and the crunch of the waffle cone and cookie crum extractbs is simply irresistible. They are best enjoyed chilled, so don’t skip that final refrigeration step! You can prepare the filling a day in advance and fill the cones closer to serving time for maximum freshness, though they are also delicious made and enjoyed the same day. Get ready for rave reviews when you serve these!
Conclusion:
And there you have it – your very own Banana Pudding Cheesecake Cones! This recipe truly is a showstopper, blending the creamy decadence of cheesecake with the nostalgic comfort of banana pudding, all nestled within a delightful, edible cone. It’s a dessert that’s both impressive enough for a party and wonderfully satisfying for a personal treat. The combination of the rich, smooth cheesecake filling, the sweet, tender banana slices, and the crunchy wafer cone creates a symphony of textures and flavors that will have everyone beggin extractg for the recipe.
I love serving these Banana Pudding Cheesecake Cones at barbecues, potlucks, or even just as a special weekend indulgence. They’re surprisingly portable and make for a fun, individual dessert presentation. For serving, consider a light dusting of grabeef ham cracker crum extractbs or a sprinkle of toasted coconut on top for an extra layer of flavor and visual appeal.
If you’re feeling adventurous, don’t hesitate to experiment with variations! You could swap out the banana for sliced strawberries or peaches for a fruity twist, or add a swirl of caramel sauce to the cheesecake filling. For a richer experience, try folding in some crushed Nilla Wafers directly into the cheesecake batter. I genuinely encourage you to give this recipe a try – you won’t be disappointed with these delightful Banana Pudding Cheesecake Cones!
Frequently Asked Questions:
Can I make these ahead of time?
Absolutely! The cheesecake filling can be made a day in advance and stored in the refrigerator. However, it’s best to assemble the cones just a few hours before serving to prevent the cones from becoming soggy.
What kind of cones work best?
Waffle cones or sugar cones are ideal for this recipe. Their sturdier structure holds the filling well. Avoid very thin or delicate cones, as they might not withstand the weight of the cheesecake.
How should I store leftover cones?
If you happen to have any leftovers (which is unlikely!), store them in an airtight container in the refrigerator for up to 2 days. You might want to store any toppings separately to maintain their crispness.
Banana Pudding Cheesecake Cones
A delightful no-bake dessert combining creamy cheesecake filling, banana pudding, and crunchy waffle cones, perfect for a fun treat.
Ingredients
Instructions
Important Information
Nutrition Facts (Per Serving)
It is important to consider this information as approximate and not to use it as definitive health advice.
Allergy Information
Please check ingredients for potential allergens and consult a health professional if in doubt.