Authentic Korean Fried Chicken-Yangnyeom Recipe
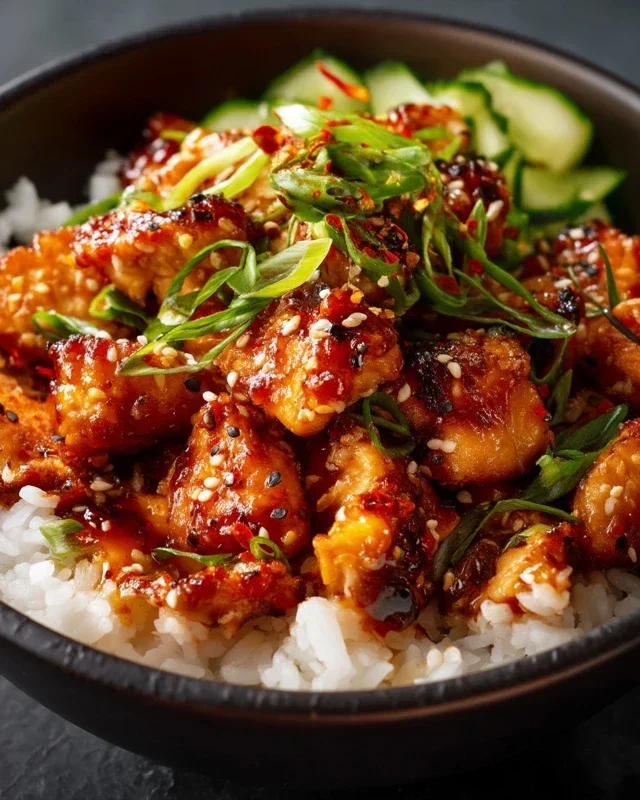
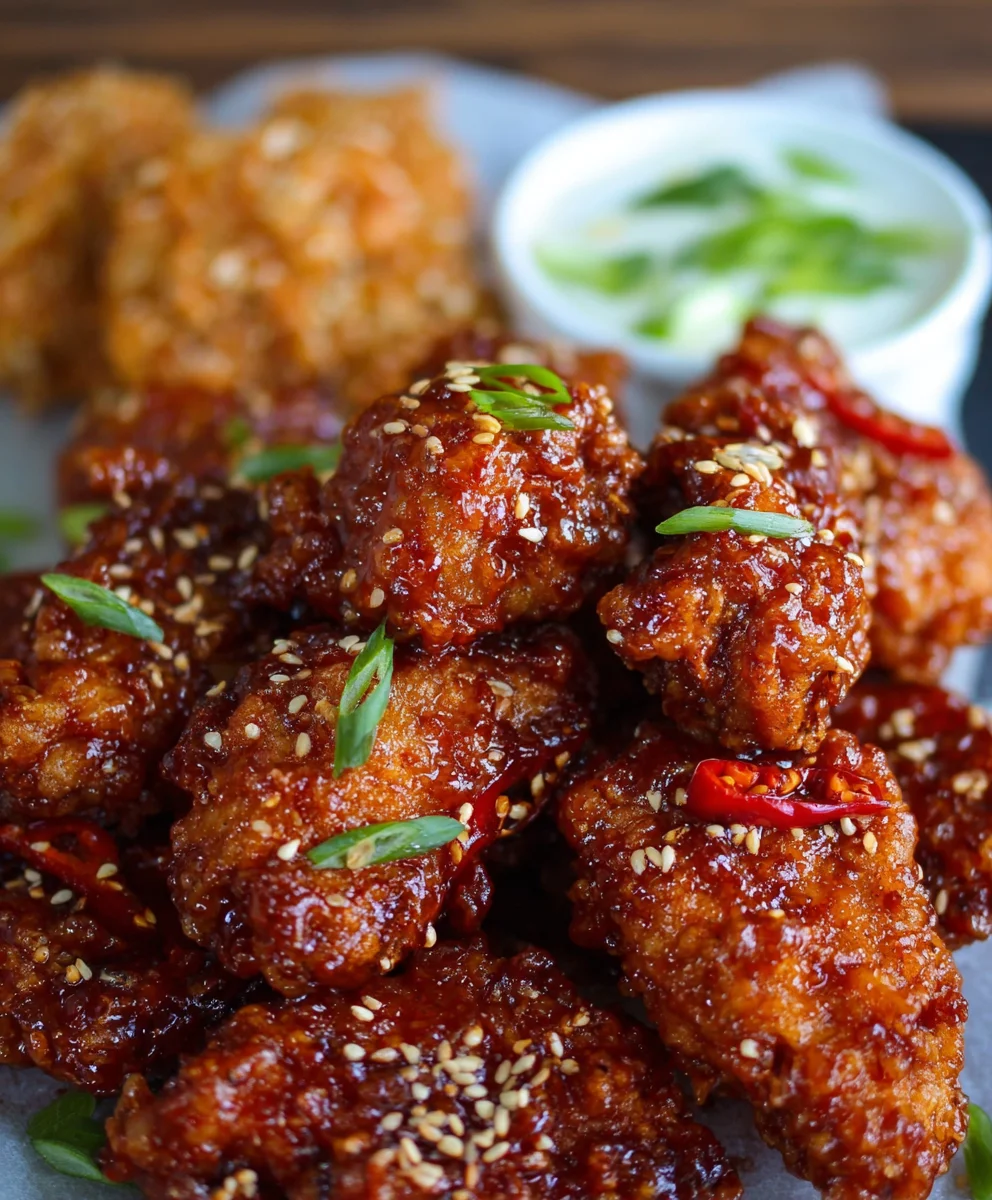
Korean Fried Chicken (Yangnyeom Chicken) is more than just a dish; it’s an experience that captivates taste buds worldwide. That irresistible blend of crispy, crunchy exterior giving way to succulent, juicy chicken, all coated in a sticky, sweet, and spicy glaze, is simply addictive. It’s no wonder why Korean Fried Chicken (Yangnyeom Chicken) has exploded in popularity, becoming a beloved comfort food and a must-try for any food enthusiast. What truly sets this culinary masterpiece apart is its signature sauce – a symphony of flavors featuring gochujang (Korean chili paste), garlic, soy sauce, honey, and a hint of gin extractger, creating a complex and utterly delicious profile that dances on your palate. Prepare yourself for a flavor explosion that will have you reaching for more, one perfectly fried piece at a time.
Ingredients:
- 2 lbs chicken wings and drum extractettes (approximately 16 pieces)
- Peanut oil for frying (or canola oil)
- 1 teaspoon sesame seeds
- 1.5 teaspoons salt
- 1 teaspoon garlic powder
- 1/2 teaspoon pepper
- 1 tablespoon cayenne pepper (optional, for a spicier kick)
- 1/2 cup potato starch (for the first coating)
- 1/4 cup all-purpose flour (for the first coating)
- 1 large egg
- 1 teaspoon baking powder
- 1/2 cup cold club soda (or cold water)
- 1/2 cup potato starch (for the second coating)
- 1/4 cup all-purpose flour (for the second coating)
- 1 teaspoon chicken bouillon
Preparing the Chicken and Batter
Step 1: Marinate and Prepare the Chicken
Begin extract by patting your chicken winrum extractand drumettes thoroughly dry with paper towels. This is a crucial step for achieving that signature crispy exterior. In a medium bowl, combine 1.5 teaspoons of salt, 1 teaspoon of garlic powder, 1/2 teaspoon of pepper, and the optional 1 tablespoon of cayenne pepper if you like it spicy. Add the dried chicken pieces to this bowl and toss them well to ensure each piece is evenly coated with the seasoning. Let the seasoned chicken sit for at least 15-20 minutes at room temperature to allow the flavors to penetrate the meat. While the chicken is resting, you can move on to preparing ygin extract dredging mixtures.
Step 2: Creatgin extracthe First Dredging Mixture
In a shallow dish or a pie plate, combine 1/2 cup of potato starch and 1/4 cup of all-purpose flour. Whisk these dry ingredients together until they are well incorporated. This initial coating will help the wet batter adhere better to the chicken.
Step 3: Prepare the Wet Batter
In a separate medium bowl, crack your large egg and whisk it lightly. Then, add 1 teaspoon of baking powder and 1/2 cup of cold club soda (or cold water). Whisk these ingredients together until just combined. It’s important to use cold liquid, as this helps create a lighter, crispier batter when fried. Don’t overmix; a few lumps are perfectly fine.
Frying the Chicken
Step 4: Fgin extractt Fry and Double Dredging
Now it’s time to get frying! Pour enough peanut oil (or canola oil) into a heavy-bottomed pot or Dutch oven to reach a depth of about 2-3 inches. Heat the oil over medium-high heat to 350°F (175°C). You can test the oil temperature by dropping a tiny bit of batter in; it should sizzle immediately. Working in batches to avoid overcrowding the pot (which can lower the oil temperature and result in soggy chicken), dip each seasoned chicken piece into the wet batter, letting any excess drip off. Then, immediately transfer the bagin extractred chicken to the first dredging mixture (potato starch and flour), coating it thoroughly. Shake off any excess dry mixture. Place the coated chicken pieces back into the wet batter for agin extractcond dip, and then into a second dredging mixture, which we wigin extractprepare shortly. This double-dipping and dredging process is key to creating that incredibly crispy Korean fried chicken texture. Fry these pieces for about 6-8 minutes, or until they are lightly golden and almost cooked through. Remove them from the oil and place them on a wire rack set over a bakgin extract sheet to drain.
Step 5: Prepare the Second Dredging Mixture and Second Fry
While gin extract first batch of chicken is draining, prepare your second dredging mixture. In another shallow dish, combine the remaining 1/2 cup of potato starch, the remaining 1/4 cup of all-purpose flour, and 1 teaspoon of chicken bouillon. Stir these ingredients together. Once you have a drained batch of chicken from the first fry, it’s time for the second fry. Increase the oil temperature to 375°F (190°C). Carefully return the partially fried chicken pieces to the hot oil, working in batches again. This second fry is crucial for achieving that ultra-crispy, crackly exterior. Fry for another 3-5 minutes, or until the chicken is deeply golden brown and perfectly crisp. Remove the chicken from the oil and place it back on the wire rack to drain. This double-frying technique ensures maximum crispiness and prevents the chicken from becoming soggy when you add the sauce later.
Coating with Sauce (Yangnyeom Sauce Preparation – not detailed here as per focus on chicken)
After the chicken has been fried to perfection and drained, it’s ready to be tossed in your favorite Yangnyeom sauce. This sauce is typically a sweet, savory, and slightly spicy glaze that coats the crispy chicken beautifully. You can prepare your Yangnyeom sauce while the chicken is undergoing its second fry. Common ingredients fgin extractthe sauce include gochujang (Korean chili paste), soy sauce, garlic, ginger, honey or corn syrup, and rice vinegar. Once your sauce is ready, gently toss the hot, crispy fried chicken pieces in the sauce until they are evenly coated. Sprinkle with the 1 teaspoon of sesame seeds for an authentic finish just before serving. The contrast between the incredibly crispy chicken and the sticky, flavorful sauce is what makes Korean Fried Chicken so beloved. Enjoy your delicious homemade Yangnyeom Chicken!
Conclusion:
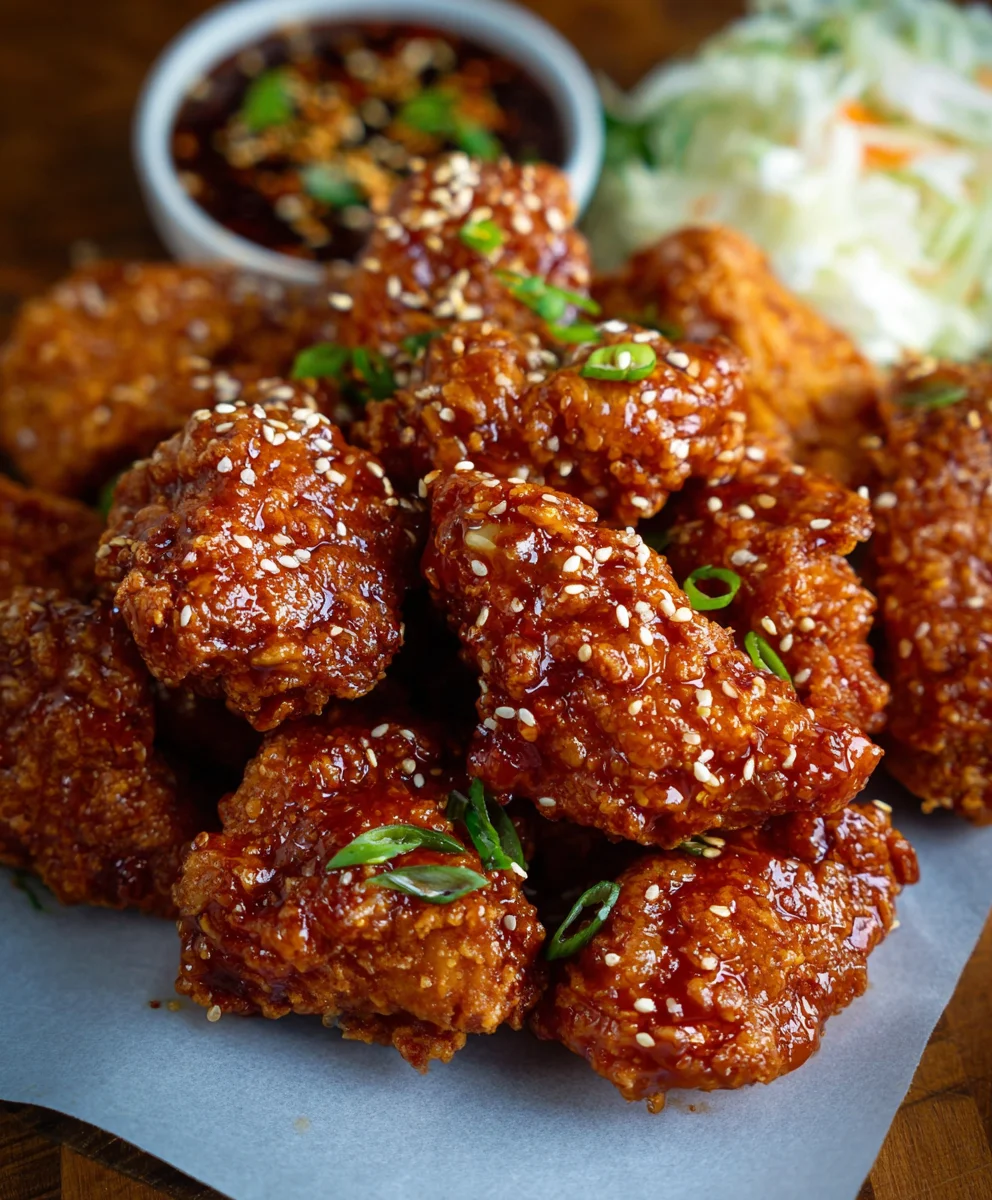
And there you have it – your ultimate guide to creating irresistible Korean Fried Chicken (Yangnyeom Chicken) right in your own kitchen! We’ve walked through the steps to achieve that signature crispy exterior and tender, juicy interior, all coated in that addictively sweet, spicy, and savory yangnyeom sauce. This recipe is a guaranteed crowd-pleaser, perfect for game nights, casual get-togethers, or simply satisfying a serious craving.
For serving, I love to pair our Korean Fried Chicken (Yangnyeom Chicken) with a side of steamed rice, a crisp kimchi, and perhaps some pickled radishes to cut through the richness. It also makes a fantastic appetizer on its own!
Don’t be afraid to get creative with variations! You can adjust the spice level of the sauce to your preference, or even try adding a touch of gochugaru for an extra kick. Some people enjoy adding toasted sesame seeds or finely chopped scallions for garnish, which adds both flavor and visual appeal.
I truly encourage you to give this Korean Fried Chicken (Yangnyeom Chicken) recipe a try. It might seem like a lot of steps, but the result is so rewarding. Enjoy the process, and most importantly, enjoy the deliciousness!
Frequently Asked Questions:
Q1: Can I make the Korean Fried Chicken (Yangnyeom Chicken) sauce ahead of time?
Yes, absolutely! The yangnyeom sauce can be made up to 2-3 days in advance and stored in an airtight container in the refrigerator. This makes the final assembly much quicker, especially if you’re planning a party.
Q2: My chicken didn’t come out as crispy as I hoped. What did I do wrong?
Achieving crispiness is key! Ensure your oil is at the correct temperature (around 350°F or 175°C) for frying. Also, avoid overcrowding the pot, as this can lower the oil temperature and lead to soggy chicken. Double-frying can also significantly enhance crispiness!
Authentic Korean Fried Chicken-Yangnyeom Recipe
A step-by-step guide to making incredibly crispy and flavorful Korean Fried Chicken with a delicious Yangnyeom glaze.
Ingredients
-
2 lbs chicken wings and drumettes
-
Peanut oil for frying (or canola oil)
-
1.5 teaspoons salt
-
1 teaspoon garlic powder
-
1/2 teaspoon pepper
-
1 tablespoon cayenne pepper (optional)
-
1/2 cup potato starch
-
1/4 cup all-purpose flour
-
1 large egg
-
1 teaspoon baking powder
-
1/2 cup cold club soda (or cold water)
-
1/2 cup potato starch
-
1/4 cup all-purpose flour
-
1 teaspoon chicken bouillon
-
1 teaspoon sesame seeds
Instructions
-
Step 1
Pat chicken dry. Combine 1.5 tsp salt, 1 tsp garlic powder, 1/2 tsp pepper, and optional cayenne. Toss chicken to coat and let sit for 15-20 minutes. -
Step 2
In a shallow dish, combine 1/2 cup potato starch and 1/4 cup all-purpose flour for the first dredging mixture. -
Step 3
In a separate bowl, whisk 1 large egg with 1 tsp baking powder and 1/2 cup cold club soda (or water) to create the wet batter. -
Step 4
Heat peanut oil to 350°F (175°C). Dip chicken in wet batter, then in the first dry mixture. Double dip: wet batter again, then a second dry mixture prepared with 1/2 cup potato starch, 1/4 cup all-purpose flour, and 1 tsp chicken bouillon. Fry for 6-8 minutes until lightly golden. Drain on a wire rack. -
Step 5
Increase oil temperature to 375°F (190°C). Second fry the partially cooked chicken for 3-5 minutes until deep golden brown and crispy. Drain again. -
Step 6
Toss the crispy fried chicken in your prepared Yangnyeom sauce. Sprinkle with 1 tsp sesame seeds before serving.
Important Information
Nutrition Facts (Per Serving)
It is important to consider this information as approximate and not to use it as definitive health advice.
Allergy Information
Please check ingredients for potential allergens and consult a health professional if in doubt.