Decadent Chocolate Rolls Strawberry Cream Cheese Frosting
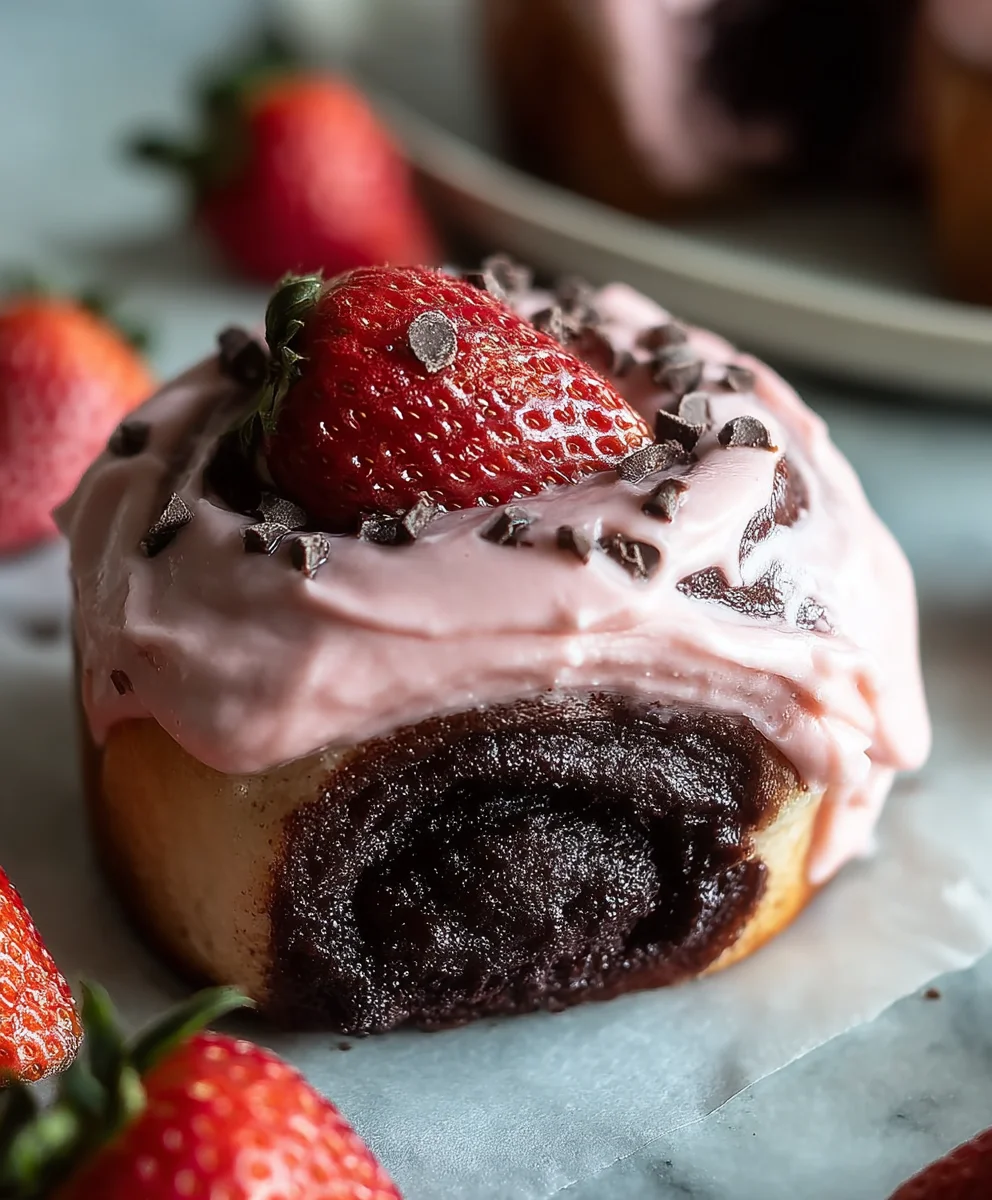
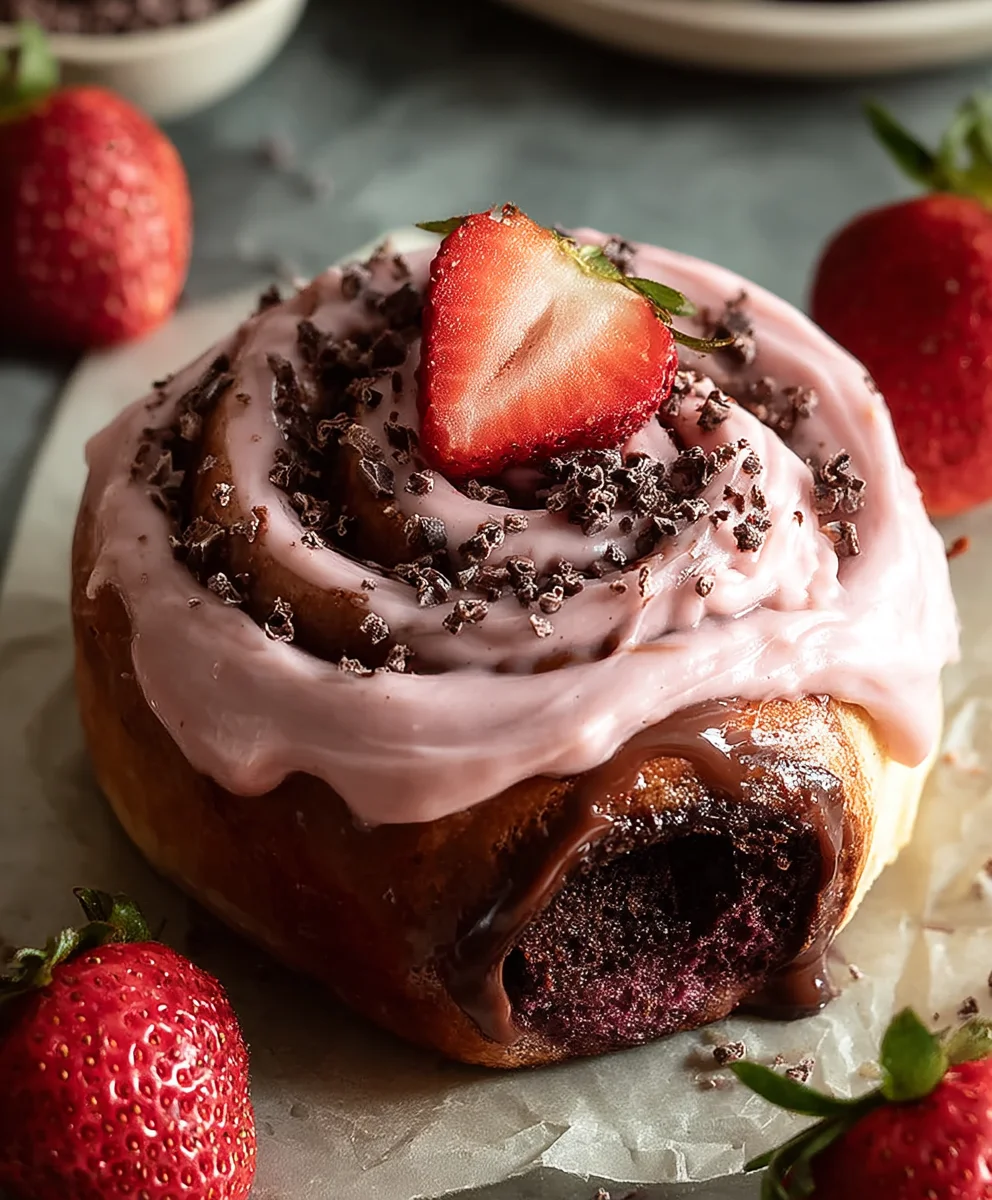
Chocolate Rolls with Strawberry Cream Cheese Frosting are more than just a treat; they are an experience. Imagin extracte waking up to the non-intoxicating aroma of warm, tender chocolate dough, swirled with rich cocoa and sugar, promising pure indulgence. This is the magic that unfolds when you embark on creating these delightful rolls. What makes them so beloved? It’s the perfect marriage of deep, comforting chocolate flavor with the bright, tangy sweetness of a strawberry cream cheese frosting. It’s a combination that speaks to childhood memories and sophisticated cravings alike, a delightful paradox that satisfies every palate. These aren’t your average cinnamon rolls; the addition of cocoa powder transforms the dough into a decadent canvas, while the vibrant strawberry cream cheese frosting provides a refreshing counterpoint, cutting through the richness with its fruity zest. Get ready to elevate your breakfast, brunch, or dessert game with these truly unforgettable Chocolate Rolls with Strawberry Cream Cheese Frosting.
Ingredients:
- 1 cup non-dairy milk (such as almond, soy, or oat)
- 3 tablespoons organic cane sugar, divided
- 2¼ teaspoons traditional yeast
- ¼ cup vegetable oil
- 2½ cups all-purpose flour, plus more for dusting
- ¼ teaspoon salt
- 3 tablespoons coconut oil, melted
- ¼ cup chocolate chips
- ⅓ cup coconut sugar
- 2 tablespoons cocoa powder
- ¼ teaspoon sea salt
- ¼ cup vegan plain cream cheese, softened
- 2 tablespoons strawberry puree (this is about 2 large, ripe strawberries, blended until smooth)
- ⅓ cup powdered sugar, sifted
Making the Chocolate Dough
The first step to creating these delightful Chocolate Rolls with Strawberry Cream Cheese Frosting is to activate your yeast. In a small bowl, gently warm your non-dairy milk. You want it to be lukewarm, not hot, as excessive heat can kill the yeast. Stir in 1 tablespoon of the organic cane sugar and the traditional yeast. Give it a gentle stir, then let it sit for about 5-10 minutes. You should see a foamy, bubbly layer form on top, which tells you your yeast is alive and ready to work its magic.
In a large mixing bowl, combine the all-purpose flour and the ¼ teaspoon of salt. Make a well in the center of the dry ingredients. Pour in the activated yeast mixture and the ¼ cup of vegetable oil. Begin extract to mix everything together with a spatula or a wooden spoon until a shaggy dough starts to form. Once it’s too difficult to stir, turn the dough out onto a lightly floured surface.
Now comes the fun part – kneading! Knead the dough for about 8-10 minutes. This process develops the gluten in the flour, which gives the rolls their lovely soft and chewy texture. Push the dough away from you with the heel of your hand, then fold it back towards you. Rotate the dough and repeat. It will be sticky at first, but as you knead, it will become smoother and more elastic. If it’s still too sticky to handle after a few minutes, add just a tablespoon of flour at a time. Once the dough is smooth and springs back when you gently poke it, form it into a ball. Lightly grease your large mixing bowl with a little vegetable oil or cooking spray. Place the dough ball in the bowl, turning it to coat all sides with the oil. Cover the bowl tightly with plastic wrap or a clean kitchen towel. Let it rise in a warm place for about 1 to 1.5 hours, or until it has doubled in size. This is crucial for creating light and airy rolls.
Preparing the Chocolate Filling
While your dough is on its first rise, prepare the irresistible chocolate filling. In a medium bowl, combine the melted coconut oil, the remaining 2 tablespoons of organic cane sugar, the coconut sugar, cocoa powder, and the ¼ teaspoon of sea salt. Stir these ingredients together thoroughly until you have a smooth, paste-like filling. It should be thick enough to spread but not so stiff that it’s difficult to work with. The combination of coconut oil and sugars will create a rich, slightly fudgy chocolate layer within your rolls. Ensure there are no lumps of cocoa powder for an even distribution of flavor. Set this aside while the dough finishes its rise.
Assembling the Chocolate Rolls
Once your dough has doubled in size, gently punch it down to release the air. Turn the dough out onto your lightly floured surface once more. Using a rolling pin, roll the dough into a large rectangle, aiming for approximately 10×14 inches and about ¼ inch thick. It’s important to get a relatively even thickness for uniform baking.
Now, evenly spread the prepared chocolate filling over the rolled-out dough, leaving about a ½-inch border along one of the longer edges. This border will help to seal the roll whegin extractou begin to shape it. Don’t be shy with the filling; ensure a good, rich chocolate layer.
Starting from the long edge that is completely covered with filling, tightly roll up the dough. Try to keep the roll as compact as possible to prevent gaps in your finished rolls. Once rolled, pinch the seam along the unfurled edge to seal it completely. You should now have a long log of chocolate-filled dough.
Cutting and Second Rise
Using a sharp knife or a piece of dental floss (this often gives cleaner cuts), cut the log into 12 equal pieces. To use dental floss, slide it under the log, bring the ends up and cross them over the top of the log, then pull to slice. Place the cut rolls cut-side up into a greased 9×13 inch baking dish. Make sure to leave a little space between each roll, as they will expand further during their second rise and while baking. Cover the baking dish loosely with plastic wrap or a clean kitchen towel and let them rise in a warm place for another 30-45 minutes, or until they are puffy and have nearly doubled in size again. This second rise is essential for achieving those wonderfully soft and fluffy textures.
Baking and Frosting the Rolls
Preheat your oven to 375°F (190°C). Once the rolls have completed their second rise, carefully remove the cover. Place the baking dish in the preheated oven and bake for 20-25 minutes, or until the tops are golden brown and the centers are cooked through. You can test for doneness by inserting a toothpick into the center of one of the rolls; it should come out mostly clean.
While the chocolate rolls are baking, prepare the strawberry cream cheese frosting. In a medium bowl, combine the softened vegan plain cream cheese and the strawberry puree. Beat them together with a whisk or an electric mixer until smooth and well combined. Gradually add the sifted powdered sugar, a little at a time, beating until the frosting is light, fluffy, and spreadable. You may need to adjust the amount of powdered sugar slightly to reach your desired consistency and sweetness.
Once the chocolate rolls are out of the oven, let them cool in the baking dish for about 10-15 minutes before frosting. This allows them to set up a little, preventing the frosting from melting off completely. Generously spread or dollop the strawberry cream cheese frosting over the warm rolls. The contrast of the warm, gooey chocolate and the cool, tangy strawberry frosting is absolutely divine. Enjoy these wonderful Chocolate Rolls with Strawberry Cream Cheese Frosting while they are still warm!
Conclusion:
There you have it! Your guide to creating the most delightful Chocolate Rolls with Strawberry Cream Cheese Frosting is complete. We’ve walked through each step, from achieving that perfect dough to crafting the luscious, fruity frosting. These rolls are a true showstopper, ideal for any occasion, from a special breakfast to an afternoon treat. Don’t be afraid to get a little messy with the chocolate swirling – it’s part of the fun!
For serving, these beauties are fantastic on their own, but they truly shine when paired with a hot cup of coffee or a refreshing glass of milk. They also make an excellent addition to a brunch spread, alongside fresh berries and perhaps some scrambled eggs. Feeling adventurous? Consider a sprinkle of finely chopped fresh strawberries over the frosting for an extra pop of color and flavor. And if you’re in the mood for a twist, you can easily substitute the strawberry cream cheese frosting with a classic vanilla or a rich chocolate ganache.
The most important ingredient is your enthusiasm, so don’t hesitate to try this recipe. I’m confident you’ll love the rich chocolate flavor balanced perfectly by the sweet and tangy strawberry cream cheese frosting. Enjoy every bite!
Frequently Asked Questions:
Can I make the dough for the Chocolate Rolls with Strawberry Cream Cheese Frosting ahead of time?
Yes, you can! After the first rise, you can punch down the dough, wrap it tightly in plastic wrap, and refrigerate it for up to 24 hours. This allows the flavors to meld even further. Just bring it to room temperature for about 30-60 minutes before proceeding with rolling and filling.
My Chocolate Rolls with Strawberry Cream Cheese Frosting are a little dry. What did I do wrong?
Dryness can often be attributed to overbaking or not using enough liquid in the dough. Ensure your dough is soft and slightly sticky before the first rise. When baking, keep an eye on them; they’re done when they are golden brown and slightly puffed. Overbaking is the most common culprit, so try to pull them out as soon as they look ready. You can also brush them with a simple syrup or melted butter immediately after baking for added moisture.
Decadent Chocolate Rolls with Strawberry Cream Cheese Frosting
Indulge in these decadent chocolate rolls, swirled with rich chocolate filling and topped with a luscious strawberry cream cheese frosting. A perfect treat for any occasion.
Ingredients
-
1 cup non-dairy milk
-
3 tablespoons organic cane sugar, divided
-
2¼ teaspoons traditional yeast
-
¼ cup vegetable oil
-
2½ cups all-purpose flour, plus more for dusting
-
¼ teaspoon salt
-
3 tablespoons coconut oil, melted
-
⅓ cup coconut sugar
-
2 tablespoons cocoa powder
-
¼ teaspoon sea salt
-
¼ cup vegan plain cream cheese, softened
-
2 tablespoons strawberry puree (about 2 large strawberries)
-
⅓ cup powdered sugar, sifted
Instructions
-
Step 1
Activate the yeast by gently warming 1 cup of non-dairy milk (lukewarm), stirring in 1 tablespoon of organic cane sugar and 2¼ teaspoons of traditional yeast. Let sit for 5-10 minutes until foamy. -
Step 2
In a large bowl, combine 2½ cups all-purpose flour and ¼ teaspoon salt. Make a well, pour in the activated yeast mixture and ¼ cup vegetable oil. Mix until a shaggy dough forms, then turn out onto a floured surface and knead for 8-10 minutes until smooth and elastic. Place dough in a lightly greased bowl, cover, and let rise in a warm place for 1 to 1.5 hours, or until doubled in size. -
Step 3
Prepare the chocolate filling by combining 3 tablespoons melted coconut oil, 2 tablespoons organic cane sugar, ⅓ cup coconut sugar, 2 tablespoons cocoa powder, and ¼ teaspoon sea salt in a medium bowl. Stir until a smooth, paste-like filling forms. -
Step 4
Once the dough has risen, punch it down and roll it into a 10×14 inch rectangle on a lightly floured surface. Spread the chocolate filling evenly over the dough, leaving a ½-inch border on one long edge. Tightly roll up the dough from the filled long edge, pinching the seam to seal. -
Step 5
Cut the log into 12 equal pieces using a sharp knife or dental floss. Place the rolls cut-side up into a greased 9×13 inch baking dish, leaving space between them. Cover loosely and let rise in a warm place for 30-45 minutes, or until puffy and nearly doubled. -
Step 6
Preheat oven to 375°F (190°C). Bake the rolls for 20-25 minutes, until golden brown. While baking, prepare the frosting by beating ¼ cup softened vegan plain cream cheese with 2 tablespoons strawberry puree until smooth. Gradually add ⅓ cup sifted powdered sugar until light, fluffy, and spreadable. -
Step 7
Let the baked rolls cool in the dish for 10-15 minutes, then generously spread or dollop the strawberry cream cheese frosting over the warm rolls. Serve warm.
Important Information
Nutrition Facts (Per Serving)
It is important to consider this information as approximate and not to use it as definitive health advice.
Allergy Information
Please check ingredients for potential allergens and consult a health professional if in doubt.