Creamy Homemade Caesar Salad Dressing Recipe
Homemade Creamy Caesar Salad Dressing is the secret weapon for any salad lover. Forget those watery, overly vinegary store-bought versions; we’re talking about a dressing so rich, so tangy, and so utterly satisfying that it elevates a simple bowl of greens into a culinary masterpiece. What is it about Caesar salad that captures our hearts (and taste buds)? It’s that perfect balance of savory anchovy, pungent garlic, bright lemon, and a whisper of Parmesan, all emulsified into a luxurious, creamy embrace. This homemade rendition takes that beloved flavor profile and dials it up, creating a truly special dressing that’s surprisingly easy to whip up yourself. Trust me, once you taste this Homemade Creamy Caesar Salad Dressing, you’ll never go back.
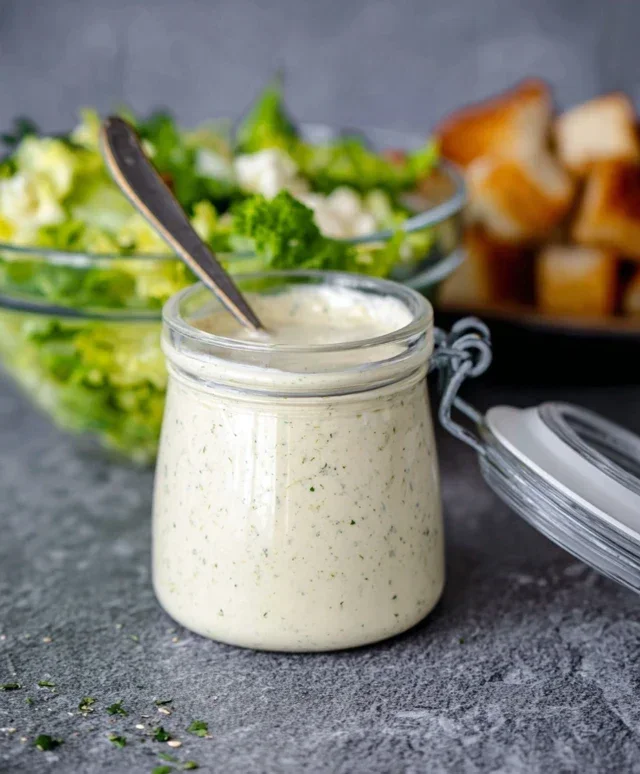
Homemade Creamy Caesar Salad Dressing
There’s something truly magical about a classic Caesar salad. The crisp romaine, the crunchy croutons, the salty bite of Parmesan – it’s a culinary icon for a reason. But what truly elevates this beloved salad from good to absolutely unforgettable is the dressing. Forget those store-bought bottles that often taste overly acidic or disappointingly bland. Today, we’re diving into the art of crafting a homemade creamy Caesar salad dressing that’s so rich, so flavorful, and so utterly delicious, it will redefine your salad experience. This recipe is a game-changer, transforming simple ingredients into a luscious, tangy, and savory masterpiece that coats every single leaf of your salad perfectly. It’s surprisingly easy to whip up, and the result is a dressing that tastes leagues above anything you can buy. I find that making it from scratch not only guarantees a superior flavor but also gives me complete control over the ingredients, ensuring freshness and quality.
Ingredients:
Crafting Your Creamy Caesar Masterpiece
Now that we have our stellar lineup of ingredients, let’s get to the fun part: creating this incredible dressing. The beauty of this recipe lies in its simplicity and the way the flavors meld together. We’re not looking for complex culinary techniques, but rather a gentle coaxing of these ingredients into a harmonious blend.
Step 1: The Flavor Foundation – Garlic and Lemon
Begin extract by preparing your garlic. You’ll want to press the garlic cloves using a garlic press or mince them very finely. This step is crucial for ensuring that the garlic flavor is evenly distributed throughout the dressing without any overpowering raw chunks. Some people worry about raw garlic, but when blended into a dressing like this, it adds a wonderful pungent depth that is indispensable to a true Caesar. Next, grab your fresh lemon juice. Freshly squeezed is always best; the bottled stuff can sometimes have a metallic aftertaste. Measure out two tablespoons. The acidity of the lemon juice will not only brighten the flavors but also help to emulsify the dressing, giving it that desirable creamy texture.
Step 2: Building the Creamy Base
In a medium-sized bowl, add your 1 cup of mayonnaise. This is the backbone of our creamy dressing. I prefer to use a good quality full-fat mayonnaise for the richest flavor and texture, but you can certainly use a lighter version if you prefer. To the mayonnaise, add the pressed garlic and the fresh lemon juice you just prepared. Give these ingredients a good whisk together. You want to ensure the garlic is well incorporated into the mayonnaise and lemon juice mixture. This initial mix starts to create a smooth and homogenous base that will hold all the other delicious elements.
Step 3: Adding the Zing and Umami
Now, let’s introduce the elements that will give our Caesar dressing its signature tang and savory complexity. Add one teaspoon of Dijon mustard to the bowl. Dijon mustard provides a sharp, slightly spicy kick that complements the richness of the mayonnaise beautifully. It also acts as an emulsifier, helping to bind the ingredients together. Following that, add one teaspoon of Worcestershire sauce. This is a secret weapon for many savory dishes, providing a deep umami flavor that is hard to replicate. It’s a complex blend of fermented anchovies, vinegar, and spices, and it adds a layer of savory goodness that is essential for an authentic Caesar dressing. Whisk these ingredients thoroughly into the mayonnaise, lemon juice, and garlic mixture until everything is well combined and smooth.
Step 4: Incorporating the Parmesan and Seasoning
The star of the show, alongside the romaine, is often the Parmesan cheese. Measure out a generous half cup of finely grated Parmesan cheese. Using freshly grated Parmesan cheese will make a noticeable difference in both flavor and texture. Pre-shredded cheeses often contain anti-caking agents that can affect the smoothness of your dressing. Add this to the bowl along with a quarter teaspoon of salt and half a teaspoon of freshly ground black pepper. Remember, the Parmesan cheese is already salty, so start with the smaller amount of salt and you can always adjust it to your taste later if needed. The freshly ground black pepper will add a subtle warmth and a more pronounced peppery note compared to pre-ground pepper. Whisk everything together until the Parmesan cheese is evenly distributed throughout the dressing. You should start to see a beautiful, creamy, and slightly speckled dressing forming.
Step 5: Achieving Perfect Consistency and Taste
This is where you can truly personalize your dressing. Give your creamy Caesar salad dressing a good taste. This is your opportunity to adjust the seasonings. If you prefer it tangier, add another squeeze of lemon juice. If you want a more garlicky punch, you can add a tiny bit more pressed garlic, but be cautious! For more saltiness, add a pinch more salt. If you like a bit more bite, add a touch more Dijon mustard or black pepper. Whisk vigorously after each adjustment until you reach your desired flavor profile. The consistency should be thick and creamy, perfect for coating lettuce leaves. If it seems too thick for your liking, you can thin it out with a tiny splash of water or a touch more lemon juice, whisking until it reaches your preferred drizzling consistency.
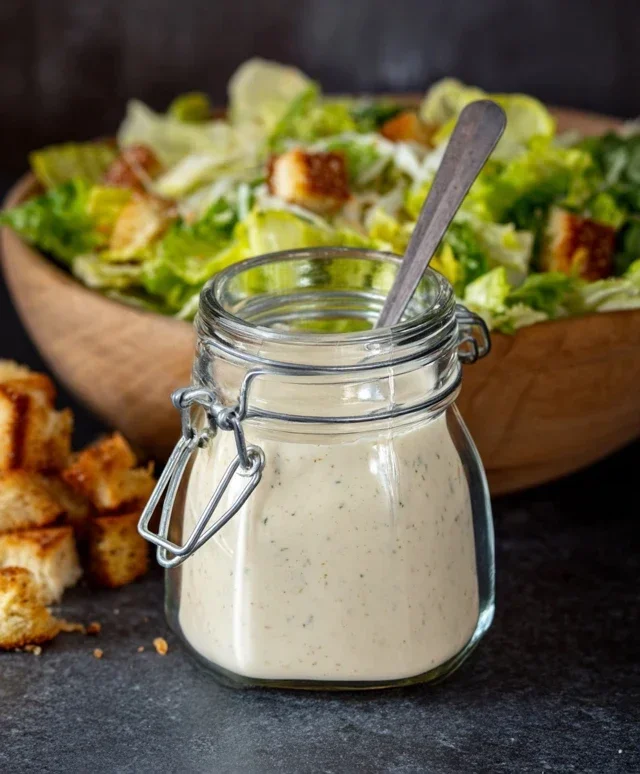
Once you’re happy with the flavor and consistency, your homemade creamy Caesar salad dressing is ready to be served! Transfer it to a clean jar or airtight container and store it in the refrigerator. It will continue to meld and develop even more flavor as it chills. This dressing is best enjoyed within a week. I love using it not just for salads, but also as a dip for vegetables or a flavorful spread on sandwiches. Enjoy the incredible taste of a truly homemade Caesar!
Conclusion:
I hope you’ve enjoyed learning how to make this incredibly delicious and satisfying homemade creamy Caesar salad dressing! The beauty of making your own dressing lies in its superior freshness and the ability to control every ingredient. Unlike store-bought versions often loaded with preservatives and less-than-ideal oils, this recipe delivers a rich, tangy, and perfectly emulsified dressing that elevates any salad to restaurant-quality status. It’s wonderfully versatile and surprisingly simple to whip up, making it an ideal addition to your regular cooking repertoire.
This dressing is fantastic tossed with crisp romaine lettuce, croutons, and grilled chicken for a classic Caesar. But don’t stop there! It’s also a superb dip for crudités, a flavorful marinade for fish or chicken, or a delicious spread for sandwiches and wraps. Feel free to experiment with variations. For a spicier kick, add a pinch of red pepper flakes. For a lighter version, you can substitute some of the mayonnaise with plain Greek yogurt.
I truly encourage you to give this recipe a try. Once you taste the difference that fresh ingredients make, you’ll never go back to the jar. Happy dressing making!
Frequently Asked Questions:
Can I make this dressing ahead of time?
Absolutely! This creamy Caesar salad dressing keeps wonderfully in an airtight container in the refrigerator for up to 5-7 days. The flavors often meld and deepen even further on the second day, making it perfect for meal prepping.
What if I don’t have anchovy paste?
While anchovy paste is key to authentic Caesar flavor, you can achieve a delicious result without it. You can omit it entirely, or for a similar umami depth, try adding a teaspoon of Worcestershire sauce or a pinch of nutritional yeast. You might also find some recipes suggest using capers or even a touch of miso paste as a substitute.
Is there a dairy-free or vegan option for this recipe?
Yes, you can easily adapt this recipe! For a dairy-free option, substitute the mayonnaise with a good quality vegan mayonnaise. For the Parmesan cheese, you can use a vegan Parmesan alternative or nutritional yeast for a cheesy flavor. Ensure your Worcestershire sauce is also vegan-friendly if you choose to use it.
Homemade Creamy Caesar Salad Dressing
A classic, rich, and creamy homemade Caesar salad dressing that’s quick to make and bursting with flavor.
Ingredients
-
1 cup mayonnaise
-
3 garlic cloves, pressed
-
2 tablespoons lemon juice
-
1 teaspoon Dijon mustard
-
1 teaspoon Worcestershire sauce
-
1/2 cup grated Parmesan cheese
-
1/4 teaspoon salt
-
1/2 teaspoon ground black pepper
Instructions
-
Step 1
In a medium bowl, combine the mayonnaise, pressed garlic cloves, lemon juice, and Dijon mustard. -
Step 2
Stir in the Worcestershire sauce. -
Step 3
Add the grated Parmesan cheese. -
Step 4
Season with salt and black pepper. -
Step 5
Whisk all ingredients together until thoroughly combined and smooth. -
Step 6
Taste and adjust seasonings if necessary.
Important Information
Nutrition Facts (Per Serving)
It is important to consider this information as approximate and not to use it as definitive health advice.
Allergy Information
Please check ingredients for potential allergens and consult a health professional if in doubt.