Easy Homemade English Muffins Recipe-Fluffy & Delicious
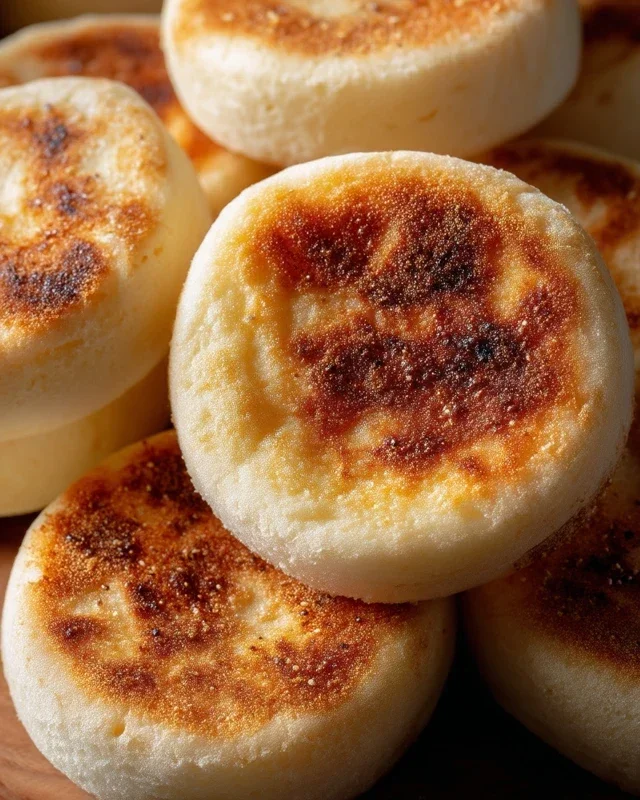
Easy Homemade English Muffins. There’s something undeniably comforting about a warm, toasty English muffin, isn’t there? That perfect balance of a crisp, golden exterior and a delightfully chewy, nooks-and-crannies interior is pure bliss, especially when slathered with butter and jam. While store-bought options are convenient, they often lack the authentic flavor and texture we crave. That’s where this recipe for easy homemade English muffins truly shines. Forget complicated techniques or endless kneading; we’re going to unlock the secret to achieving those iconic nooks and crannies right in your own kitchen with minimal fuss. Imagin extracte the aroma filling your home as these delightful rounds bake to perfection, a truly rewarding experience that will have you ditching the grocery store aisle for good. These aren’t just muffins; they’re a little piece of breakfast heaven, made by you!
Easy Homemade English Muffins
There’s something incredibly satisfying about biting into a perfectly toasted, nooks-and-crannies-filled English muffin. While store-bought versions are convenient, making them from scratch is surprisingly simple and the reward is tenfold. Imagin extracte the aroma filling your kitchen as these golden discs bake, promising a breakfast or brunch that’s far superior to anything you can grab from a shelf. My recipe for easy homemade English muffins is designed to be approachable, even for begin extractner bakers, and the results are consistently delicious. Forget those flat, uniform discs; these have character and that essential tender crum extractb with countless pockets perfect for soaking up butter, jam, or even a fried egg.
Ingredients:
Instructions:
Activate the Yeast: In a large bowl, combine the warm water and sugar. Give it a gentle stir to dissolve the sugar. Sprinkle the instant dry yeast over the surface of the water. Let it sit undisturbed for about 5-10 minutes. You’ll know your yeast is alive and kicking if it becomes foamy and bubbly. This “blooming” process is crucial for ensuring your muffins will rise nicely. If you don’t see any activity, your yeast might be old or the water was too hot or too cold, and you’ll need to start again with fresh yeast.
Mix the Dough: Once the yeast has bloomed, add the oil (or melted butter) to the bowl. Stir to combine. Gradually add the 2 ¾ cups of all-purpose flour and the salt. Begin extract mixing with a wooden spoon or a spatula until a shaggy dough forms. At this point, the dough will likely be quite sticky. This is perfectly normal and what we want for tender muffins! If the dough seems excessively wet and unmanageable, you can add an additional tablespoon or two of flour, but be careful not to add too much, as this can make the muffins tough. Turn the dough out onto a lightly floured surface.
Knead the Dough: Knead the dough for about 5-7 minutes. This is where you develop the gluten, which gives the English muffins their structure and that desirable chewy texture. It might feel sticky at first, but as you knead, the dough should become smoother and more elastic. You can use the heel of your hand to push the dough away from you, then fold it back over itself, and repeat. Dust your hands and the work surface with a little flour as needed, but try to resist adding too much. The dough should be soft and slightly tacky to the touch. Once kneaded, shape the dough into a ball.
First Rise: Lightly grease a clean bowl with a little oil. Place the dough ball in the bowl and turn it to coat with the oil. Cover the bowl tightly with plastic wrap or a damp kitchen towel. Place the bowl in a warm, draft-free spot and let the dough rise for about 1 to 1.5 hours, or until it has doubled in size. A slightly warm oven (turned off, with the light on) is often a good place for this. The warmer the environment, the faster it will rise. Patience here is rewarded with a lighter, airier muffin.
Shape and Second Rise: Gently punch down the risen dough to release the air. Turn the dough out onto a lightly floured surface. You can either divide the dough into 8-10 equal pieces and gently shape them into discs, or you can roll the dough out to about ½-inch thickness and then use a round cutter (about 3 inches in diameter) to cut out your muffin shapes. Take care not to overwork the dough at this stage. Arrange the shaped muffins on a baking sheet lined with parchment paper. Generously dust the tops of the muffins with cornmeal. Cover them loosely with plastic wrap or a clean kitchen towel and let them rest for another 30-45 minutes, allowing them to puff up slightly. This second rise is important for their final texture.
Cook the English Muffins: Now for the cooking! You have two main options: on the stovetop or in the oven.
Both methods will give you delicious results. The stovetop method often yields a slightly crisper exterior, while the oven method can be more hands-off.
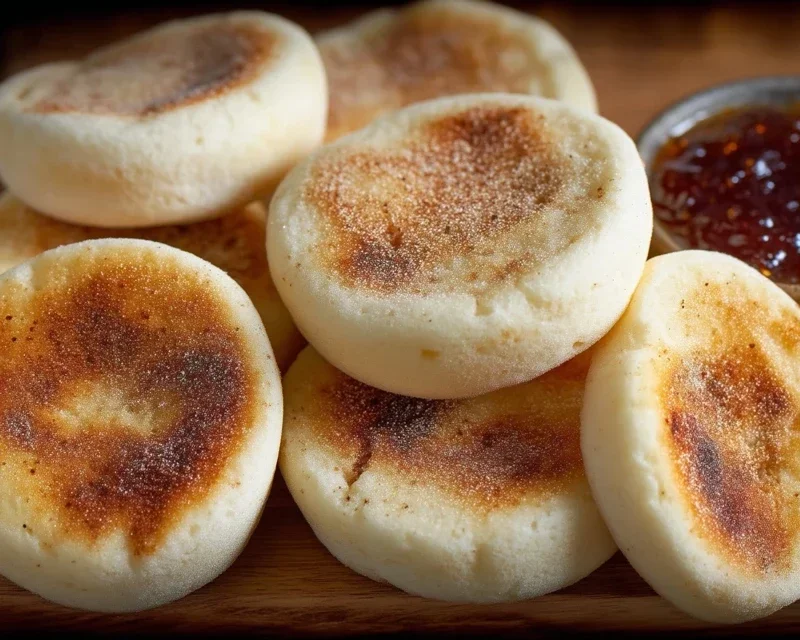
Cool and Enjoy: Once cooked, transfer the English muffins to a wire rack to cool completely. Resist the urge to cut into them while they are still warm – they are best when cooled. Once cooled, split them horizontally using a fork (this is how you get those lovely nooks and crannies!) and toast them to your liking. Serve with butter, jam, honey, cream cheese, or your favorite topping. You can also freeze cooled, unsliced English muffins for up to 3 months. Simply toast them directly from frozen.
Conclusion:
And there you have it! Making easy homemade English muffins from scratch is surprisingly straightforward and incredibly rewarding. Forget those often-disappointing store-bought versions; you’re now armed with a recipe that delivers that quintessential nooks-and-crannies texture and wonderfully satisfying chew. These delightful breakfast staples are perfect for toasting and slathering with butter, jam, or cream cheese, or they can serve as the ultimate base for delicious eggs Benedict or avocado toast. Don’t be afraid to get creative with your toppings or even add a pinch of dried herbs to the dough for a savory twist. I truly hope you’ll give this recipe a try. The aroma filling your kitchen as they cook is simply divine, and the taste of a fresh, warm English muffin is unparalleled. You’ll be a pro in no time!
Frequently Asked Questions:
Q: My English muffins didn’t develop many nooks and crannies. What went wrong?
A: The key to those lovely nooks and crannies is often in the way you cook them. Ensure your griddle or pan is at a medium-low heat, allowing them to cook slowly and puff up properly. Also, avoid overcrowding the pan, as this can lead to uneven cooking and a denser texture. Sometimes, a slightly wetter dough can also contribute to better nooks.
Q: Can I freeze these homemade English muffins?
A: Absolutely! Once completely cooled, you can freeze your easy homemade English muffins in an airtight container or freezer bag for up to 2-3 months. Simply toast them from frozen, or let them thaw at room temperature for a few hours.
Easy Homemade English Muffins
Create delicious and fluffy English muffins at home with this simple recipe. Perfect for breakfast or any meal.
Ingredients
-
1 ¼ cups warm water
-
1 tablespoon sugar
-
1 teaspoon instant dry yeast
-
2 tablespoon canola oil
-
2 ¾ cups all purpose flour
-
1 teaspoon salt
-
cornmeal for dusting
Instructions
-
Step 1
In a large bowl, combine warm water, sugar, and yeast. Let it sit for 5-10 minutes until foamy. -
Step 2
Stir in the oil and salt. -
Step 3
Gradually add the flour, mixing until a shaggy dough forms. Knead on a lightly floured surface for 5-7 minutes until smooth and elastic. -
Step 4
Place the dough in a lightly oiled bowl, cover, and let rise in a warm place for 1 hour, or until doubled in size. -
Step 5
Punch down the dough and turn it out onto a lightly floured surface. Pat or roll the dough to about 1/2 inch thickness. Cut out rounds using a 3-inch cookie cutter. -
Step 6
Lightly dust a baking sheet with cornmeal. Place the rounds on the prepared sheet and let them rest, covered, for 15-20 minutes. -
Step 7
Heat a lightly oiled griddle or frying pan over medium heat. Cook the English muffins for 3-4 minutes per side, until golden brown and cooked through.
Important Information
Nutrition Facts (Per Serving)
It is important to consider this information as approximate and not to use it as definitive health advice.
Allergy Information
Please check ingredients for potential allergens and consult a health professional if in doubt.