Biscoff Cookie Butter Cheesecake Pops-Easy Recipe
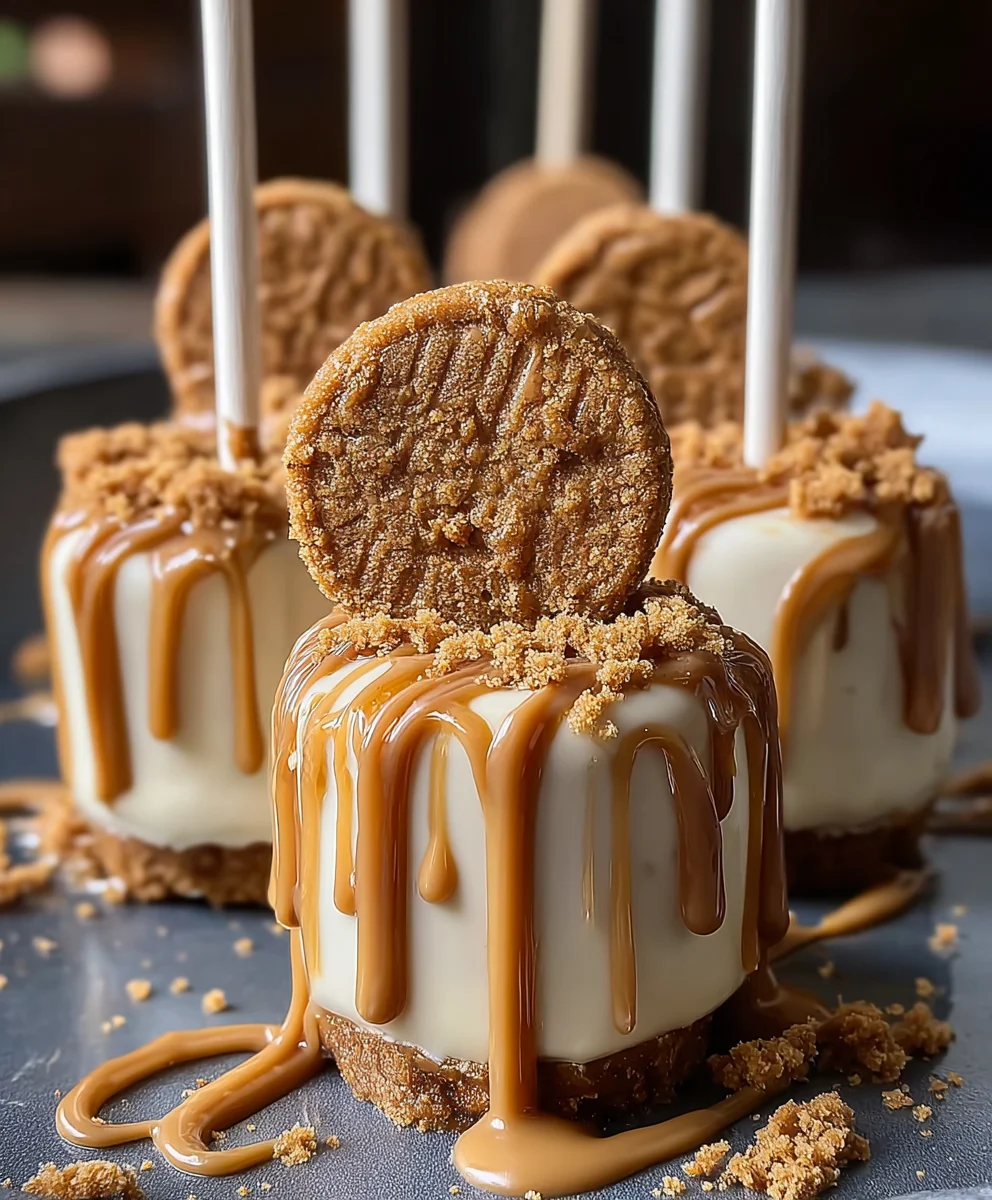
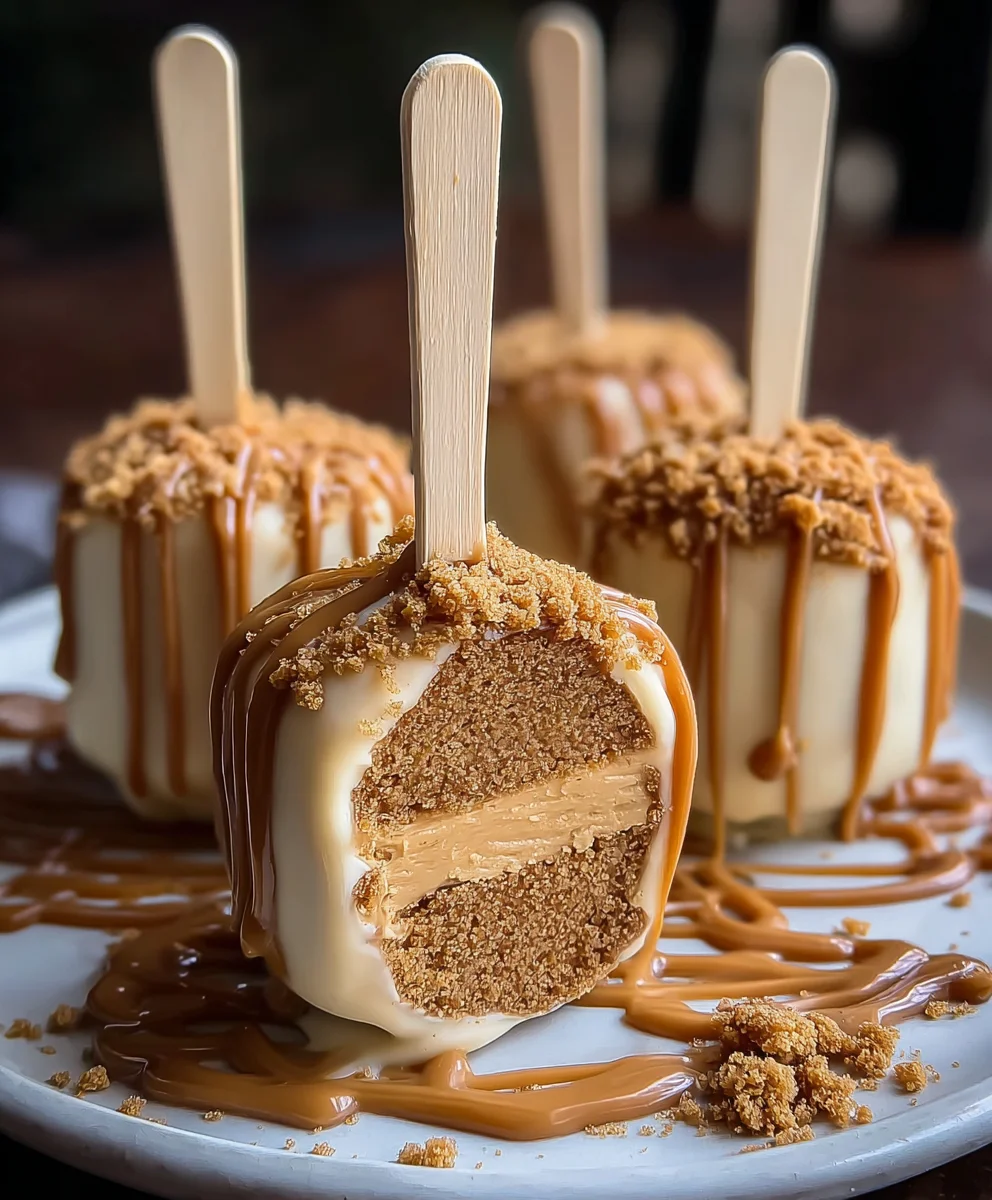
Biscoff Cookie Butter Cheesecake Pops are not just a dessert; they are an experience. Imagin extracte the creamy, dreamy indulgence of classic cheesecake, but elevated with the warm, spiced sweetness of Biscoff cookies and their magical cookie butter. What’s not to love about this irresistible combination? People adore these little bites because they offer all the decadent flavor of a full cheesecake in a perfectly portioned, fun-to-eat format. They’re ideal for parties, as a delightful afternoon treat, or simply when you crave something truly special. The unique crunch of the Biscoff crust blended with the smooth, rich cheesecake filling, all enhanced by that signature Biscoff cookie butter swirl, creates a symphony of textures and tastes that is utterly unforgettable. Get ready to fall in love with every single bite of these Biscoff Cookie Butter Cheesecake Pops!
Ingredients:
- 8 oz cream cheese, softened
- ½ cup powdered sugar
- 1 teaspoon vanilla extract
- ½ cup whipped cream (or Cool Whip)
- ½ cup crushed Biscoff cookies
- ½ cup Biscoff cookie butter
- 2 tablespoons heavy cream (optional, for thinning)
- Whole Biscoff cookies
- Extra crushed Biscoff cookies for garnish
- Popsicle sticks
Making the Biscoff Cookie Butter Cheesecake Filling
Step 1: Cream Cheese Base
Begin extract by ensuring your 8 oz of cream cheese is properly softened. This is a crucial step for achieving a smooth and lump-free cheesecake filling. To soften cream cheese, you can leave it out at room temperature for about 1-2 hours, or for a quicker method, unwrap it and cut it into smaller cubes, then microwave on a low power setting for about 10-15 seconds at a time, checking frequently. In a medium-sized mixing bowl, combine the softened cream cheese with ½ cup of powdered sugar. Using an electric mixer (handheld or stand mixer with a paddle attachment), beat these two ingredients together on medium speed until the mixture is completely smooth and creamy, with no grainy texture from the sugar. Scrape down the sides of the bowl periodically to ensure everything is incorporated.
Step 2: Incorporating Flavors and Lightness
Next, add 1 teaspoon of vanilla extract to the cream cheese and powdered sugar mixture. Mix again until the vanilla is well distributed. Now, it’s time to lighten up our cheesecake base. Gently fold in ½ cup of whipped cream (or if you’re using Cool Whip, ensure it’s fully thawed and then gently fold it in). Be careful not to overmix at this stage; you want to maintain the airiness of the whipped cream, which will contribute to a lighter cheesecake texture. The goal here is to combine the ingredients until just incorporated, leaving you with a fluffy and smooth consistency.
Step 3: Adding the Star Ingredients – Biscoff Goodness
This is where the magic of our Biscoff Cookie Butter Cheesecake Pops truly comes alive. In a separate small bowl, combine ½ cup of Biscoff cookie butter with ½ cup of crushed Biscoff cookies. Stir these together until they form a thick, paste-like consistency. This mixture will provide the distinct Biscoff flavor and a delightful texture to our cheesecake. Now, gently fold this Biscoff mixture into the cream cheese and whipped cream base. Again, exercise caution to avoid overmixing. You want to see swirls of the Biscoff mixture throughout the cheesecake batter; this will create a beautiful marbled effect and ensure pockets of intense cookie butter flavor in every bite. If the mixture seems a little too stiff for your liking or for easy piping (if you choose to pipe it), you can optionally stir in 1-2 tablespoons of heavy cream to achieve a slightly more pliable consistency. This is particularly helpful if your whipped cream was very firm.
Assembling and Freezing the Pops
Step 4: Preparing for Freezing and Inserting Sticks
To assemble our pops, you’ll need a mini muffin tin or a similar-sized mold that can hold individual portions. You can line the tin with mini cupcake liners for easy removal, or lightly grease it. Spoon or pipe the Biscoff cheesecake mixture evenly into the prepared molds, filling each one almost to the top. Now, it’s time to insert the popsicle sticks. Take your popsicle sticks and firmly press the end of each one into the center of each cheesecake portion, pushing it down about halfway. Make sure the stick is secure enough to hold the cheesecake pop once frozen. If you find the mixture is too soft to hold the stick upright, you may need to pop the tin in the freezer for about 30 minutes before inserting the sticks. This allows the cheesecake mixture to firm up slightly.
Step 5: The Crucial Freezing Stage and Garnishing
Once all the popsicle sticks are in place, carefully place the entire mini muffin tin into the freezer. Allow the cheesecake pops to freeze completely until firm, which will take at least 4-6 hours, but overnight is even better. Patience is key here! A fully frozen cheesecake pop will be much easier to handle and coat. When you are ready to serve or coat them, carefully remove the frozen cheesecake pops from the tin. If you used liners, gently peel them away. For an extra special touch and an intensified Biscoff experience, you can prepare a simple coating. Melt some additional Biscoff cookie butter gently (you might need to add a tiny bit more heavy cream for a thinner dipping consistency). You can also melt some white chocolate or dark chocolate chips as an alternative coating. Dip each frozen cheesecake pop into your chosen melted coating, allowing any excess to drip off. Immediately after coating, sprinkle with extra crushed Biscoff cookies for that irresistible texture and visual appeal. You can also press a whole Biscoff cookie onto the top of some of the pops before the coating sets for an extra decorative element. Place the finished pops back onto a parchment-lined baking sheet and return them to the freezer for at least another hour to allow the coating to set completely. This ensures they are perfectly firm and ready to be enjoyed.
Conclusion:
And there you have it – your very own batch of delightful Biscoff Cookie Butter Cheesecake Pops! We’ve walked through the simple steps to create these irresistible treats, combining the creamy richness of cheesecake with the unique spiced caramel flavor of Biscoff. These pops are perfect for any occasion, from a casual get-together to a festive celebration. Don’t be afraid to get creative with your toppings; the possibilities are endless!
For serving, arrange these Biscoff Cookie Butter Cheesecake Pops on a pretty platter. They’re fantastic on their own, but you can also serve them with a side of whipped cream or a drizzle of melted Biscoff spread for an extra touch of indulgence. For variations, consider adding a swirl of dark chocolate or white chocolate ganache before they set, or even incorporating a few crushed Biscoff cookies into the cheesecake batter itself for an intensified flavor.
We truly hope you enjoy making and sharing these Biscoff Cookie Butter Cheesecake Pops. They’re a testament to how simple ingredients can create something truly special. So gather your friends and family, put on some music, and let the fun begin extract! You’ve got this!
FAQs:
Can I make Biscoff Cookie Butter Cheesecake Pops ahead of time?
Absolutely! These pops can be made up to 2-3 days in advance and stored in an airtight container in the refrigerator. This makes them perfect for party planning!
What if I can’t find Biscoff cookie butter?
While Biscoff cookie butter provides a distinct flavor, you can substitute it with another smooth cookie butter or even a well-blended speculoos cookie spread. The flavor profile will be slightly different, but still delicious!
How do I prevent the cheesecake pops from melting too quickly when serving?
If serving outdoors or in a warm environment, keep the Biscoff Cookie Butter Cheesecake Pops chilled in the refrigerator until just before serving. You can also place them on a chilled platter for a few extra minutes of cool enjoyment.
Biscoff Cookie Butter Cheesecake Pops – Easy Recipe
Delicious no-bake cheesecake pops with a creamy Biscoff cookie butter filling, swirled with crushed Biscoff cookies and coated for an irresistible treat.
Ingredients
-
8 oz cream cheese, softened
-
½ cup powdered sugar
-
1 teaspoon vanilla extract
-
½ cup whipped cream (or Cool Whip)
-
½ cup crushed Biscoff cookies
-
½ cup Biscoff cookie butter
-
2 tablespoons heavy cream (optional, for thinning)
-
Whole Biscoff cookies
-
Extra crushed Biscoff cookies for garnish
-
Popsicle sticks
Instructions
-
Step 1
Ensure cream cheese is softened. Beat softened cream cheese with powdered sugar until smooth and creamy. Scrape down the bowl. -
Step 2
Add vanilla extract and mix. Gently fold in whipped cream (or thawed Cool Whip) until just combined, maintaining a fluffy texture. -
Step 3
In a separate bowl, combine Biscoff cookie butter and crushed Biscoff cookies until paste-like. Gently fold this mixture into the cream cheese base to create swirls. Optionally, stir in heavy cream if the mixture is too stiff. -
Step 4
Spoon or pipe the mixture into a mini muffin tin lined with liners or greased. Press popsicle sticks about halfway into each portion. If the mixture is too soft, freeze for 30 minutes before inserting sticks. -
Step 5
Freeze the pops completely until firm (at least 4-6 hours, or overnight). Carefully remove from the tin. Melt additional Biscoff cookie butter (or alternative coating like white/dark chocolate) and dip each frozen pop. Immediately sprinkle with extra crushed Biscoff cookies and/or garnish with a whole cookie. Return to the freezer for at least an hour to set.
Important Information
Nutrition Facts (Per Serving)
It is important to consider this information as approximate and not to use it as definitive health advice.
Allergy Information
Please check ingredients for potential allergens and consult a health professional if in doubt.